Last updated on January 7th, 2026.
Hi friends!
At the end of this post you can find the recipe for this AMAZING chocolate cake. BUT, this post is about my food photography journey I started about a year and a half ago.
Please note that this post contains affiliate links which means with every purchase to make I will enjoy some earnings at no cost to you!
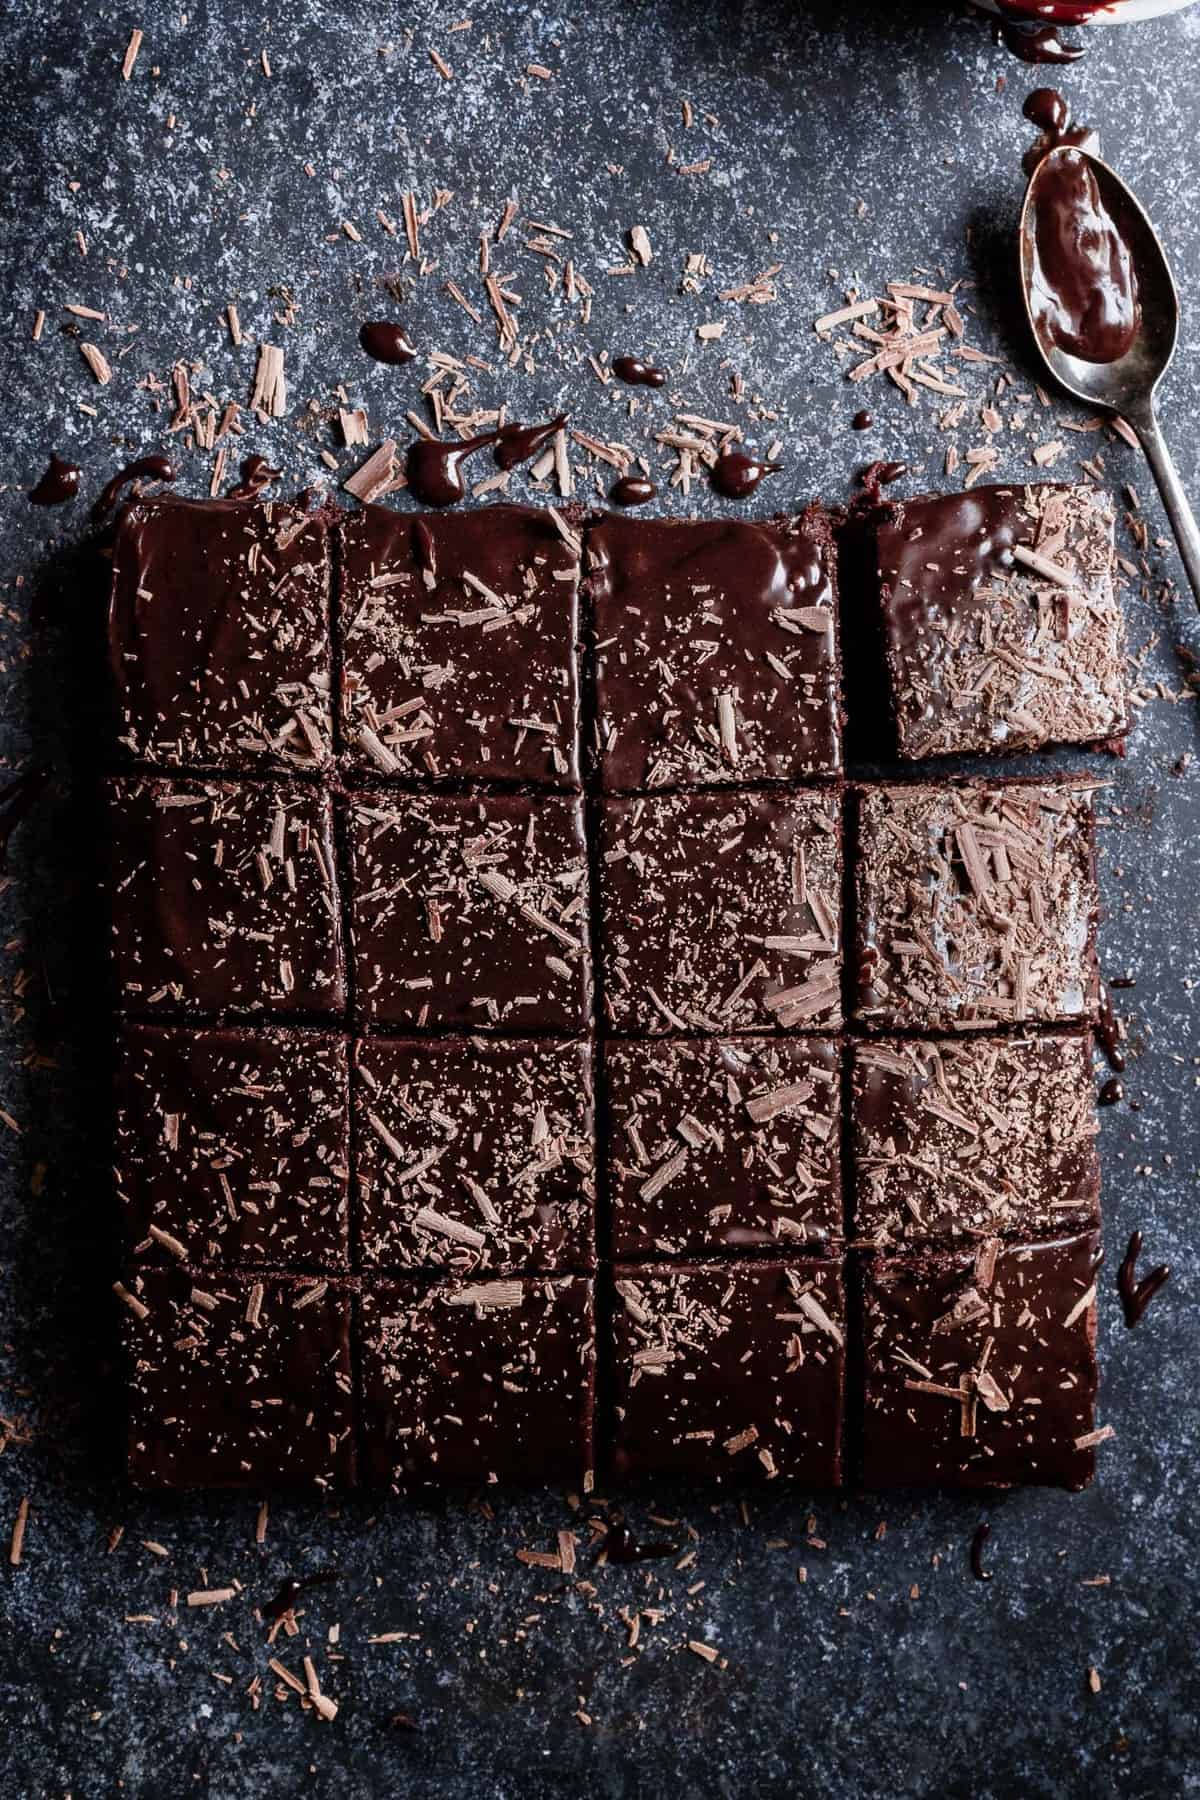
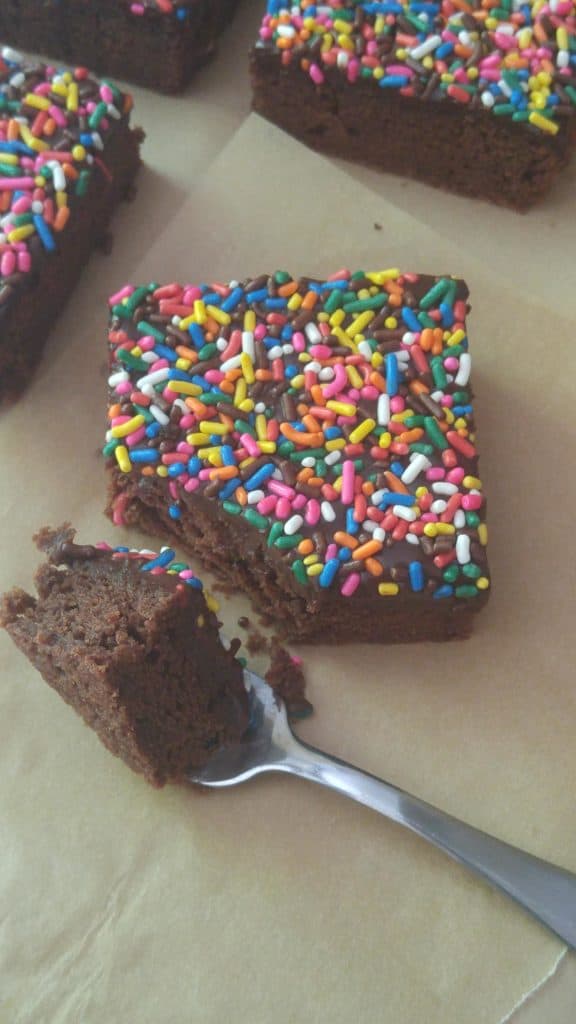
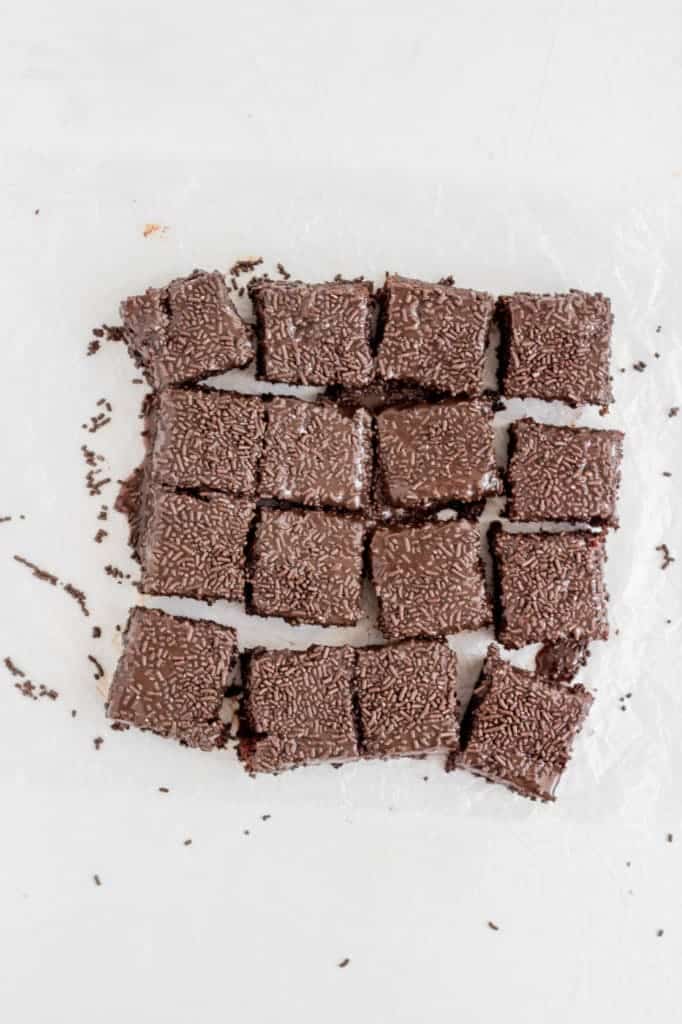
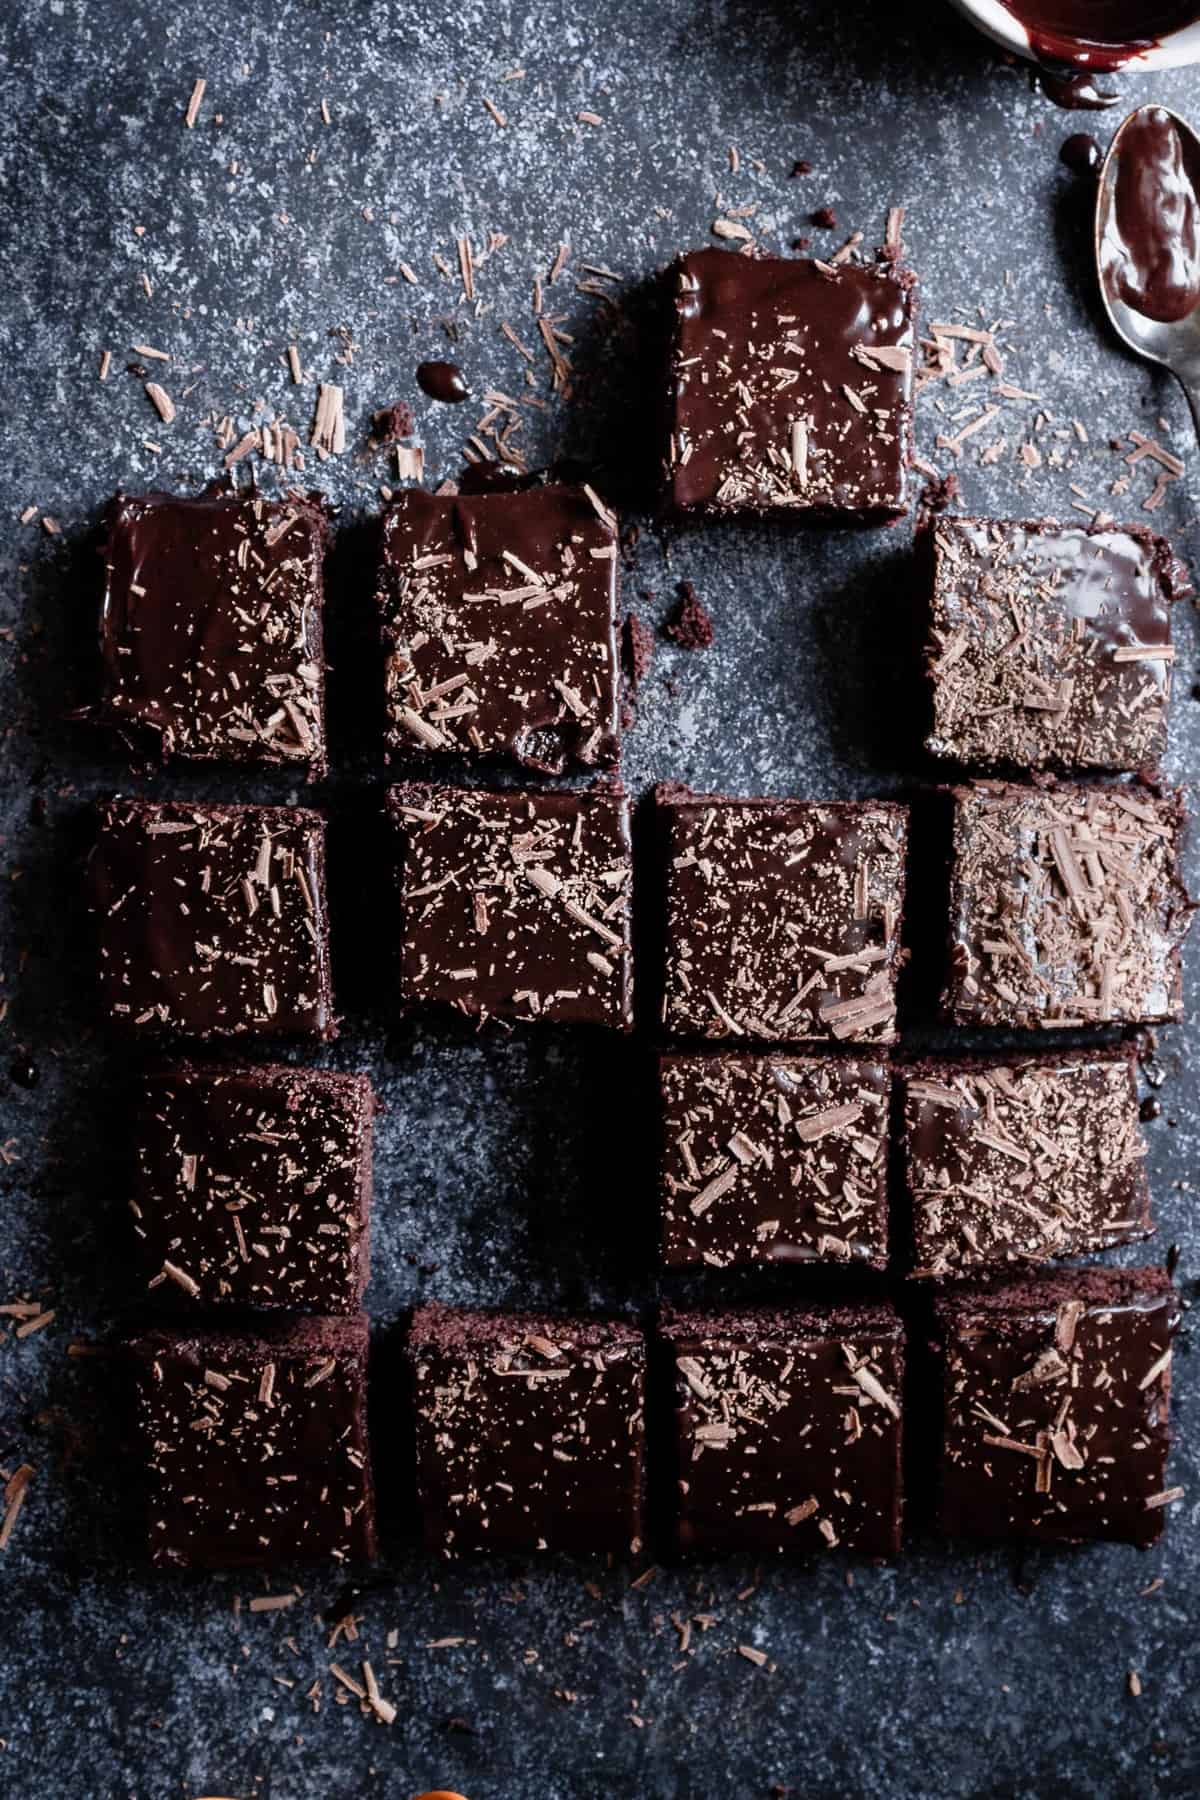
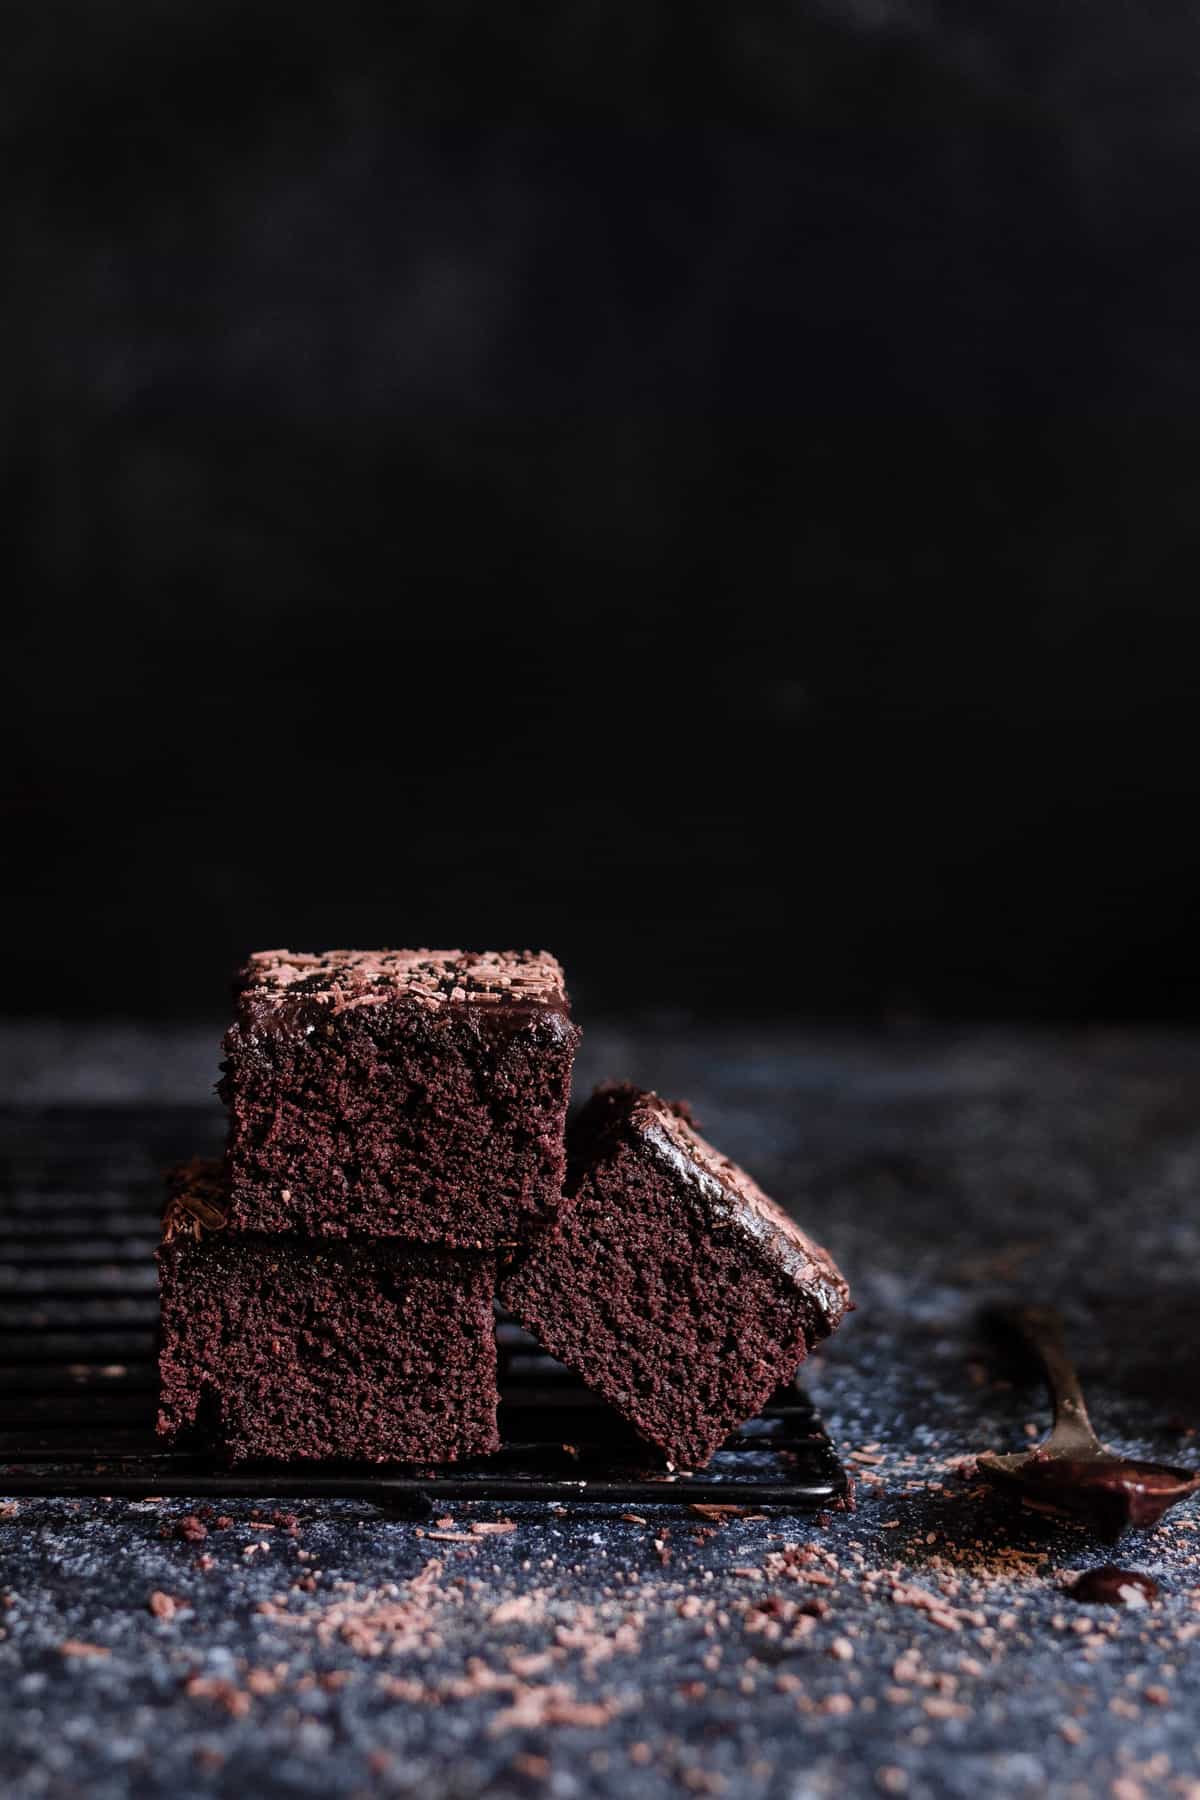
This recipe was the very first recipe I posted on my blog. Since then I photographed it twice more. Last summer. And three weeks ago. As you can see, a lot has changed!
What you can not see is all the hard work, time, money, sweat, tears and meltdowns that walked (and are still walking) by my-side throughout my journey. Thank you sarcasm for providing some coping mechanisms.
For the past 20 months food photography has been on my mind. Constantly. Online classes, e-books, books, magazines, bootcamp, facebook groups and the most important factor. Practice. every. day.
I want to say I did it my way but I had some much needed help. Got to give to me, I learned from the best!
Foodtography School!
My very first official step into the world of Food Photography.
When I first started, for some reason I had this notion that the only thing I need in order to take great photos was a DSLR. Bad mistake. No. HUGE mistake! It’s like asking a novice runner to run a full marathon just because he bought an expensive pair of running shoes.
I won’t lie, I gave up faster than the runner. I had no idea what to do or how to approach any of it. Then I got an email from Sarah announcing the opening of her Foodtography school. I signed up right there and then.
In 4 weeks Sarah taught me the two most important things. How to start and how to push forward. From that point forward it was a rolling snow ball.
Jen Davis
We all know the one and only Jenn, Her beautiful photography spiced with her southern accent are unforgettable.
I had the honor of having some 101 lessons with Jenn and learn all about Dark Photography. Those 101 sessions were the best! Not only did I learn about Dark photography, I also got to pick Jenn’s brain and really be the annoying student who asks too many questions. You would think she’d roll her eyes by question #137, but she only genuinely smiled and gave a detailed answer.
I also had the pleasure of meeting her in Nashville for her photography bootcamp. And yes, she is as nice and sweet and she seems!
Rachel Korinek
PIVOT!
Taking Rachel’s classes and reading her E book about lighting was the turning point for me.
Her Online LightRoom class is called Magic Light Room. The perfect title. I had no idea how much power there is in editing. Rachel uses her very own foodtography images to demonstrate and explain in a very clear way what each and every menu option in Lightroom does and how it can be used. After taking her class I can say in full confidence that editing is not an issue. Plus I know how to read the histogram and manipulate it while I’m shooting.
I must add and say that Rachel’s best quality is herself. She is super nice and approachable. She always answers my questions very patiently and gives great feedback and tips. (Thank you Rachel, I know I can be a pain… and I apologize in advance since I am taking your composition class now…)
The Bite Shot by Joani Simon
What’s shaking Bacon?
You guys! This is the biggest online library for everything food photography! Believe it or not, I learned about The Bite Shot only 6 months ago!!!! I know right?
I love Joanie’s short and fun videos. Every video unveil something new and I pick up a tiny little tip that makes such A HUGE difference in my photography. No matter what the subject it, even if the title is “for beginners” I will inhale it! You never know what golden tip she may unfold.
What’s Next…?
Well, these days I am taking Rachel’s “Composition Essentials” online class. I decided to take my time with it and really let all the information soak in so it will become second nature.
After that, there’s Rachel’s Photoshop class, Joanie’s Flash class and Jenn’s artificial light class. Hopefully by the end of that I will feel comfortable to call myself a food photographer. (wink)
Now Lets Talk About This Chocolate Cake:
- The cake is best eaten warm right when ready. To maintain freshness refrigerate up to 4 days and bring to room temperature before eating.
- The Ganche can be made up to 3 days in advance. If you chose to do so , refrigerate when ready and warm before applying on cake.
- For a layer cake, double the recipe and use 2-3 8″ round pans.
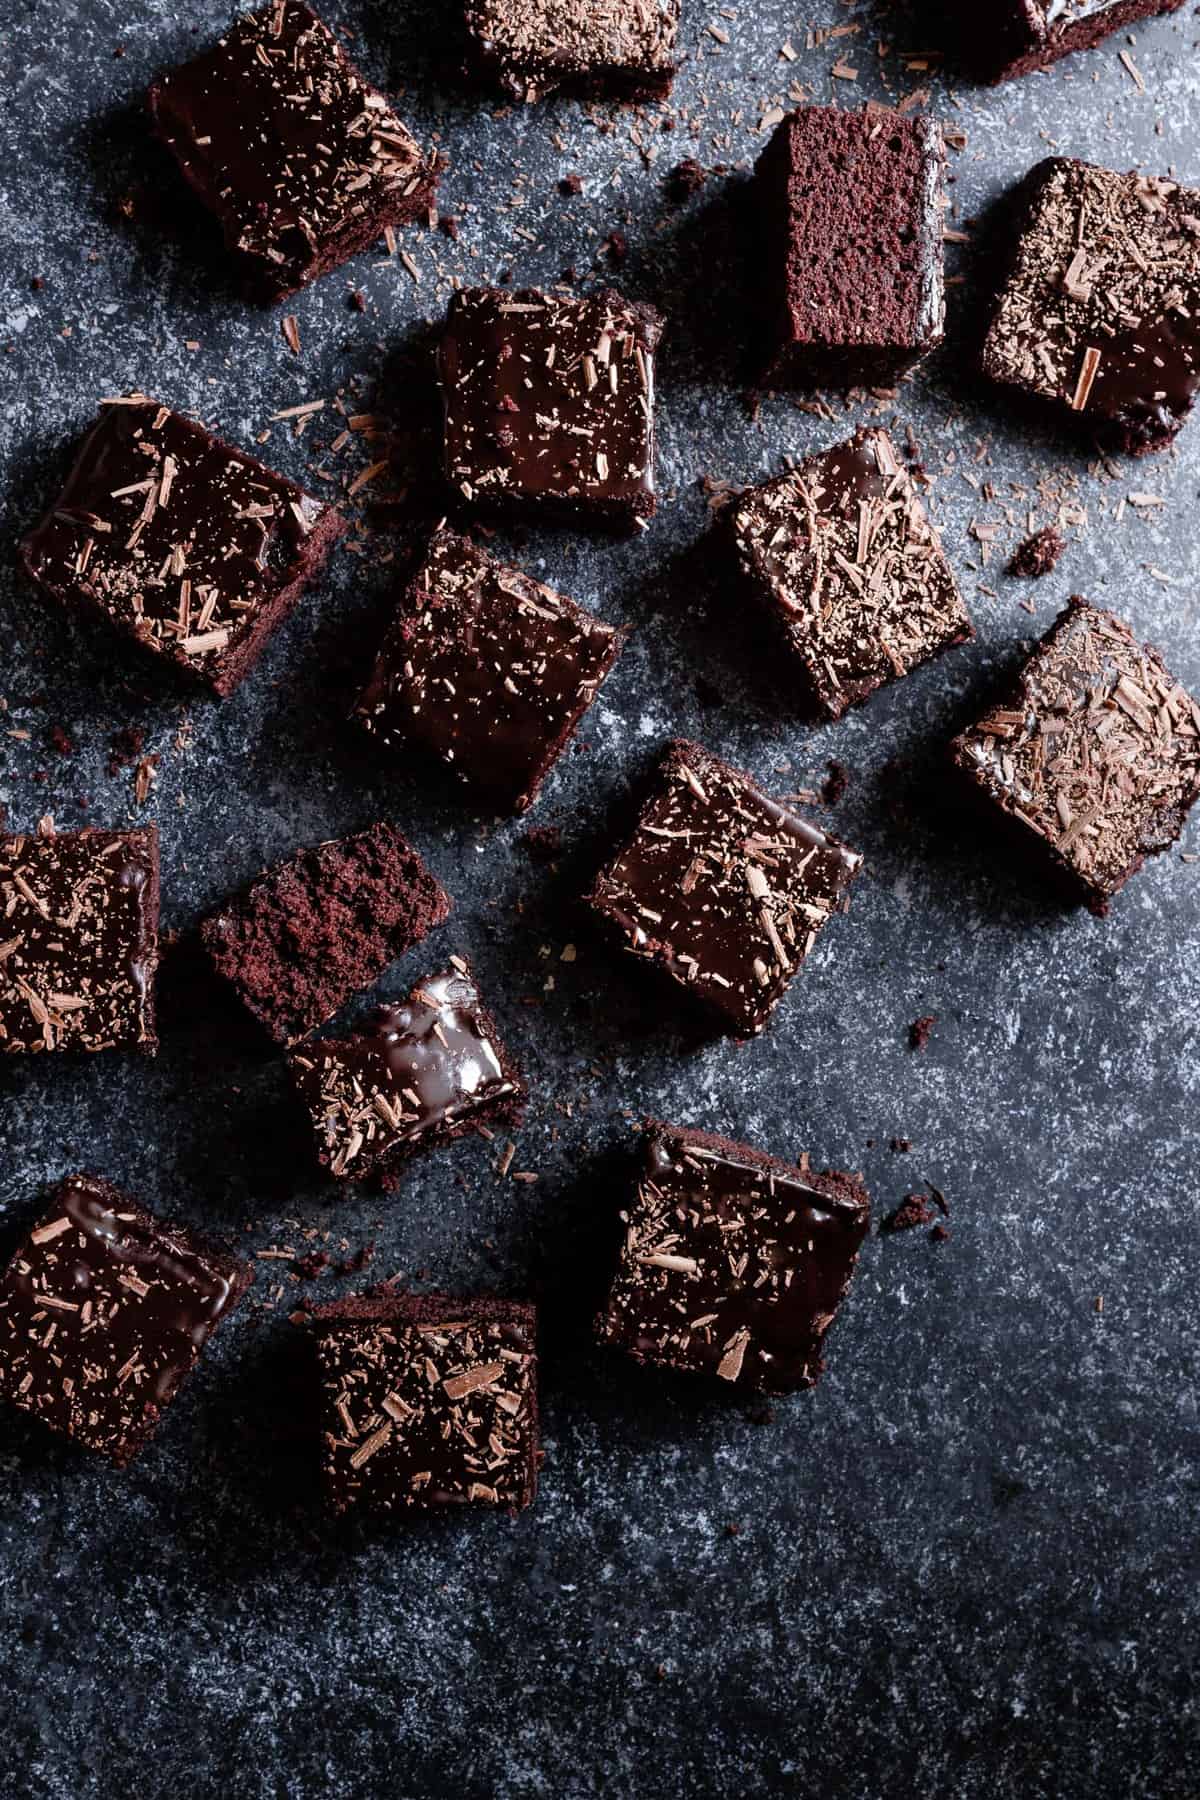
- Feel free to top the cake with your choice of toppings. Sprinkles, nuts, shave chocolate are all good options.
- As always. make sure all the ingredients are at room temperature.
HAPPY BAKING!!!
Here are some more recipes you might enjoy:
One more thing…
Don’t forget to tag @OneSarcasticBaker on Instagram if you bake this recipe. Would love to see your creations!
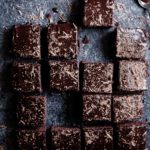
Chocolate Cake Squares
Ingredients
- 3/4 Cup + 1 TBS All purpose flour (100 g/ 3.5 oz)
- 1/4 Cup Unsweetened Cocoa Powder (28 g/1 oz)
- 3/4 tsp Baking powder
- 1/2 tsp Salt
- 1/2 Cup Sour cream (4 oz/ 120 ml)
- 1 Tbsp Vanilla extract
- 3/4 Stick Unsalted Butter, soft ( 90 g/ 3 oz)
- 1 Cup Granulated white sugar (200 g/7 oz)
- 2 eggs Large, room temperature
For the Chocolate Ganache
- 1/2 Cup Semi sweet Chocolate chip (85 g /3 oz)
- 3/4-1 Cup Heavy Cream Use the smaller amount of the cream if you want the ganache to be on the thicker side and the higher amount if you prefer a more liquid like ganache.
Instructions
- Preheat oven to 350F. Grease 8″ x 8″ pan.
- In a separate bowl sift the flour, cocoa powder, baking powder and salt. Mix to combine and set aside.
- Mix the sour cream and vanilla extract using a large measuring cup and set aside.
- With a bowl of an electric mixer medium-high speed, cream the butter and sugar until bright and fluffy, about 5 minutes.
- Add eggs one at a time waiting for each egg to completely incorporated into the batter before adding the next.
- Then add flour mix in 3 additions alternating with the half and half mix beginning and ending with the flour mixture.
- Spread batter into prepared pan and bake for 20-25 minutes. Or until a tooth pick come out clean from the center of the cake.
- Remove the cake from the oven and let cool for about 10 minutes.
- With a toothpick or a cake tester gently poke the cake. (about 150 pokes) This will allow the chocolate ganache to really soak the cake.
- Pour and spread the Chocolate Ganache wait about 5 minutes before adding the sprinkles.
To Make the Chocolate Ganache
- Measure the Chocolate chip in a medium sized bowl.
- In the microwave or over the stove warm the heavy cream, just until it strat to simmer. Do not boil, boiling will make the chocolate and fat get separated and you will be left with a big lumpy mess.
- Pour the heavy milk on top of the chocolate chips and let stand for few minutes.
- With a fork or a small hand whisk mix the chocolate chips until smooth.If you notice the choclate is not melting, place the bowl in the microwave for about 10-15 seconds. Again, do not over heat!
Oh Dee!! I love this post so much! I’m also inspired by everyone you mentioned. You are so lucky to have taken the class with Jenn!! I feel like we will never stop learning, but in my eyes, you are a master! And I love your captions too! So happy to know you and can’t wait to meet someday.
-Anita
Thank you Anita!
It is so true, we never stop learning! Jenn is amazing and I am so lucky to have had to chance to work with her.
Hoping to work with you in the future as well!!
Dee! This is so special. I started getting serious with food photography about 7 months ago and even though it can be frustrating at times not getting the results I wanted, I know photography takes time through practice, patience with yourself and a continuous love for learning. I am grateful for you in sharing your food photography journey. I cannot wait to see what is next for you!
Thank you so much Helen!
It is so true, photography takes so much practice and patience! Looking forward getting to know you and your work!
Hey Dee, lovely post!!
I also took Rachel’s courses, and the lightroom has helped me tremendously it was a big shifter in my photography journey. I took her composition one too, I actually havent finished it yet lol I’ve started last year. I’m on the very last module though so maybe now I’ll pick it back up lol!!!!
Anyway, thanks for sharing all these amazing tips and your journey with us!!!
Thank you Camila!
The composition class has so much information !I know it will take me a while to master…probably a year or so…LOL
Thanks for sharing! I’m stuck in a rut complaining about having no time to learn photography while working, momming and trying to push out recipes on my blog to keep up. But you’ve inspired me! Definitely need to dive deep and learn this (or at least start!)
Thank you so much Kelli! The journey is very long and even slower but as long as you’re doing it your are golden! I love your work and pies are my favorite to eat and photograph!
Great resources and beautiful photography. I’m just getting started on my food photography journey and have so much to learn. Thanks for a great article!
Thank you so much Sandra, so happy to hear you find it helpful! Good luck with your new journey, this is super exciting!
This is funny but in fact, I am unlike any of your followers, I somehow discovered your book on Amazon last week and have no idea who you are and I don’t even know your blog. I feel so lucky to have found you among all these other blogs and I just want to tell you I love your photographs and book. I love this article as it helps me decide what food photography course to take. I for sure will take Joani’s course. I just don’t know anything about Rachael but I think I will take her course too. I am also a foodtography student. I just want to say thank you for putting all of this amazing content.
Thank you so much, Janice, for taking the time to write this comment and getting my book! Rachel is amaizng and I can not recommend her high enough, she really helped me take my photography to a whole new level. Let me know if y ou have any more questions.