Last updated on February 9th, 2026.
Have you ever marveled at a croissant’s delicate, flaky layers or a Danish pastry’s flaky texture? These delightful treats are made with a particular type of dough called laminated dough. In this blog post, we’ll take you through making laminated dough step by step so that you can enjoy the deliciousness of homemade pastries right in your kitchen.
What is Laminated Dough?
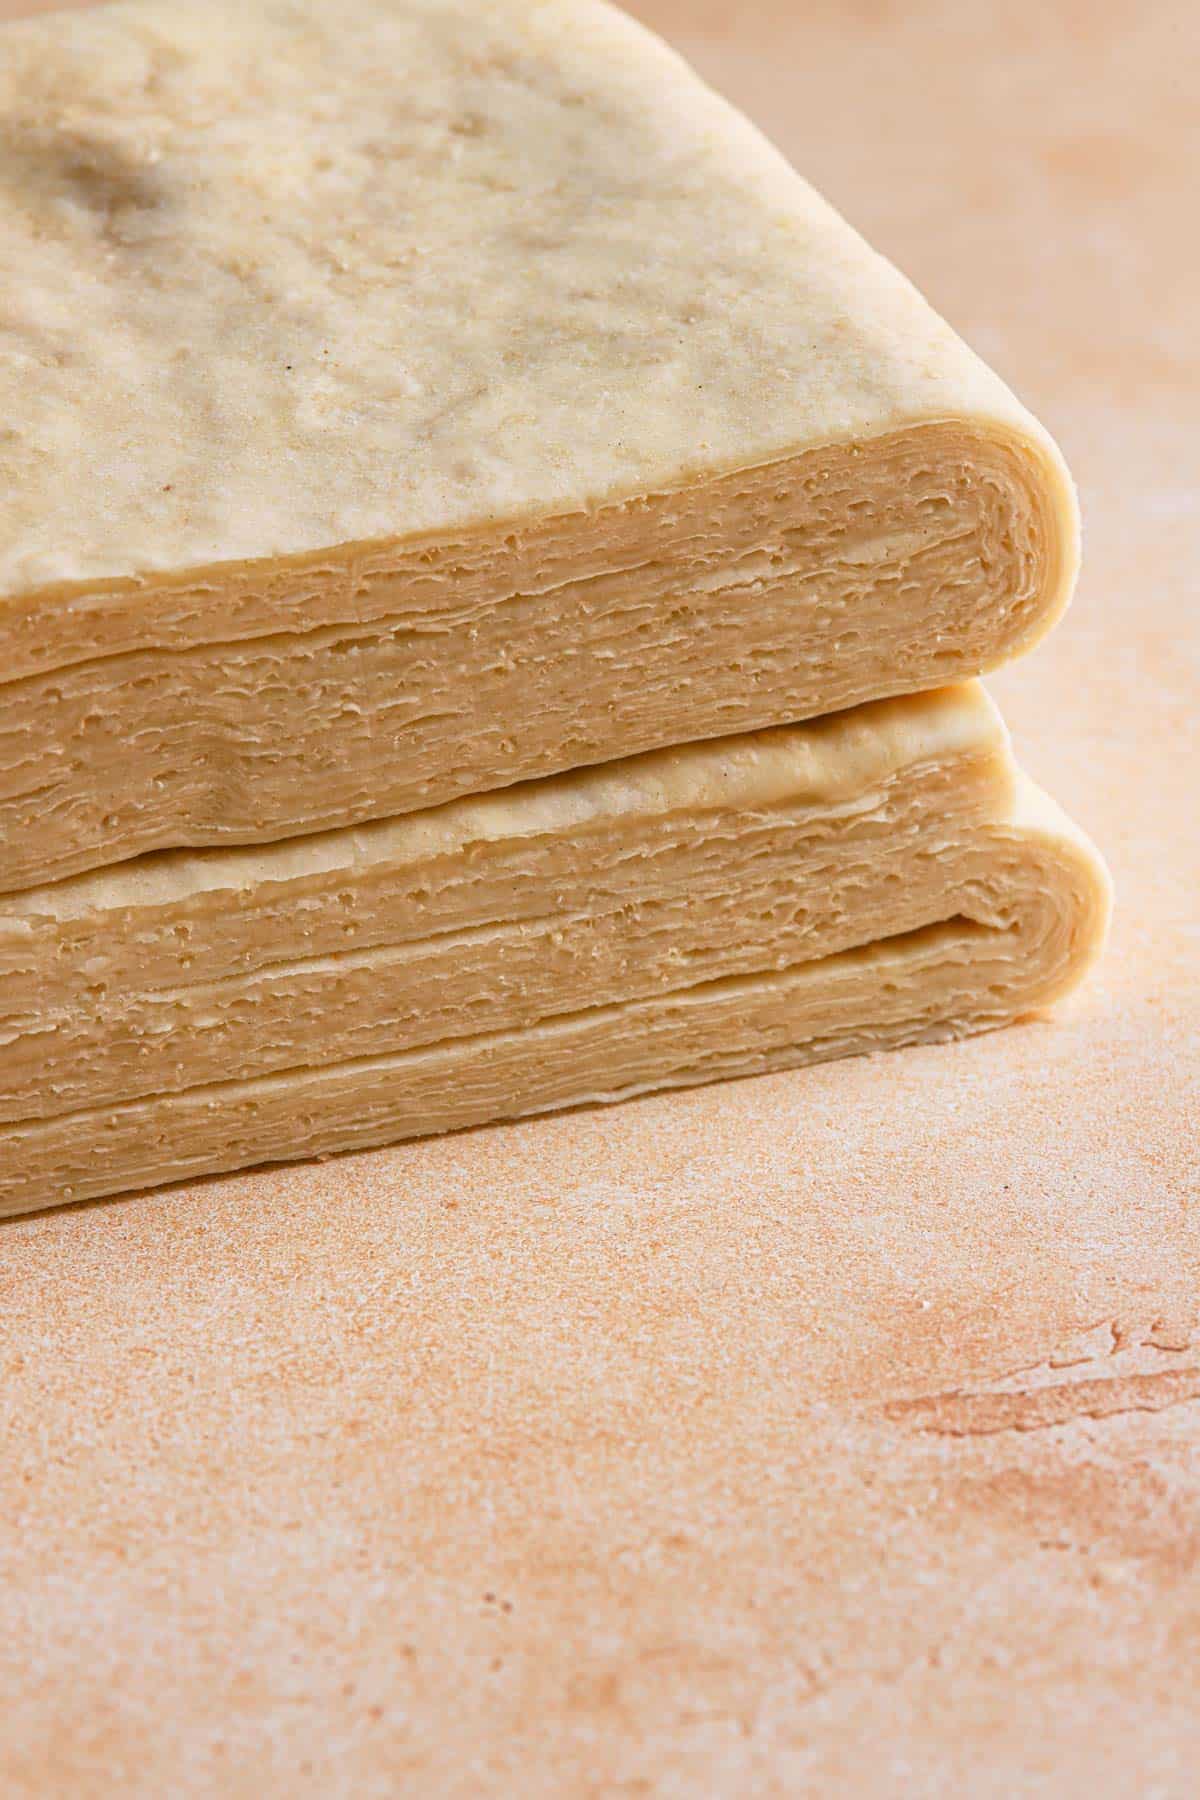
It is mainly known as Croissant dough, but laminated dough is made using a technique used in pastry-making that involves creating layers of dough and butter. The dough is rolled out, and a butter sheet is placed on top. The dough is folded over the butter, layers of a sandwich-like structure: dough-butter-dough. This process is repeated several times, resulting in multiple layers of dough and butter. During baking, the butter melts, and the moisture evaporates and creates steam, which lifts the layers of dough, giving pastries their flaky texture.
It doesn’t take long to make laminated dough from scratch, in average 3-4 hours depending on the size of the dough.
Margarine VS. Butter in Laminated Dough
You can use one over the other but the results may not be the same, both in flavor (butter is superior in flavor) and texture. Margarine water content can vary from 20-30% and some testing is needed.
Pastries Made with Laminated Dough
This dough makes various pastries, including croissants, Danish pastries, puff pastries dough, puff pastry twists, Cornetti, Pain Aux Raisins, Cruffins, Pain au chocolat, and many more. Laminating the dough gives these pastries their signature lightness and flakiness, making them a favorite among pastry lovers worldwide.


Tools you need
You don’t need to be a pastry chef, the dough lamination process is pretty simple, and it calls for simple tools:
- A rolling pin.
- Pastry brush.
- A long ruler or a measuring tape.
- Plastic wrap.
- Kitchen knife (or a pizza roller, like I like to use)
How to Make Laminated Dough
Time needed: 12 hours
Before starting, please read carefully the below steps and tips.
- Make the Dough
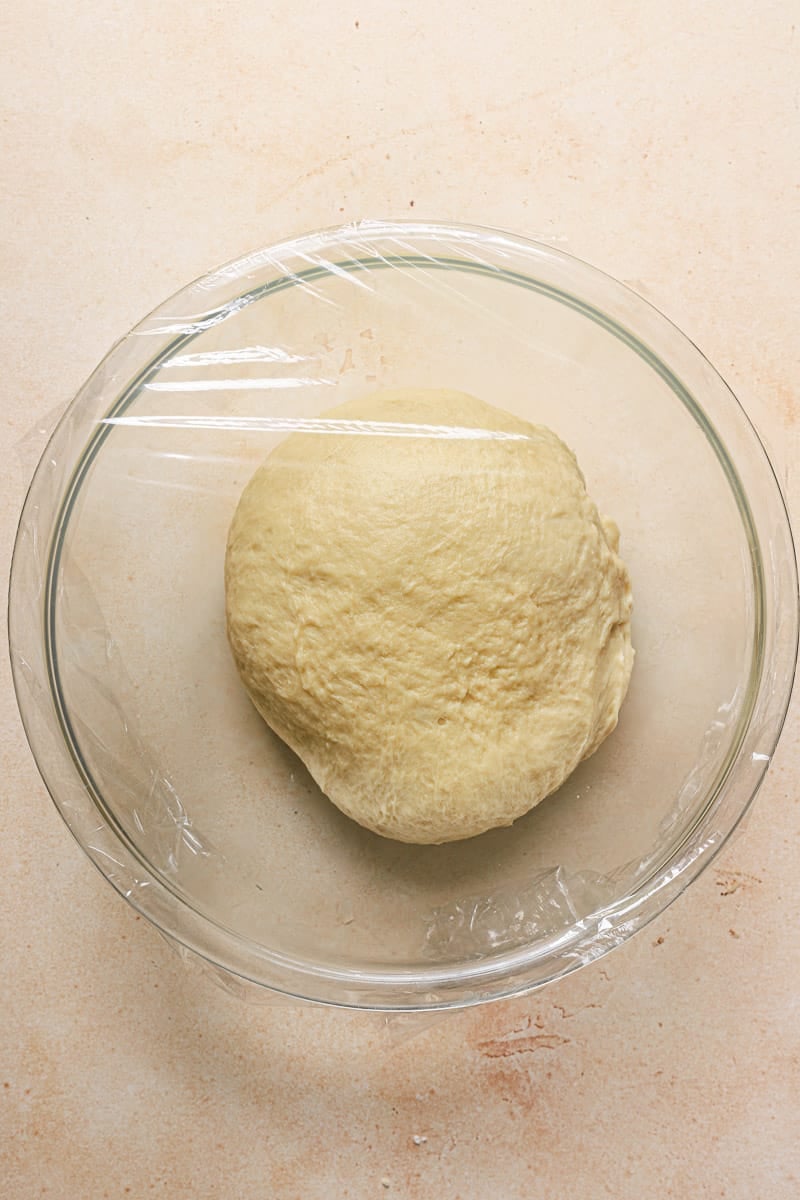
There are many types of dough, and depending on your recipe, you’ll need a basic dough made with flour, water, salt, and sometimes yeast or sugar. Mix the dry ingredients, add the wet, then knead the dough until it becomes smooth and elastic. Shape it into a ball and let it rest to relax the gluten.

- Prepare the butter
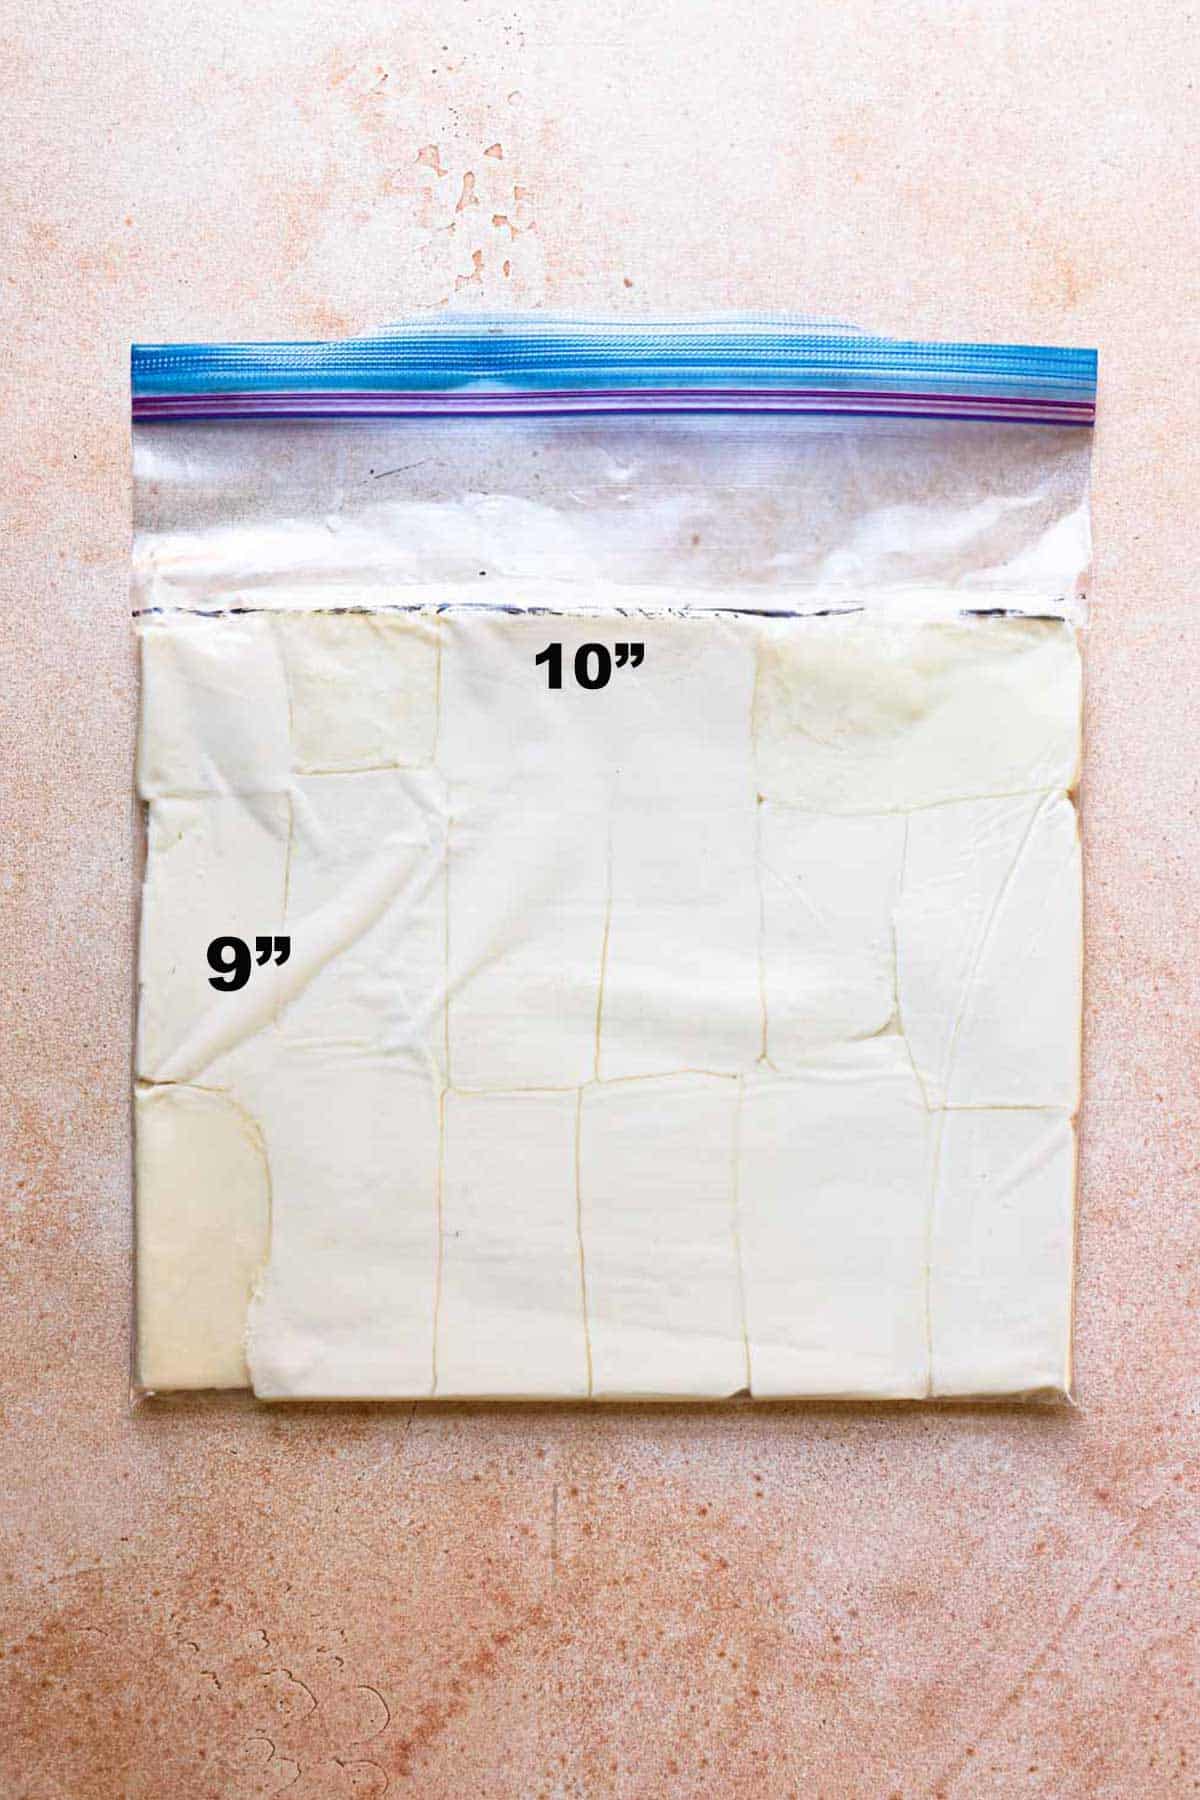
Place slightly soft butter (unsalted is typically used) in a large ziploc bag or between two pieces of parchment paper, with the bottom piece marked with a 9×10-inch rectangle. Use a rolling pin to pound the butter, flattening it and shaping it into a square or rectangle. The goal is to smooth the butter into one cohesive piece. Place the butter block in the refrigerator until 20 minutes before use.

- Lock the butter
Fold Roll out the dough into a 9×15-inch rectangle on a lightly floured surface. Take the chilled block of butter out of the refrigerator 20 minutes ahead, then take the wrapped butter out of its packaging and position it on the left side of the dough, ensuring that no exposed dough extends past the edges of the butter. Fold the other third of the dough over the butter, then the left side over the center.
- First Fold, the Book Fold (x1)
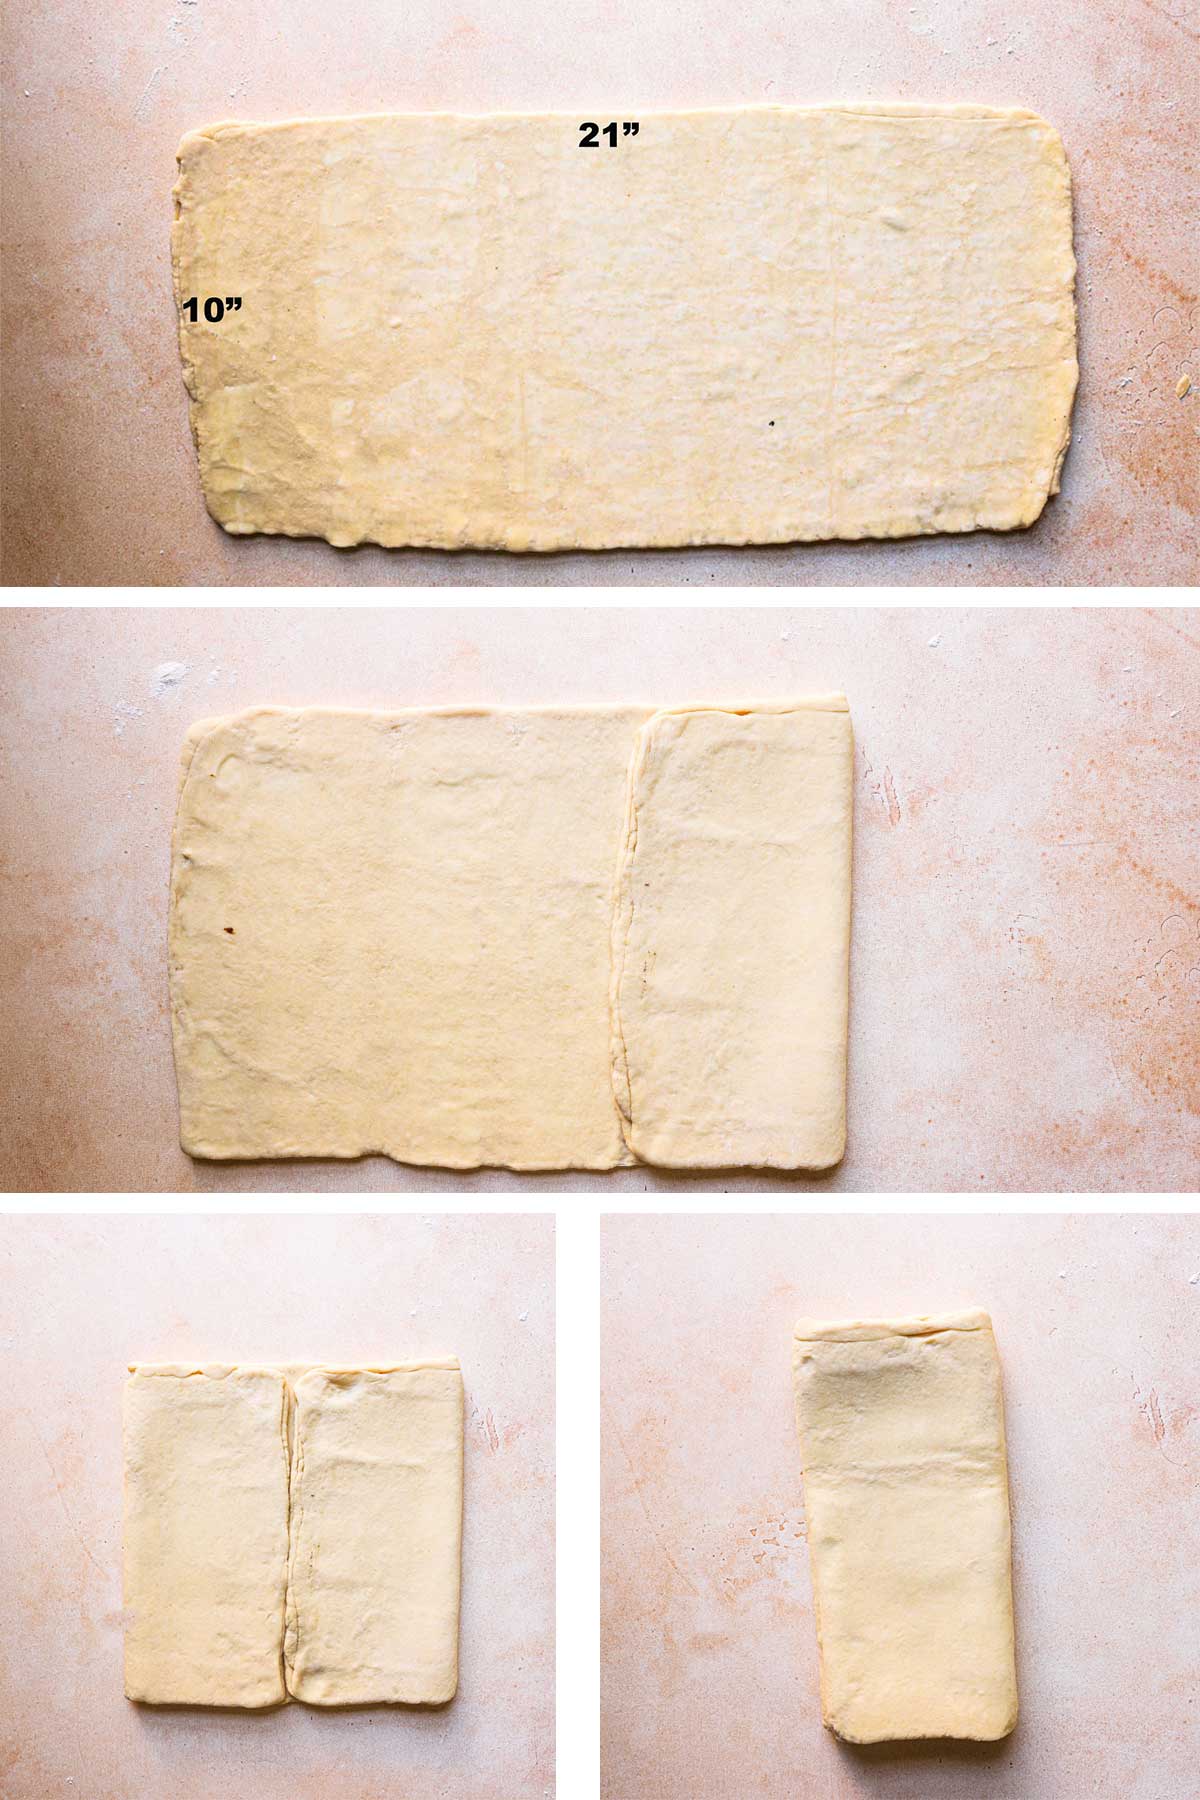
Roll the dough into a 10×21-inch rectangle. Fold the dough in half, then unfold it to see the center line. Fold the right end side towards the center line, then do the same with the left side. Fold the right side over the left. Refrigerate.
- Envelop Fold (x2)
Next, roll out the dough again into a 10×21-inch rectangle. Now, you’ll perform a series of folds known as “turns.” Fold one-third of the dough over the middle, then fold the other side over the top. Rotate the dough 90 degrees, wrap it with plastic wrap, and chill for 30-45 minutes.
Repeat the folding process. The number of turns may vary depending on the recipe. - Shape
Roll the dough to the desired thickness for your pastry. At this point, you can cut the dough into shapes for croissants, Danish pastries, or any other laminated pastry you want to make. Once shaped, let the pastries proof until they have doubled in size, and then bake them in a preheated oven until golden brown and flaky.


Tips
- Personalize your dough by adding some flavors like lemon zest, orange zest, or extract flavors like almond.
- To avoid the butter from softening, or melting keep the dough and butter cold throughout the process. Cold dough and butter are essential for the final product’s lamination and flakiness.
- Make sure your work surface is clean and dusted with a bit of flour, then use the pastry brush to brush any excess flour as you fold.
- When locking the butter, the temperature of the butter should be “playable,” meaning it bends without breaking, but it is not too soft that it sticks to the bag.
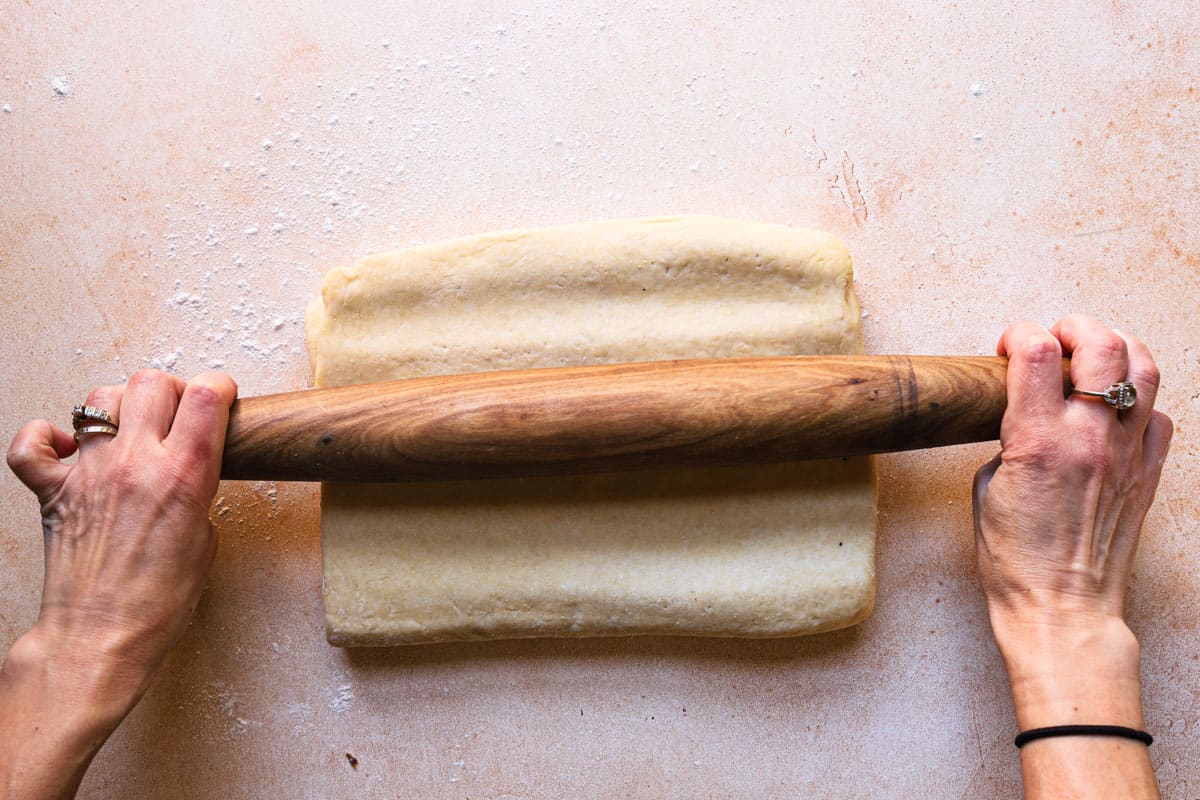
- Before rolling the dough, use your rolling pin to tap the top of the dough from top to bottom until it is 1/2-inch thick. Tapping the dough helps to relax the gluten so the dough won’t bounce back as we roll.
- Be patient and take breaks between each turn. Allowing the dough to rest in the refrigerator for 30-45 minutes between each turn helps relax the gluten and prevents the butter from melting too much.
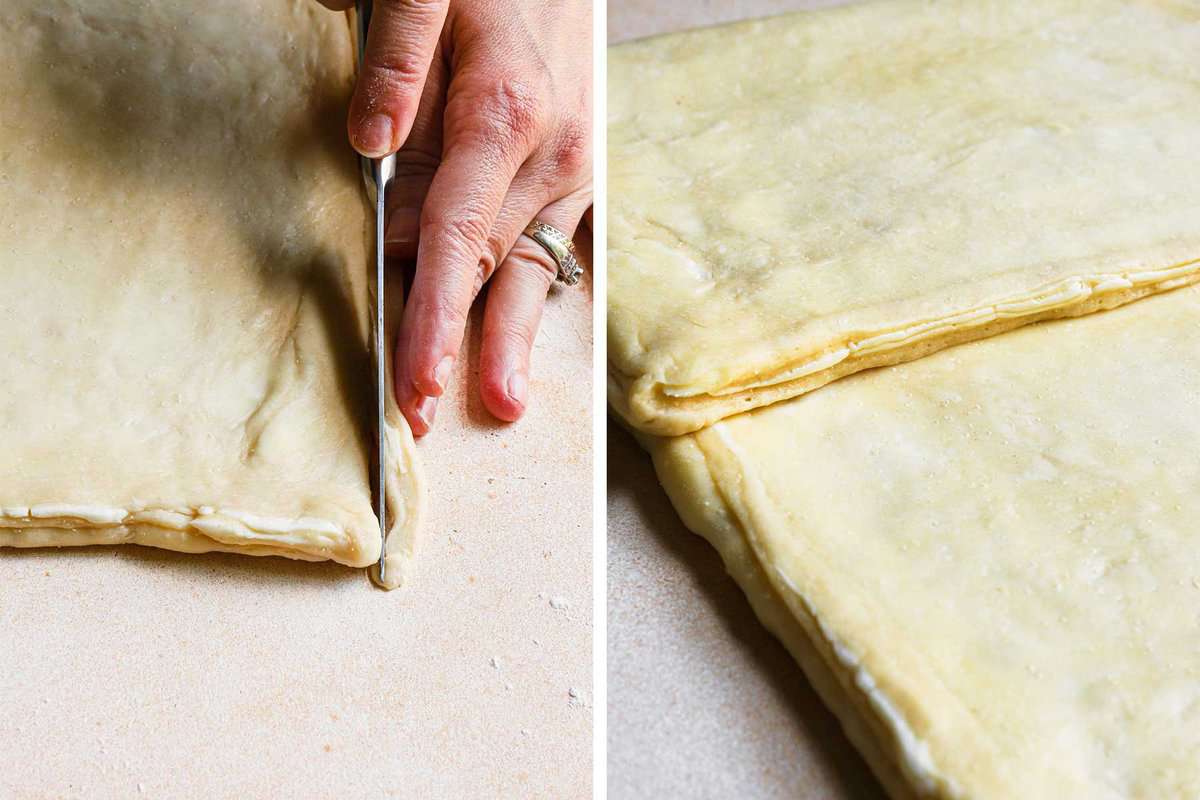
- Use a sharp knife to cut about 1/4-inch pieces from the corners of the dough before folding. Make sure you see the layers of butter and dough.
Storing
In the refrigerator for up to 24 hours after you folded the last fold. It will keep rising in the refrigerator but that should not be an issue, just tap the dough with the rolling pin before shaping to extract excess air.
To freeze wrap the dough tightly with plastic wrap, place in a freeze bag and freeze for up to 2 months. When ready thaw it overnight in the refrigerator before using.
Now that you have a step-by-step guide to making laminated dough, you can embark on a delicious pastry-making adventure in your own kitchen. From croissants to Danishes, the possibilities are endless. So, grab your rolling pin, get your butter ready, and let the layers of flaky perfection unfold before your eyes.
Happy baking!
More Recipes You Might Enjoy
Choux a la Creme, Tart Aux Fraises, How To Make Brioche Bread