Last updated on May 11th, 2026.
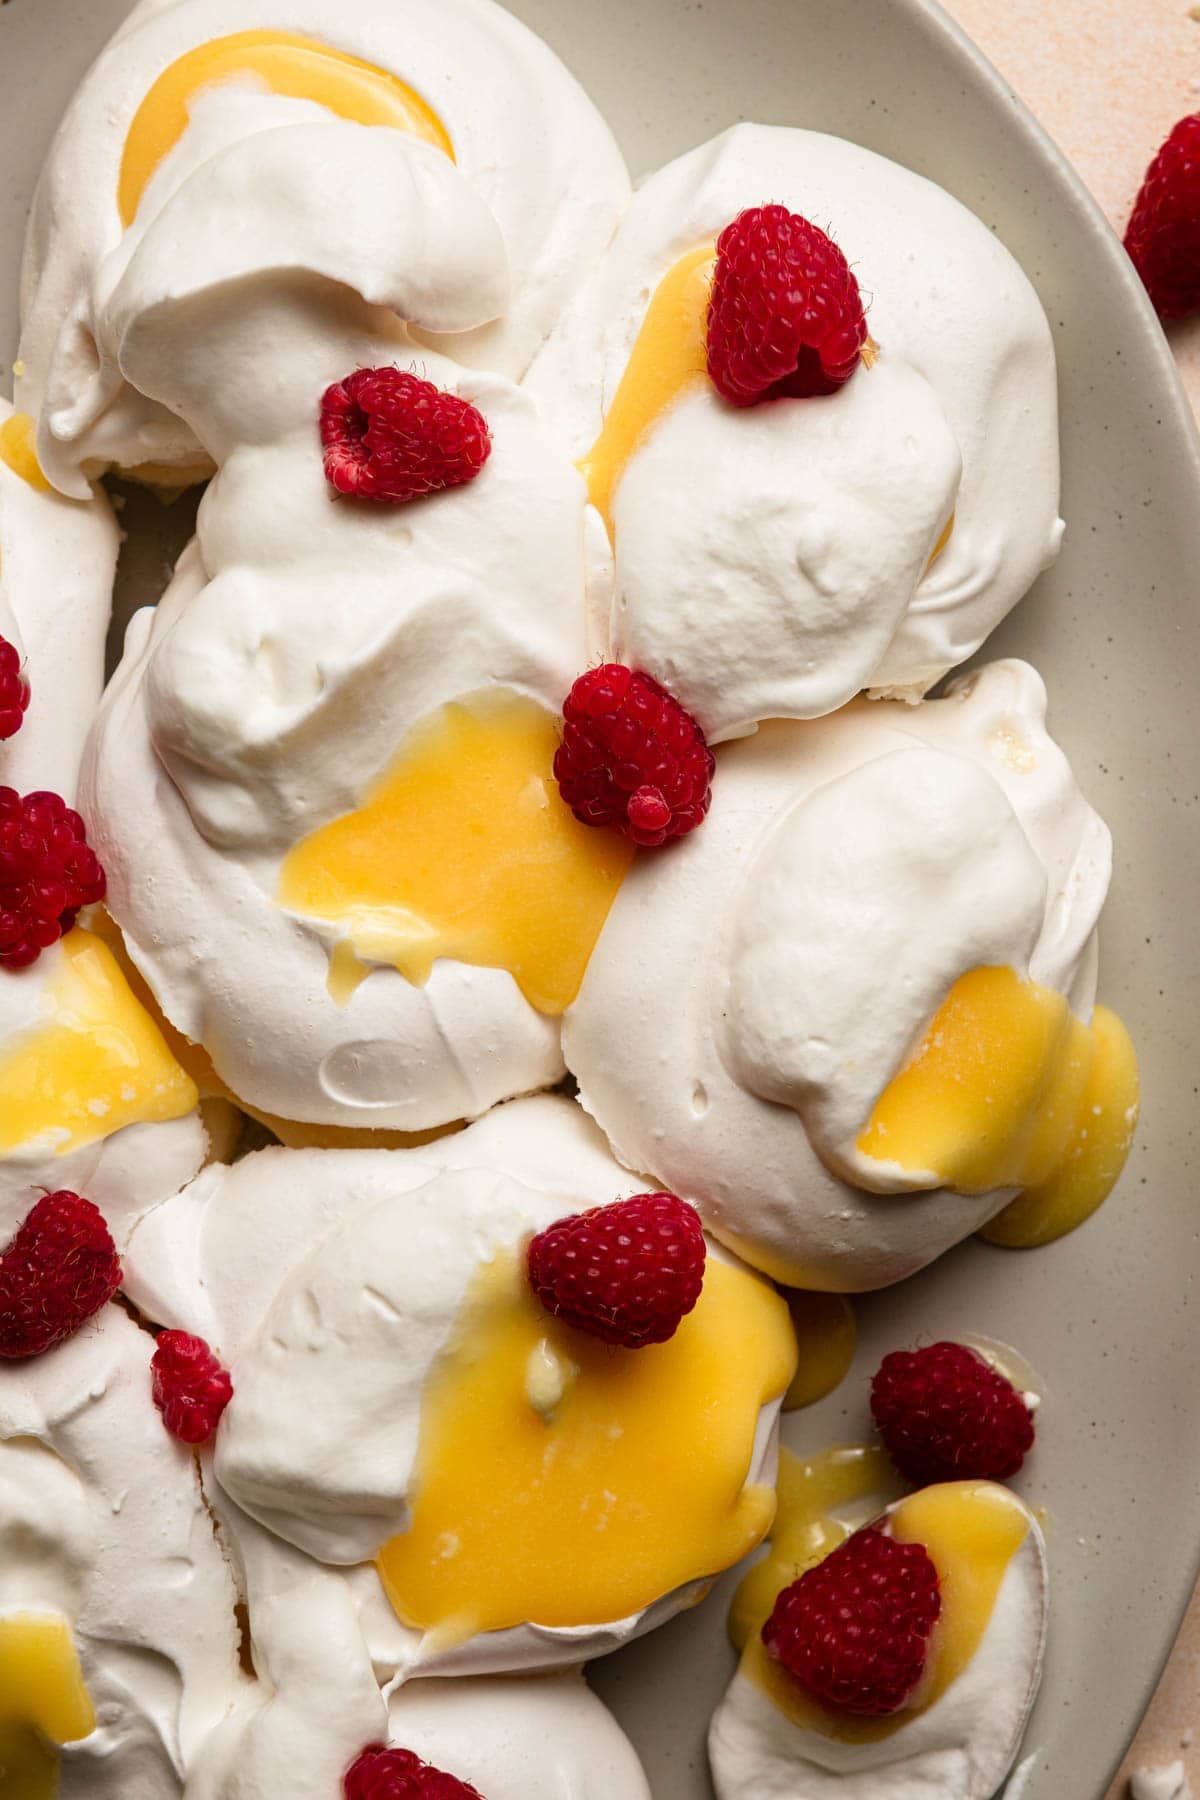
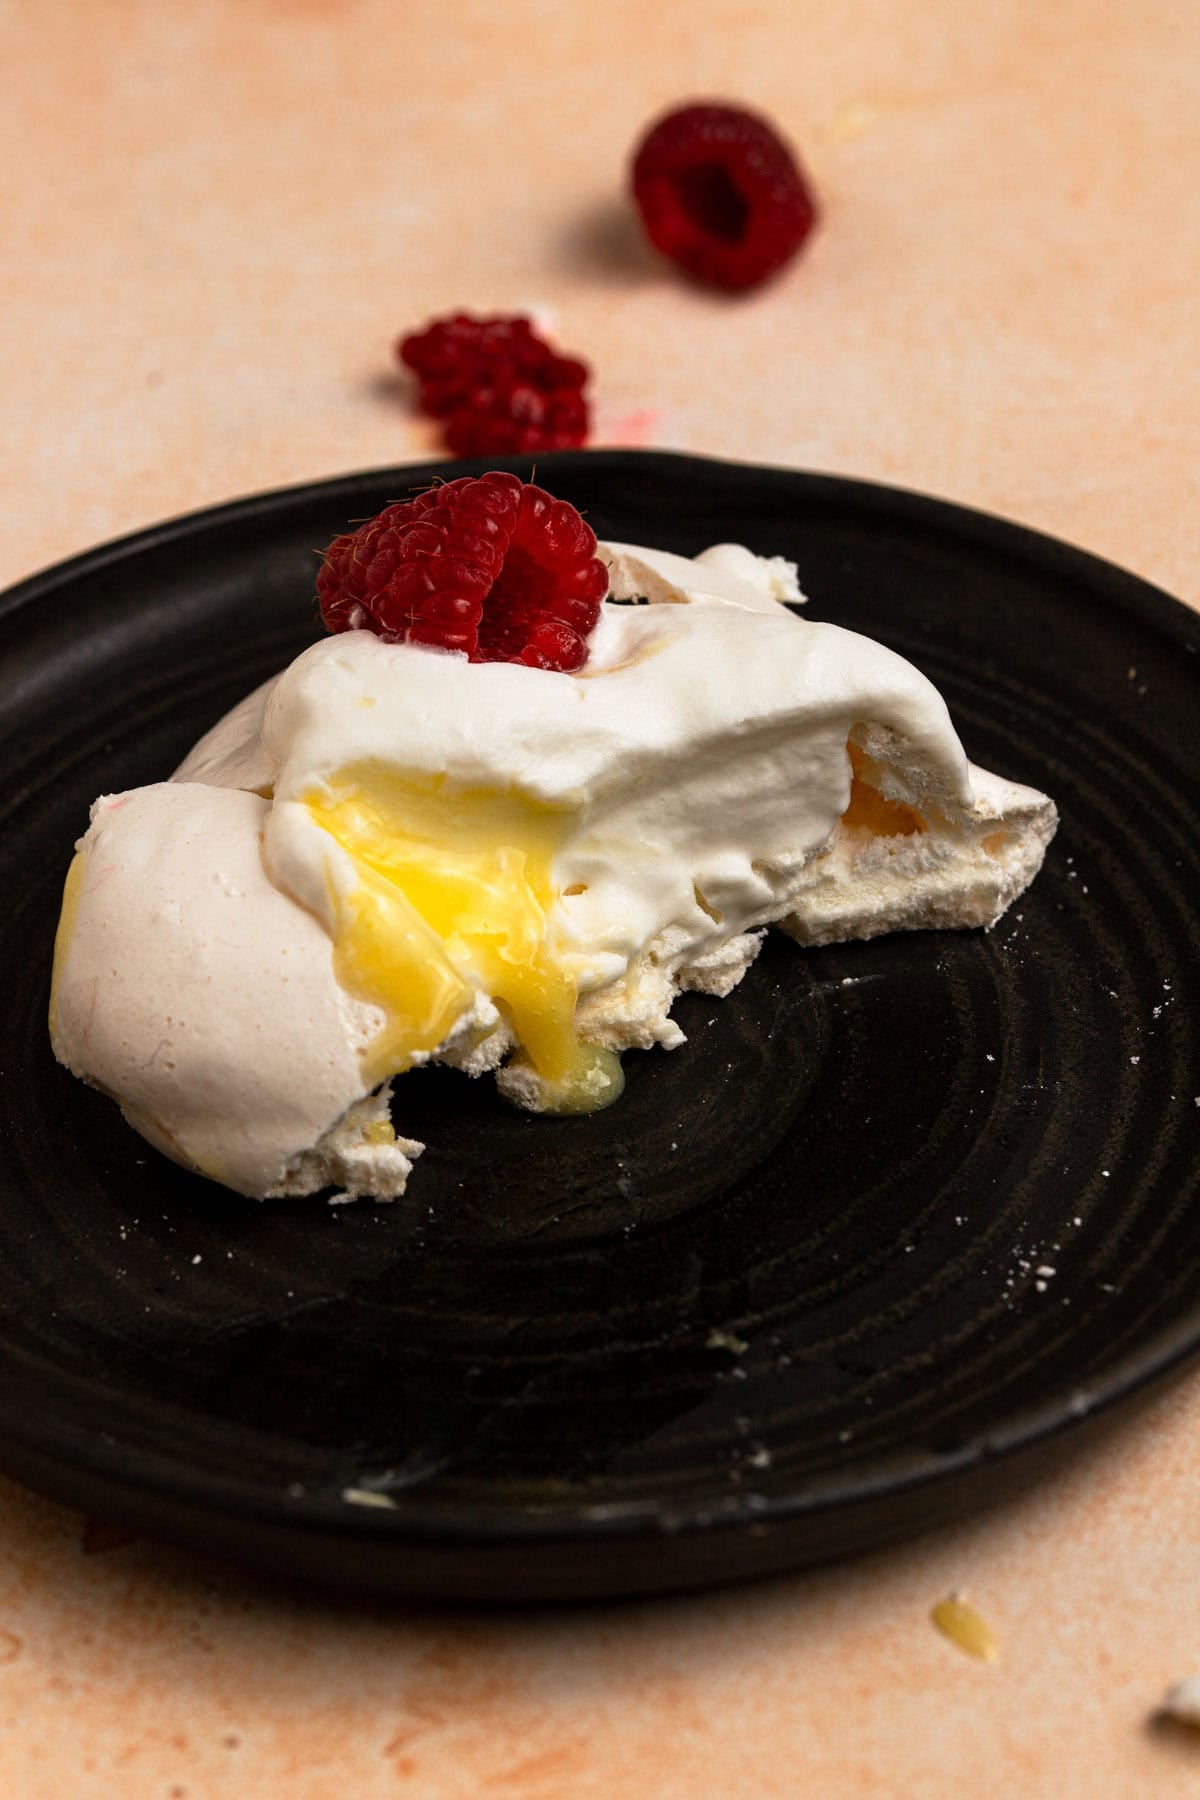
My pull-apart mini pavlovas are crisp on the outside with a soft, marshmallow-like center, baked close together so they break into delicate little clouds. I topped them with bright lemon curd and softly whipped cream, they strike the perfect balance of sweet, tangy, and airy, an effortless dessert that looks fancy but delivers pure texture and flavor payoff.
Pavlova is one of those desserts that we first eat with our eyes, something I learned the hard way when I served the cutest mini pavlova filled with homemade lemon curd and crowned with vibrant berries. And believe it or not, I got an eyebrow lift screaming “so unimpressive.”
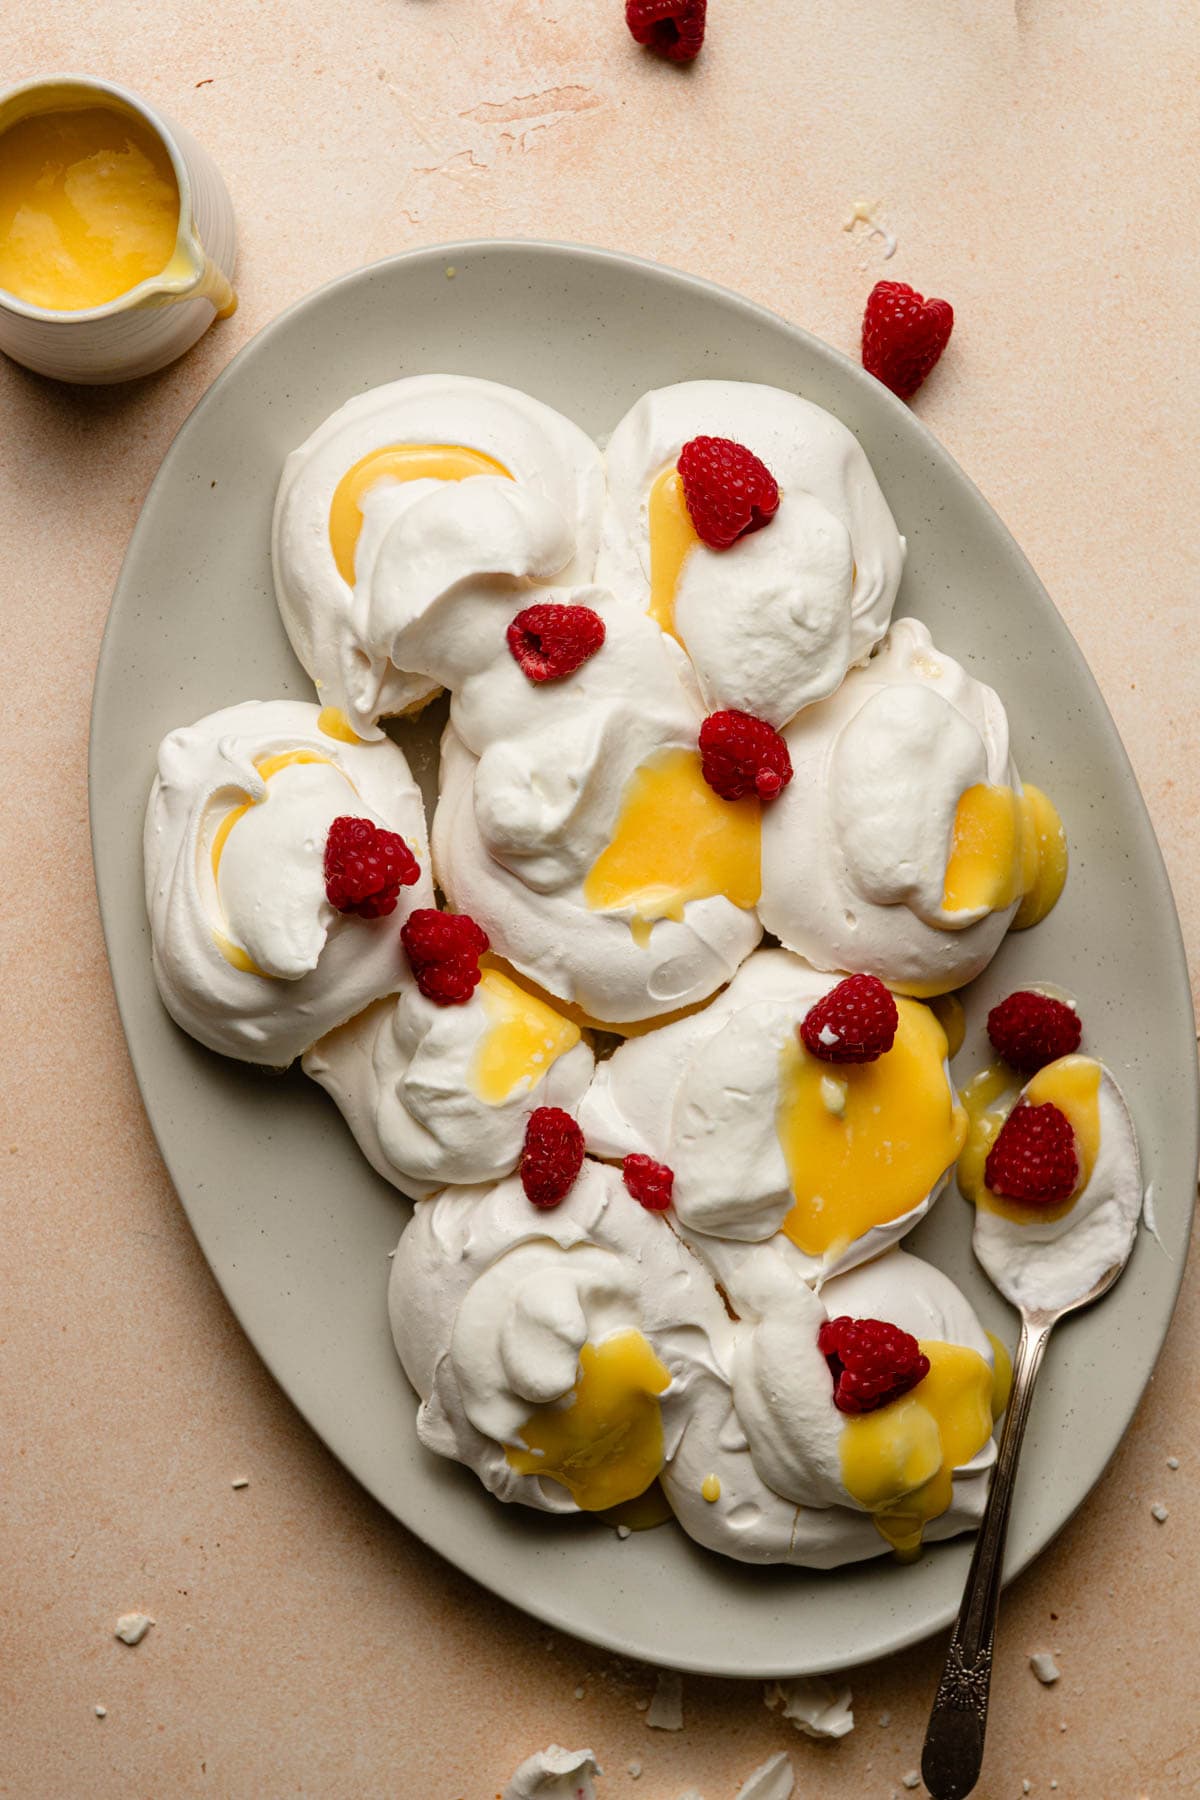
Of course I took it personally, and instead of cutting all ties with my guests, I gave it another try, this time baking the pavlovas close together so they keep their mini shape but are topped and served as one centerpiece. Suddenly, it feels abundant, like a table full of dessert instead of a single portion, and that little shift makes all the difference. Needless to say, the eyebrow lift was replaced with wide “wow” eyes.
Ingredients, Filling & Topping ideas
The complete recipe is at the bottom of this post in the recipe card, below is a quick look at the key ingredients as well as some serving ideas and subsitutions when possible.
- Egg Whites.Make sure they are yolk-free; otherwise, the meringue won’t whip. I’ve found that the best way to avoid any yolk is to separate the eggs while they’re still cold from the refrigerator.
- Granulated Sugar and cornstarch. Or, you can use powdered sugar (1 cup, 120g). Unless you have an experience with, so not replace the sugar with sweetners.
Filling and Topping Ideas
The meringue is crisp, and very sweet, which is why it goes really well with a creamy, light and sour filling. I like the lemon and cream combination, but here are some other options you can have fun with:
Let’s Bake This Recipe
What makes a common meringue into a light Pavlova is the baking reduced baking time, since meringue bakes from the outside in, it will bake the exterior while the inside keeps is fluffy texture.
Here are my key tips for best results I learned while testing different types of meringues:
- Take the extra step and wash your bowl and whisk, it may ahve some fat residue which can prevent the meringue form whipping.
- Make sure the bowl and whisk are cold. When the sugar dissolve at the present of heat, it can change its structure and as a result start to caramelize eat a low temperature.
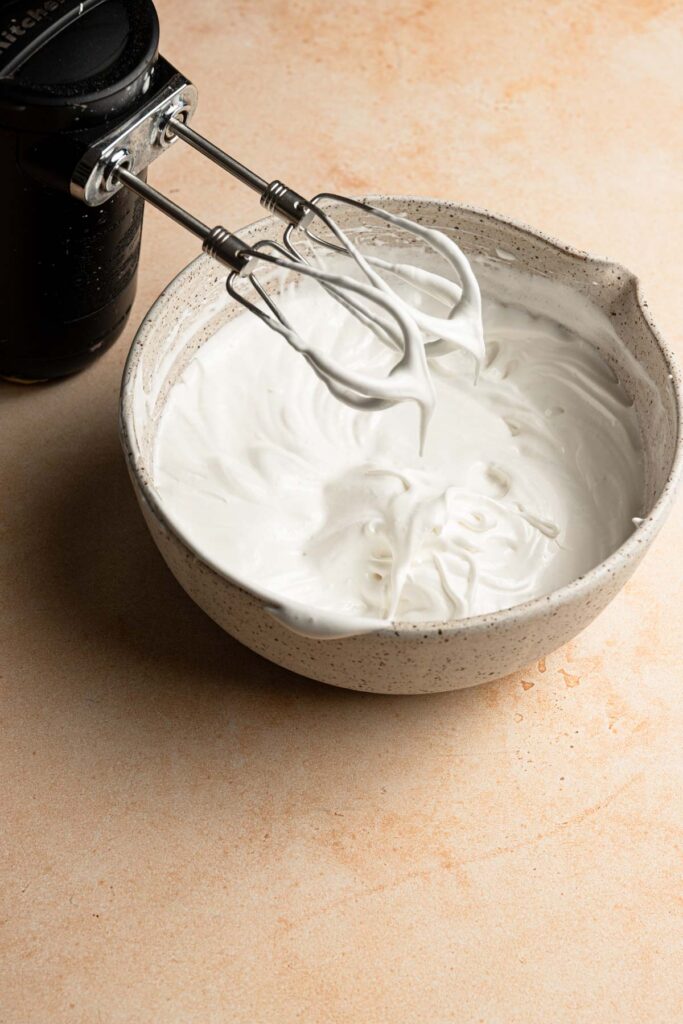
- Do not over whip. One the meringue is stable, and does not spil as you tilt (pr flip over) the bowl it is ready. Over whipping can cause the sugar to weep during baking, and the meringue to crack.
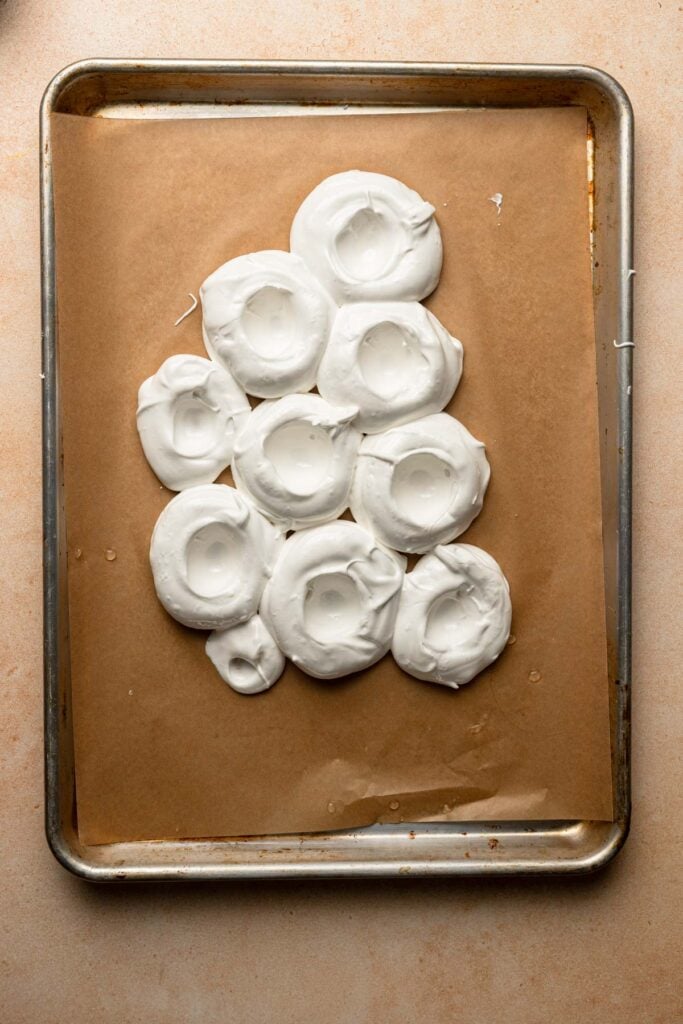
Shaping the pull-apart pavlova
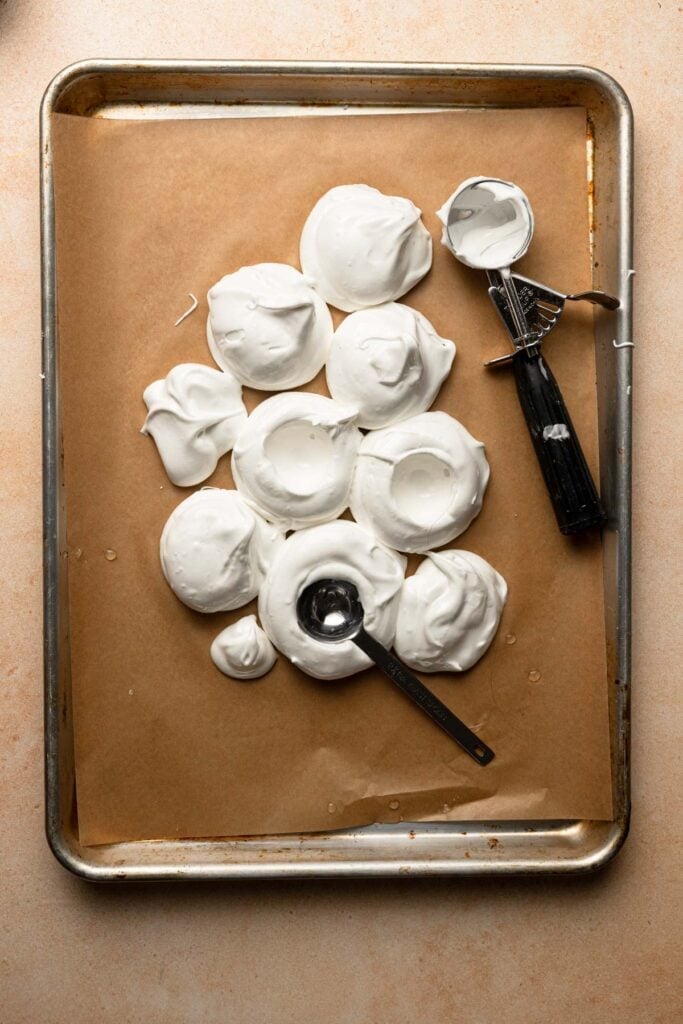
This is the fun part, and you do not need any special equipment, a cookie scoop, or even a large spoon is enough.
Mount the meringues in a random order, or try to think about the shape of your serving dish, like I did. A small gap is ok, it puffs during baking and we are going to cover the gaps with the cream and topping.
Filling And Topping
This is the fun part, and you should do it as soon as possible to serving time becasue the filling softens the meringue.
I like to fill the cavities with the curd, then use a spoon to top half of the curd (so half of it is showing), and the other half to cover where the pavlova meets. Then sprinkle the berries or nuts on top. This is the best way to show the best of al worlds: the individual pavlovas as well as an impressive cake topped with vibrant filling and toppings.
Yields and Storing
The recipe makes 12-15 mini pavlova, depends on how big each mound is. You can bake the meringue the night before, and fill it the next day. Once filled and topped it should be regrigerated for up to 3 days.
Crisp and Light Pull Apart Mini Pavlovas
Ingredients
Pavlovas
- 5 Large (150g) Egg Whites
- 1 1/2 Cups (300g) Sugar
- 1 teaspoon Cornstarch
Filling and Topping
- 1 Cup (240ml) Heavy Cream
- 1 Tablespoon Powdered sugar
- 1/2 Cup Lemon Curd
- 1 Cup Fresh berries
Instructions
Make the Mini Pavlovas
- Preheat your oven to 225°F, and line one large cookie pan with parchment paper.
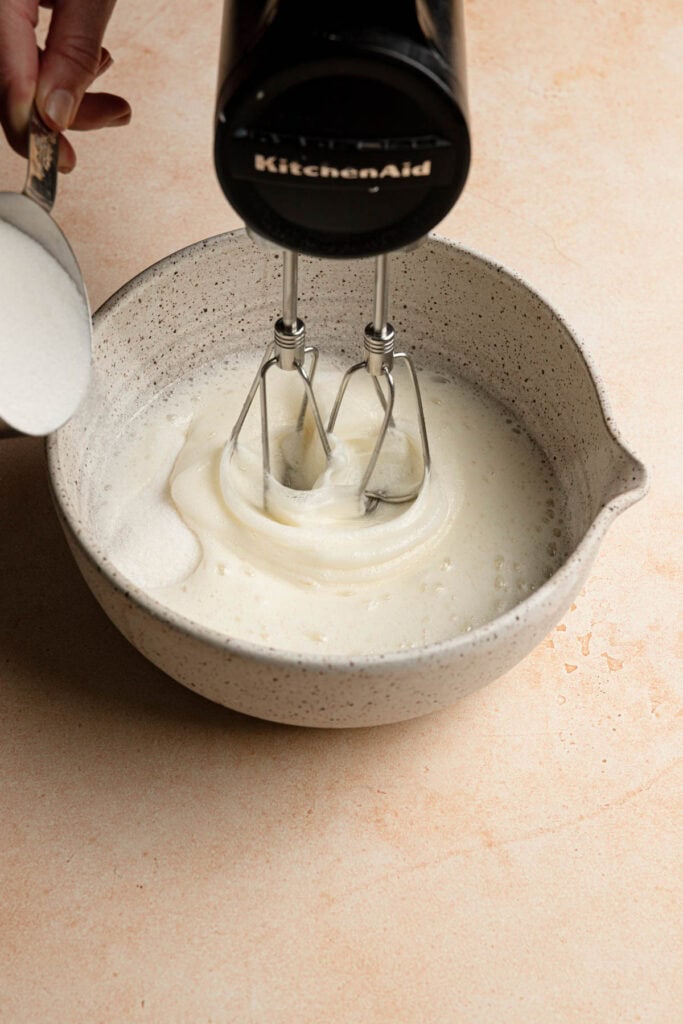
- Place the egg whites into a bowl of a stand mixer fitted with the whisk attachment and whip on medium-high speed for about 30 seconds, until it foamy.
- Increase speed to high then add the sugar in 4-5 parts, waiting about 10 seconds between each addition.
- Add the cornstarch and continue whipping until you have a thick, stable meringue.
- Use a medium cookie scoop (1.5-2 tablespoons), to scoop mounds of meringue over the pan. The overall shape of the pull-apart is up to you, I recommend to have the serving plate you are using as a guide.
- Use the back of a spoon to make a dent at the center of each mound.
- Bake for 90 minutes, then allow the meringue to cool before filling and serving.The center of each pavlova might collapse that is ok.
Fill and Serve
- Whip the cream with the powdered sugar until thick and stable.
- Right before serving, or as close to as possible, gently lift the meringue, tun it over and peel the parchment paper. Place it over your serving dish.
- Fill the cavities in the pavlova with the lemon curd then top with the whipped cream in a way that the cream is half covering the lemon curd and half covering the lines that connect each pavlova.
- Sprinkle with berries, or nuts and serve.