Last updated on April 14th, 2026.
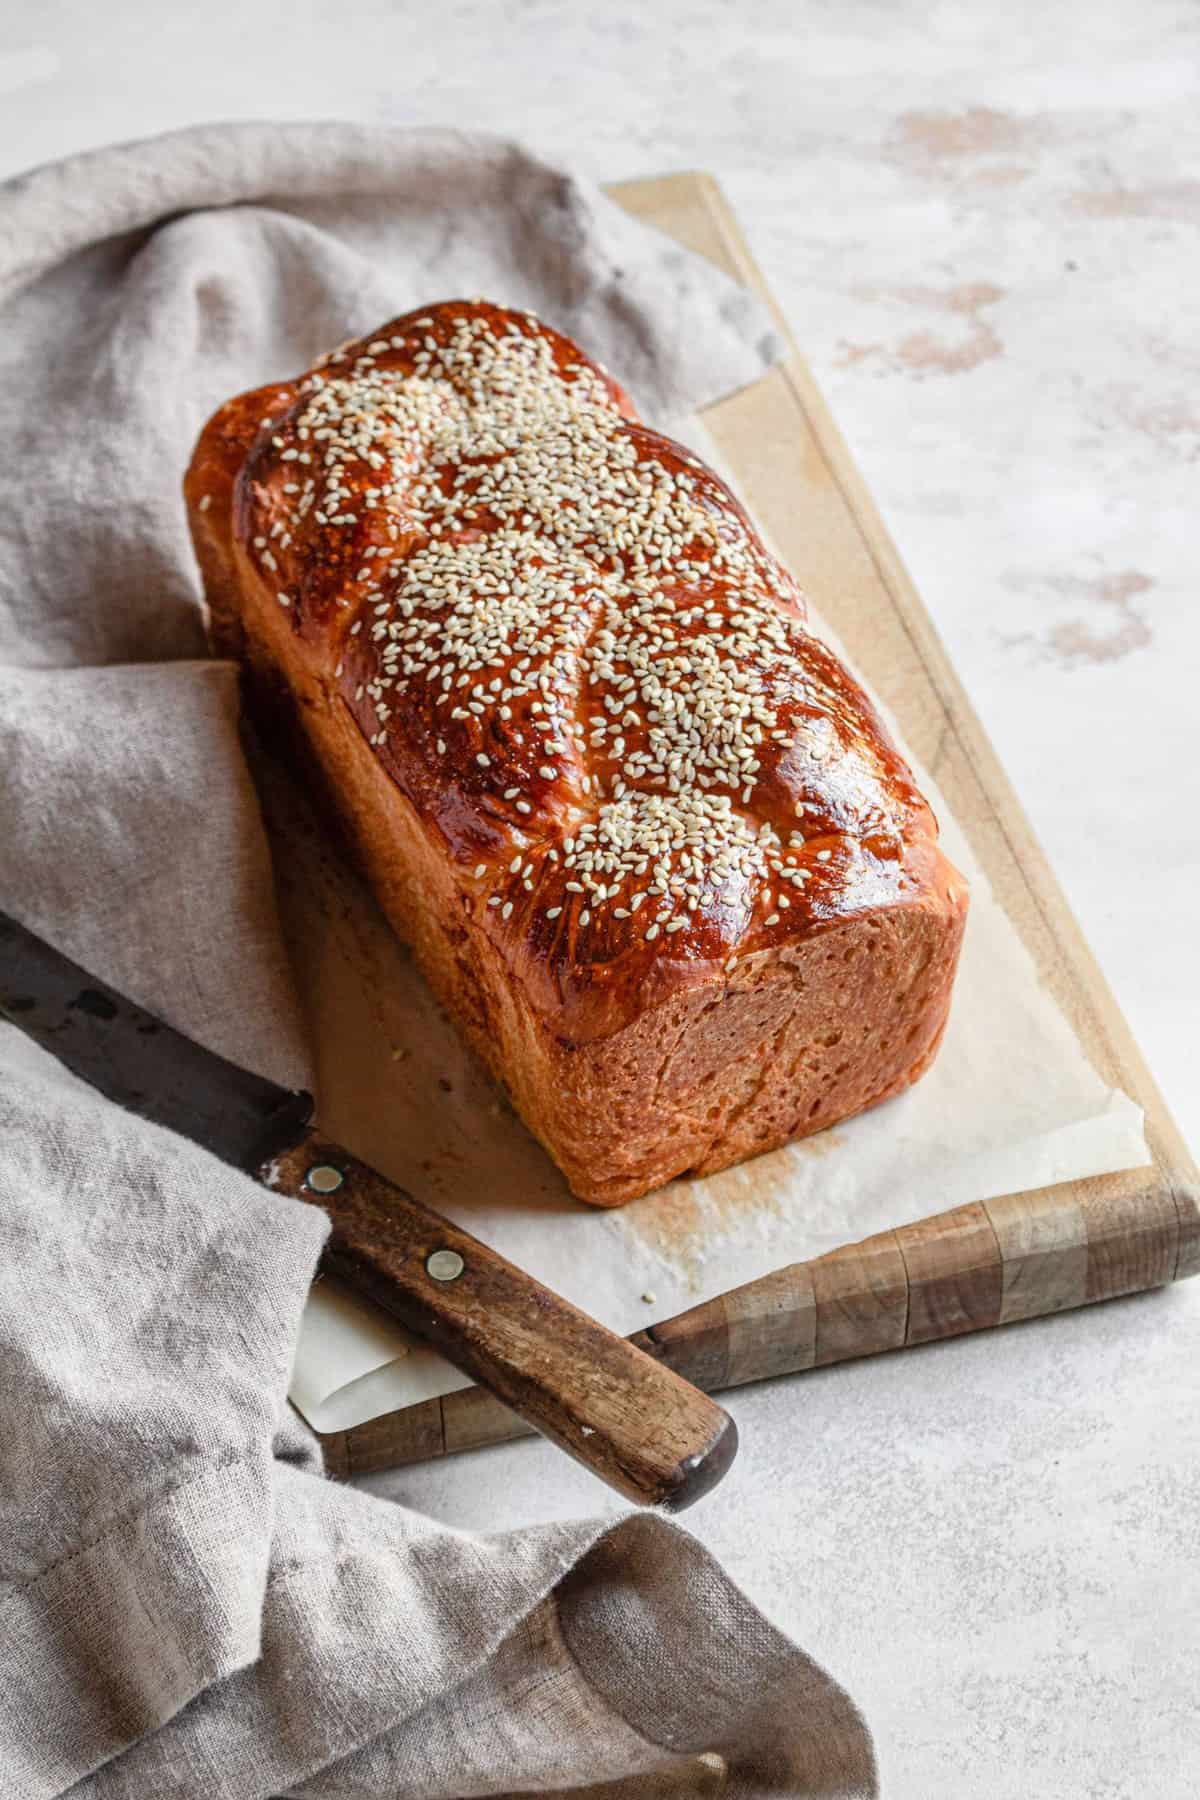
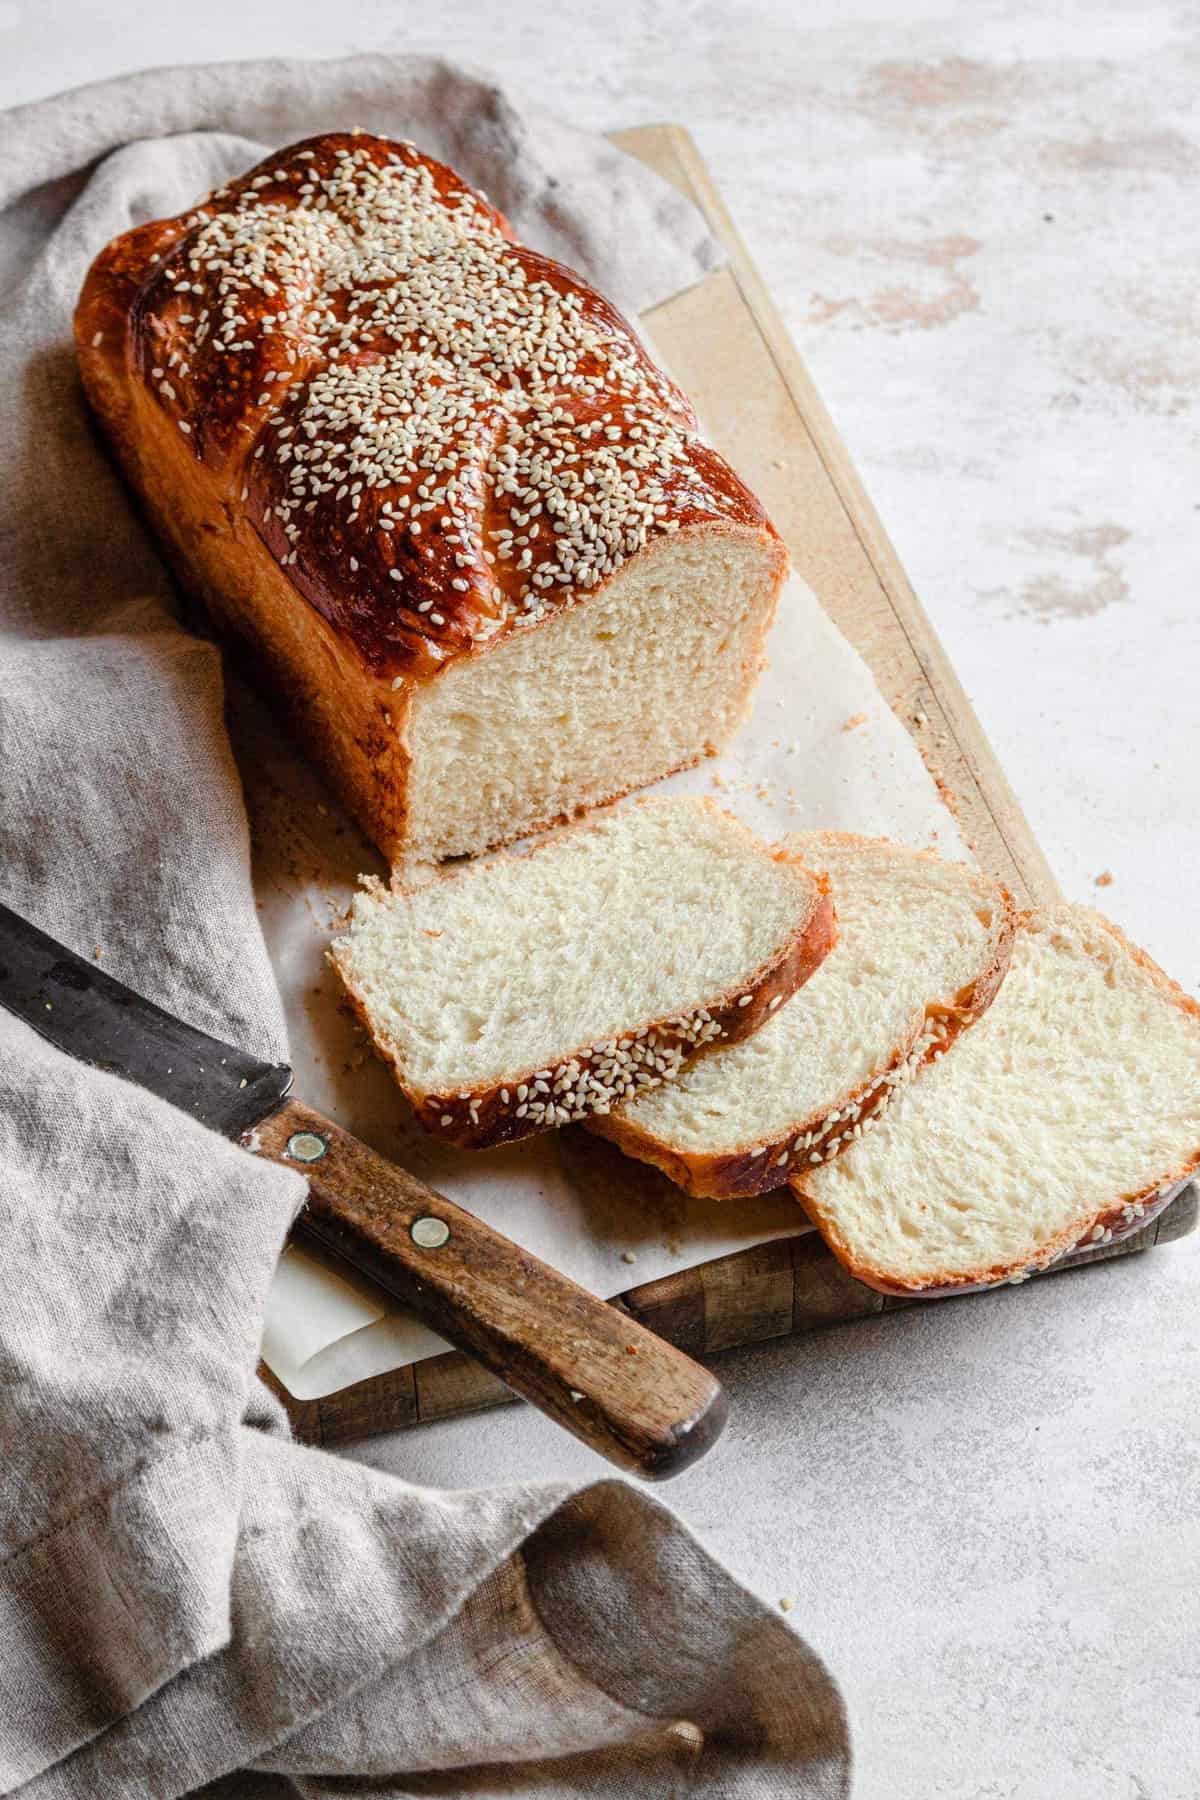
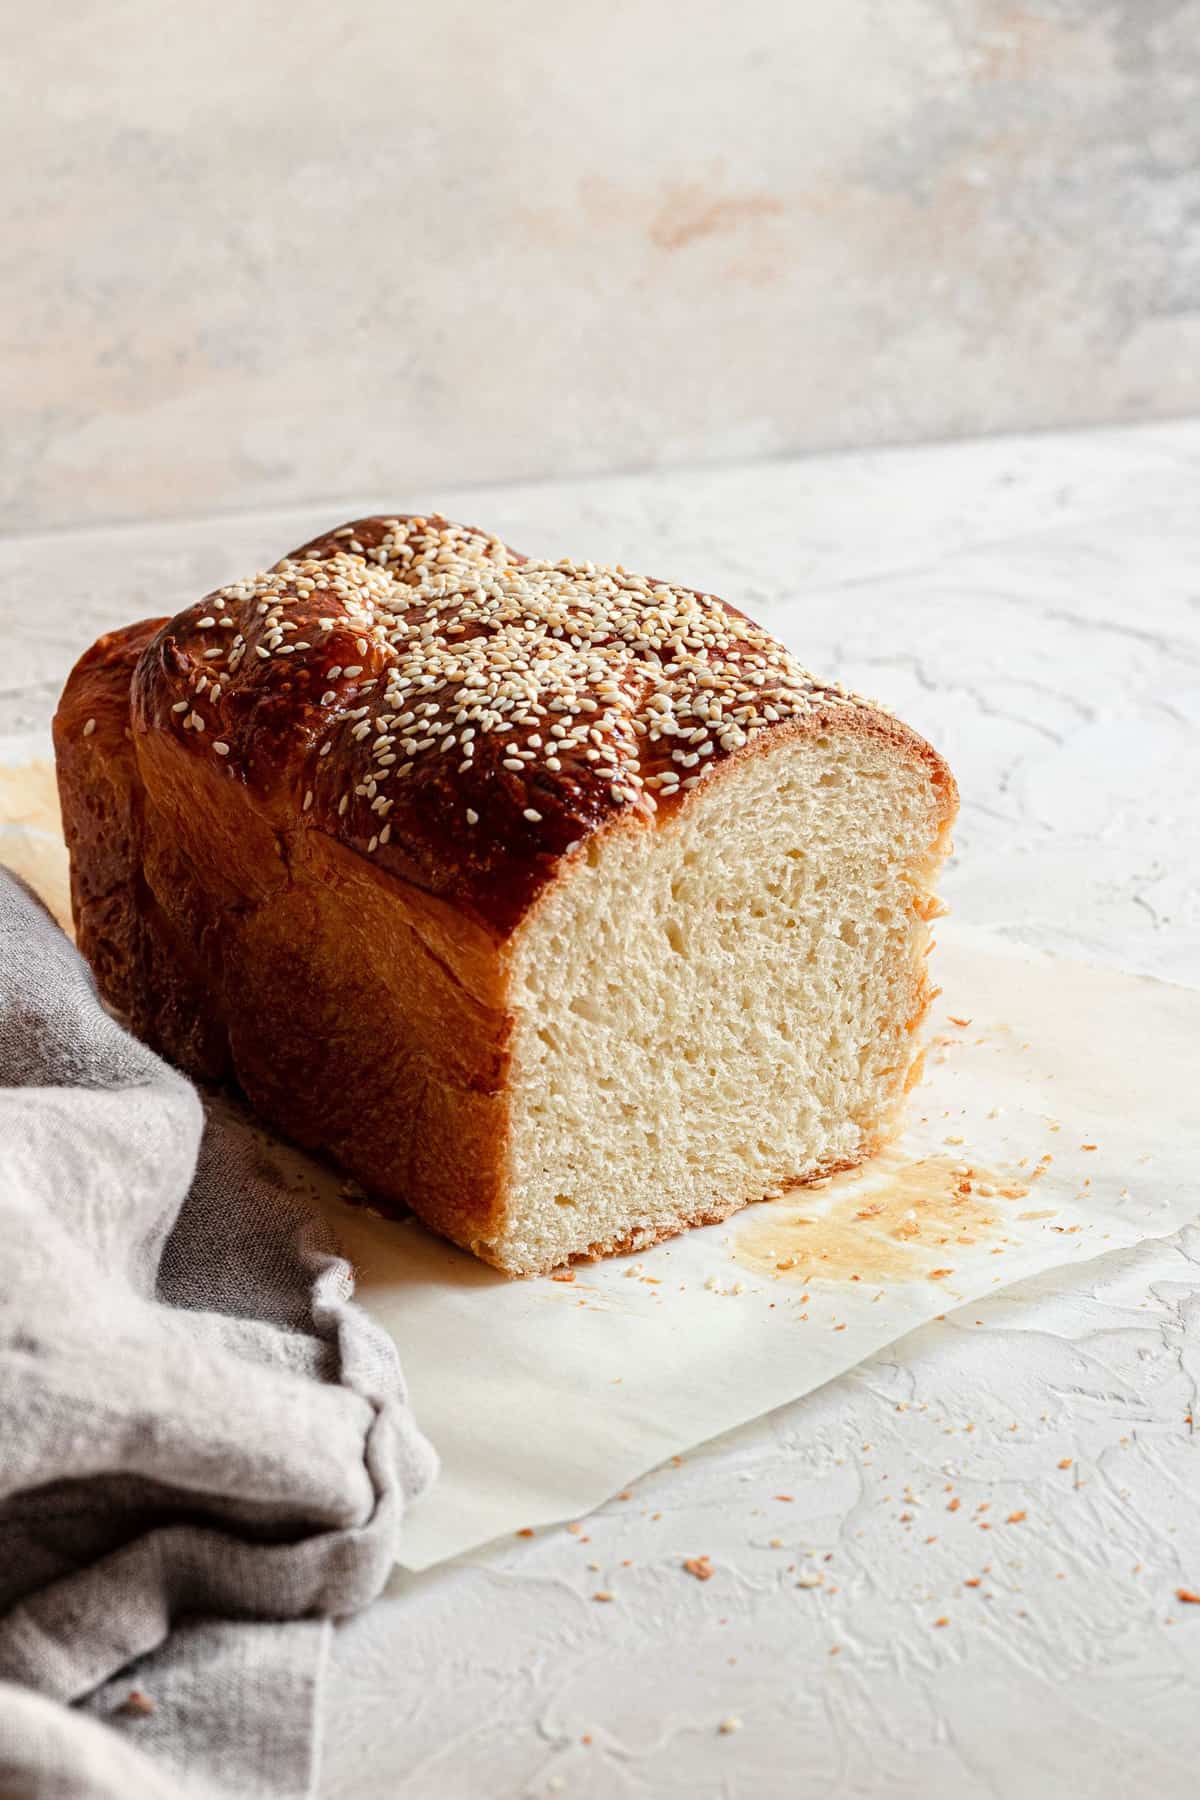
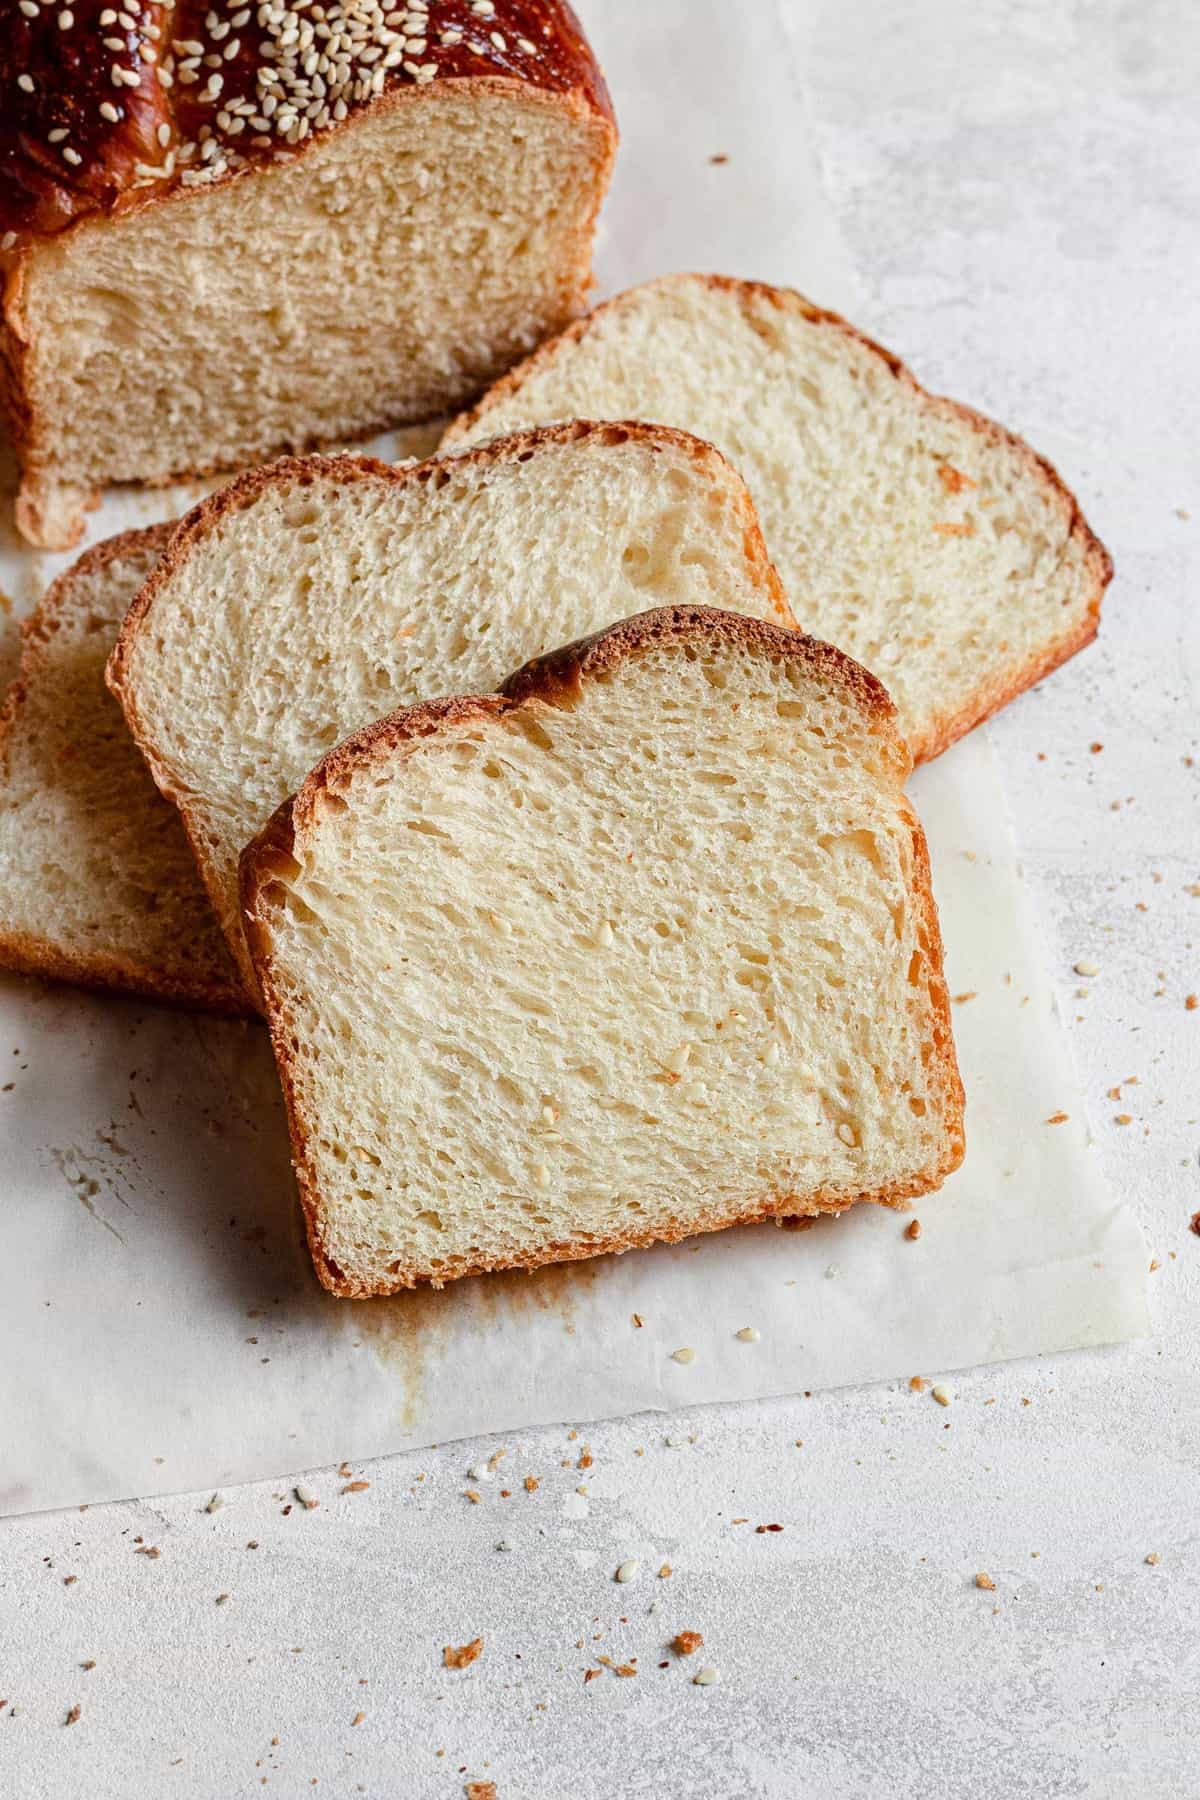
This soft, slice-and-eat challah bread is made with all-purpose flour and baked in a standard loaf pan. It’s simple to prepare by hand, and yields a golden loaf with a light, fluffy crumb. Ideal for sandwiches, french toast, or just enjoying warm with a pat of butter!
As a child, my mom would braid fresh homemade challahs for Shabbat dinner, beautiful, fluffy, and a show-stopping. Those loaves are what inspired my Bakery-Style Challah, and my overall challah recipe collection.
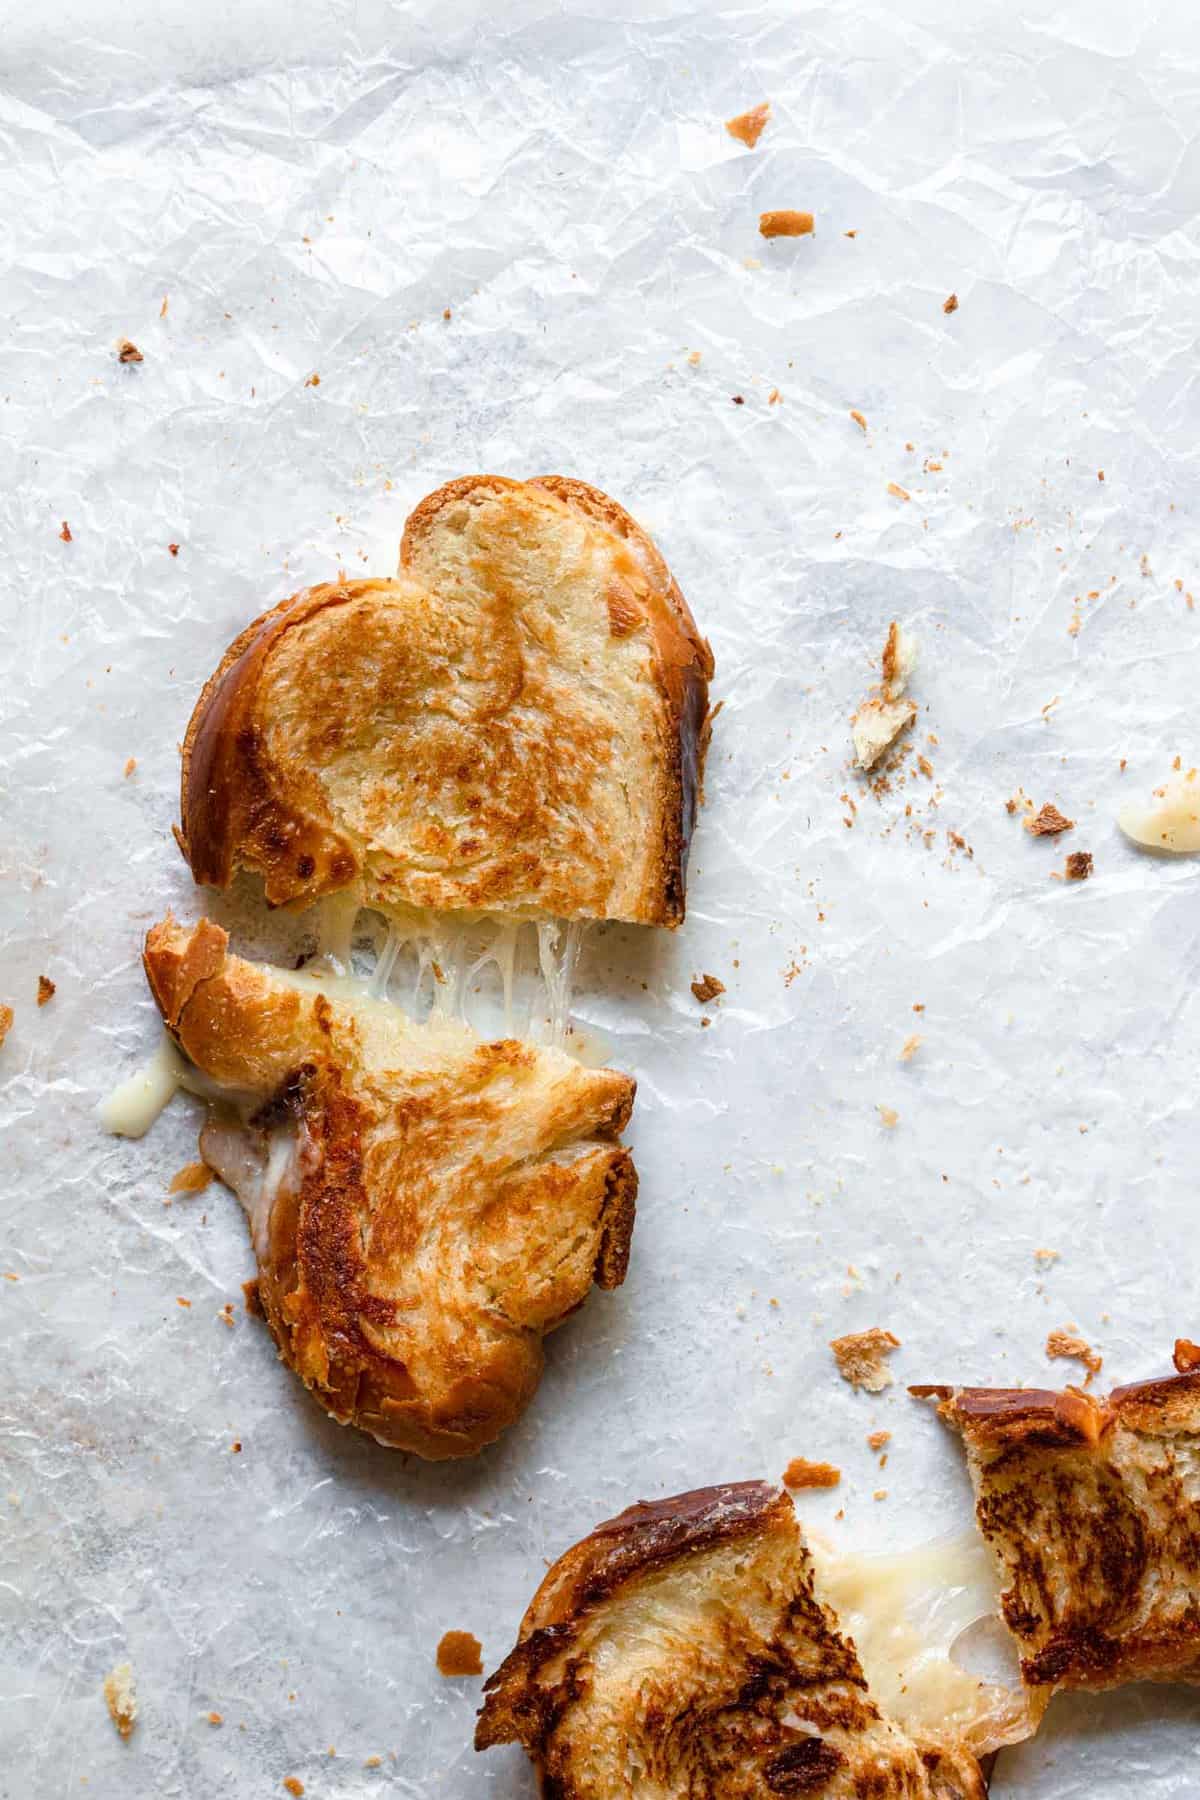
The only problem? They were meant for dinner. So to survive the wait, we’d grab a store-bought challah loaf and turn it into meatball sandwiches to hold us over. On the rare occasion there were leftovers, they’d go straight to the freezer, destined for French toast or the ultimate grilled cheese.
These days, there’s no corner store with fresh challah waiting for me on a Friday morning, so I bake my own. And while nothing beats the feel of soft dough in my hands, it’s the smell, warm, rich, freshly baked bread filling the kitchen, that makes it everything.
Lets Make This Recipe
This was my very first challah recipe I baked when starting my baking journey, and I made every mistake possible. Which is great news to you, because I am sharing all my tips and lessons I learned from baking this recipe for more than a decade.
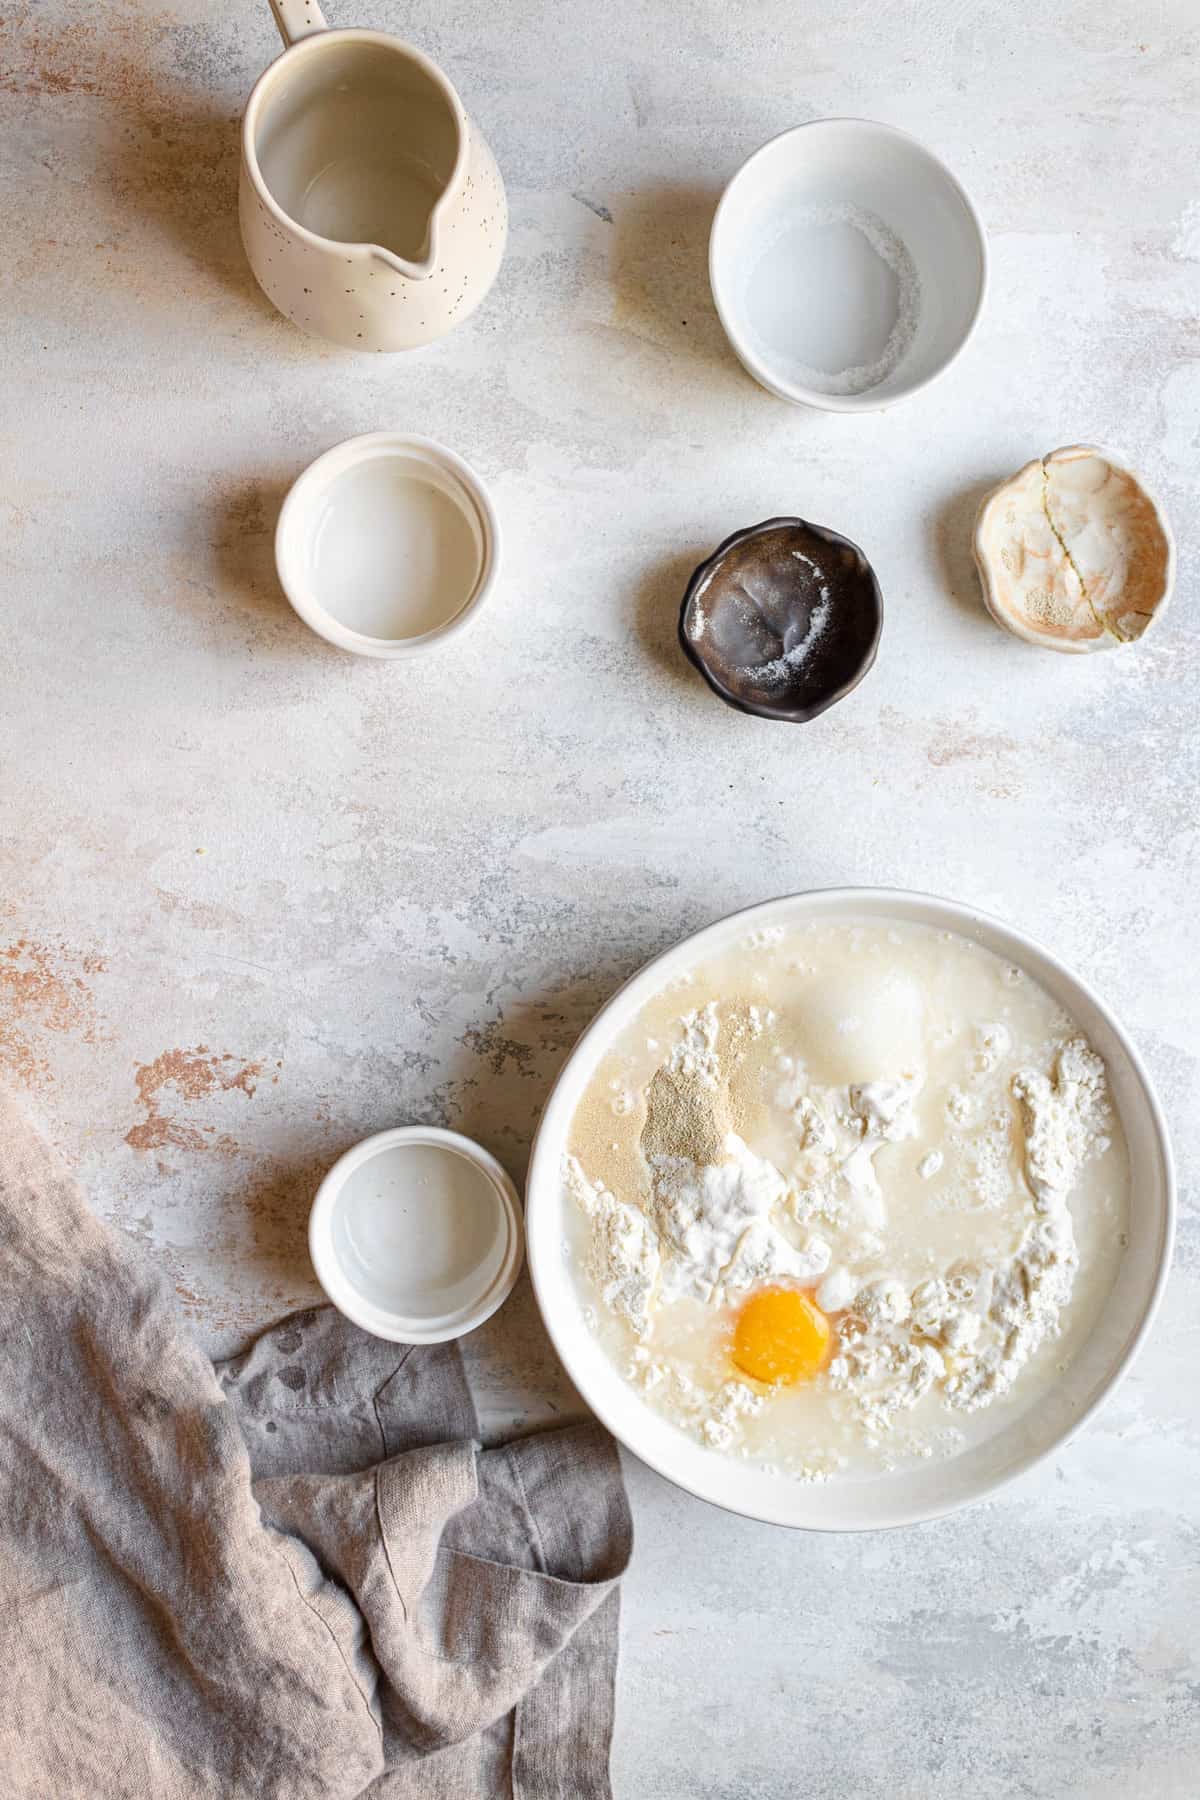
- Make sure the ingredients are at room temperature, and the water is lukewarm, if too warm, there is a risk the high temperature will kill the yeast, and the dough won’t rise.
- Have 1 1/4 cup of lukewarm water ready but start with only 1 cup if the dough is dry and does not come together add 1 tablespoon at a time. When it comes to challah, we aim for a smooth, playable, yet dry dough, so it will keep its definition during baking.
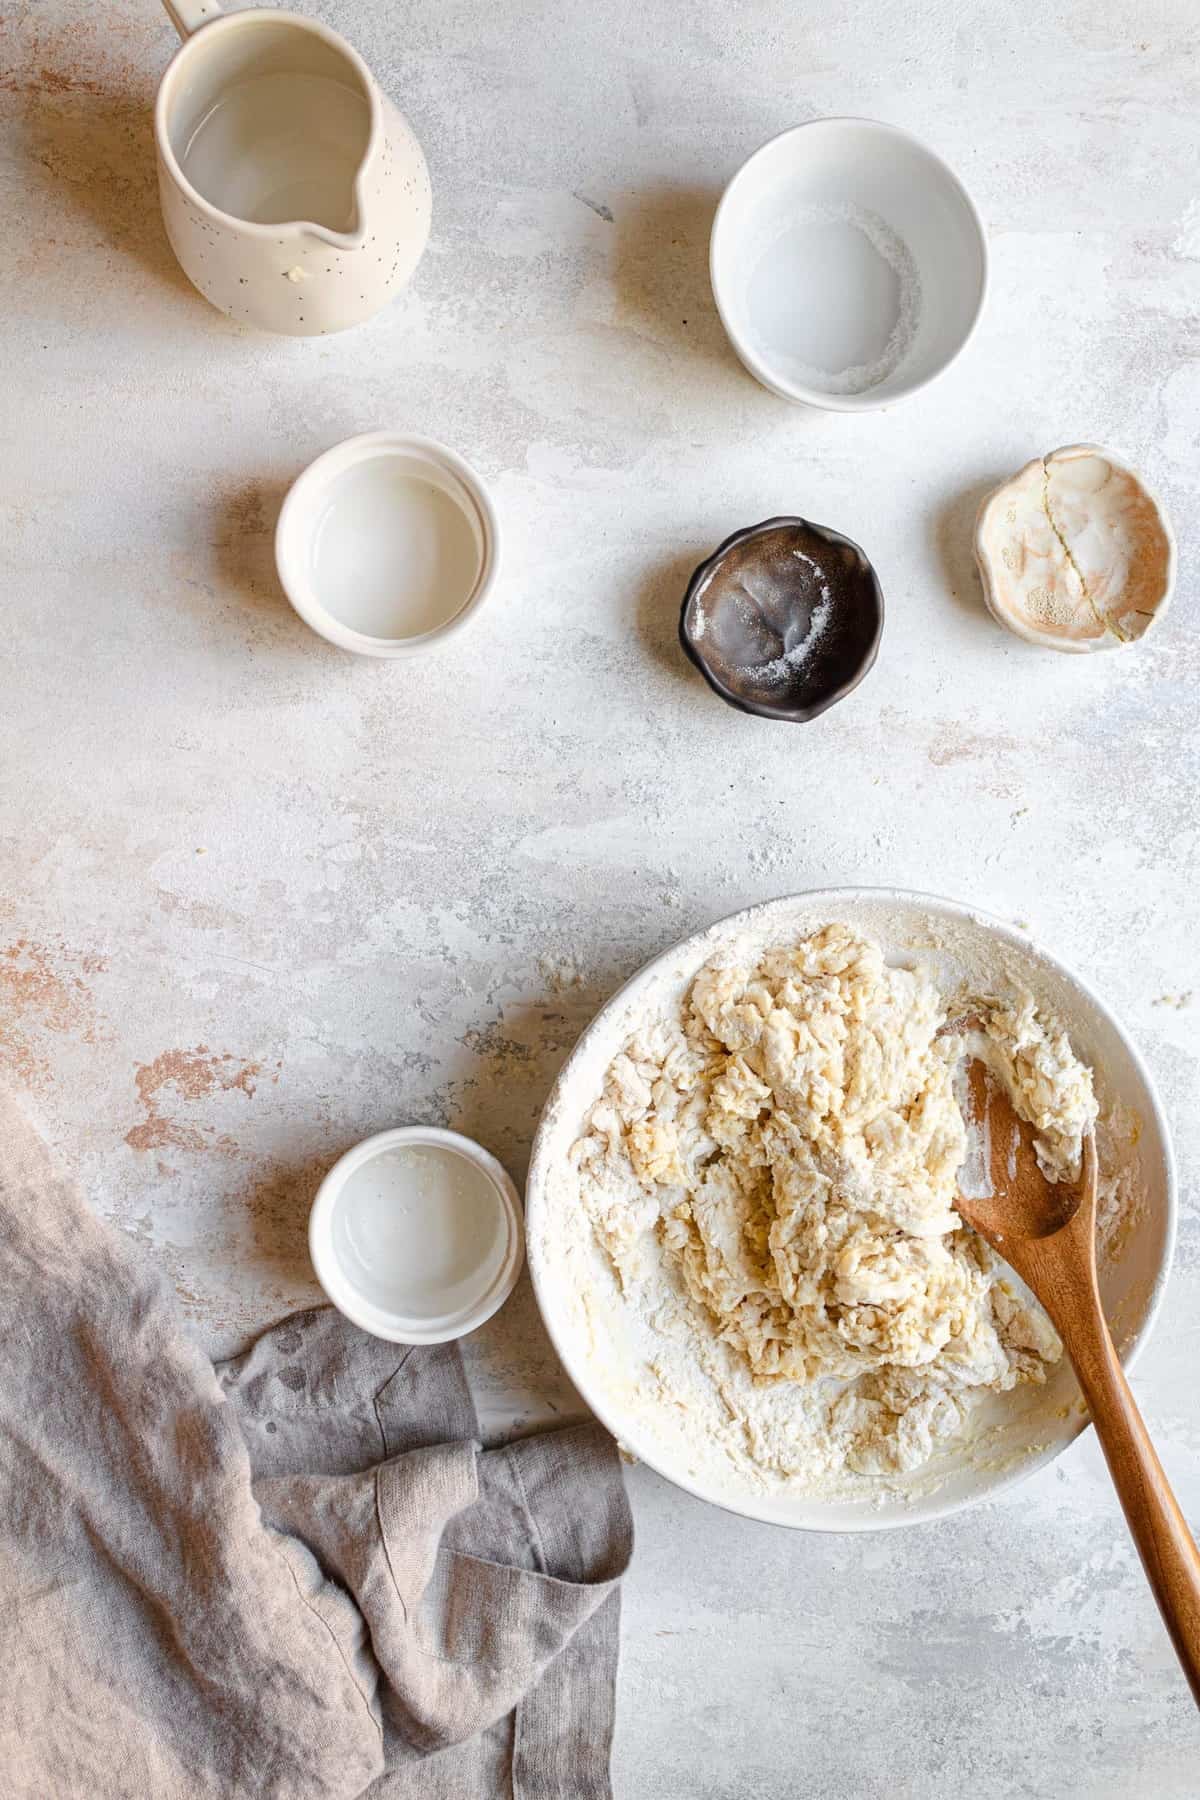
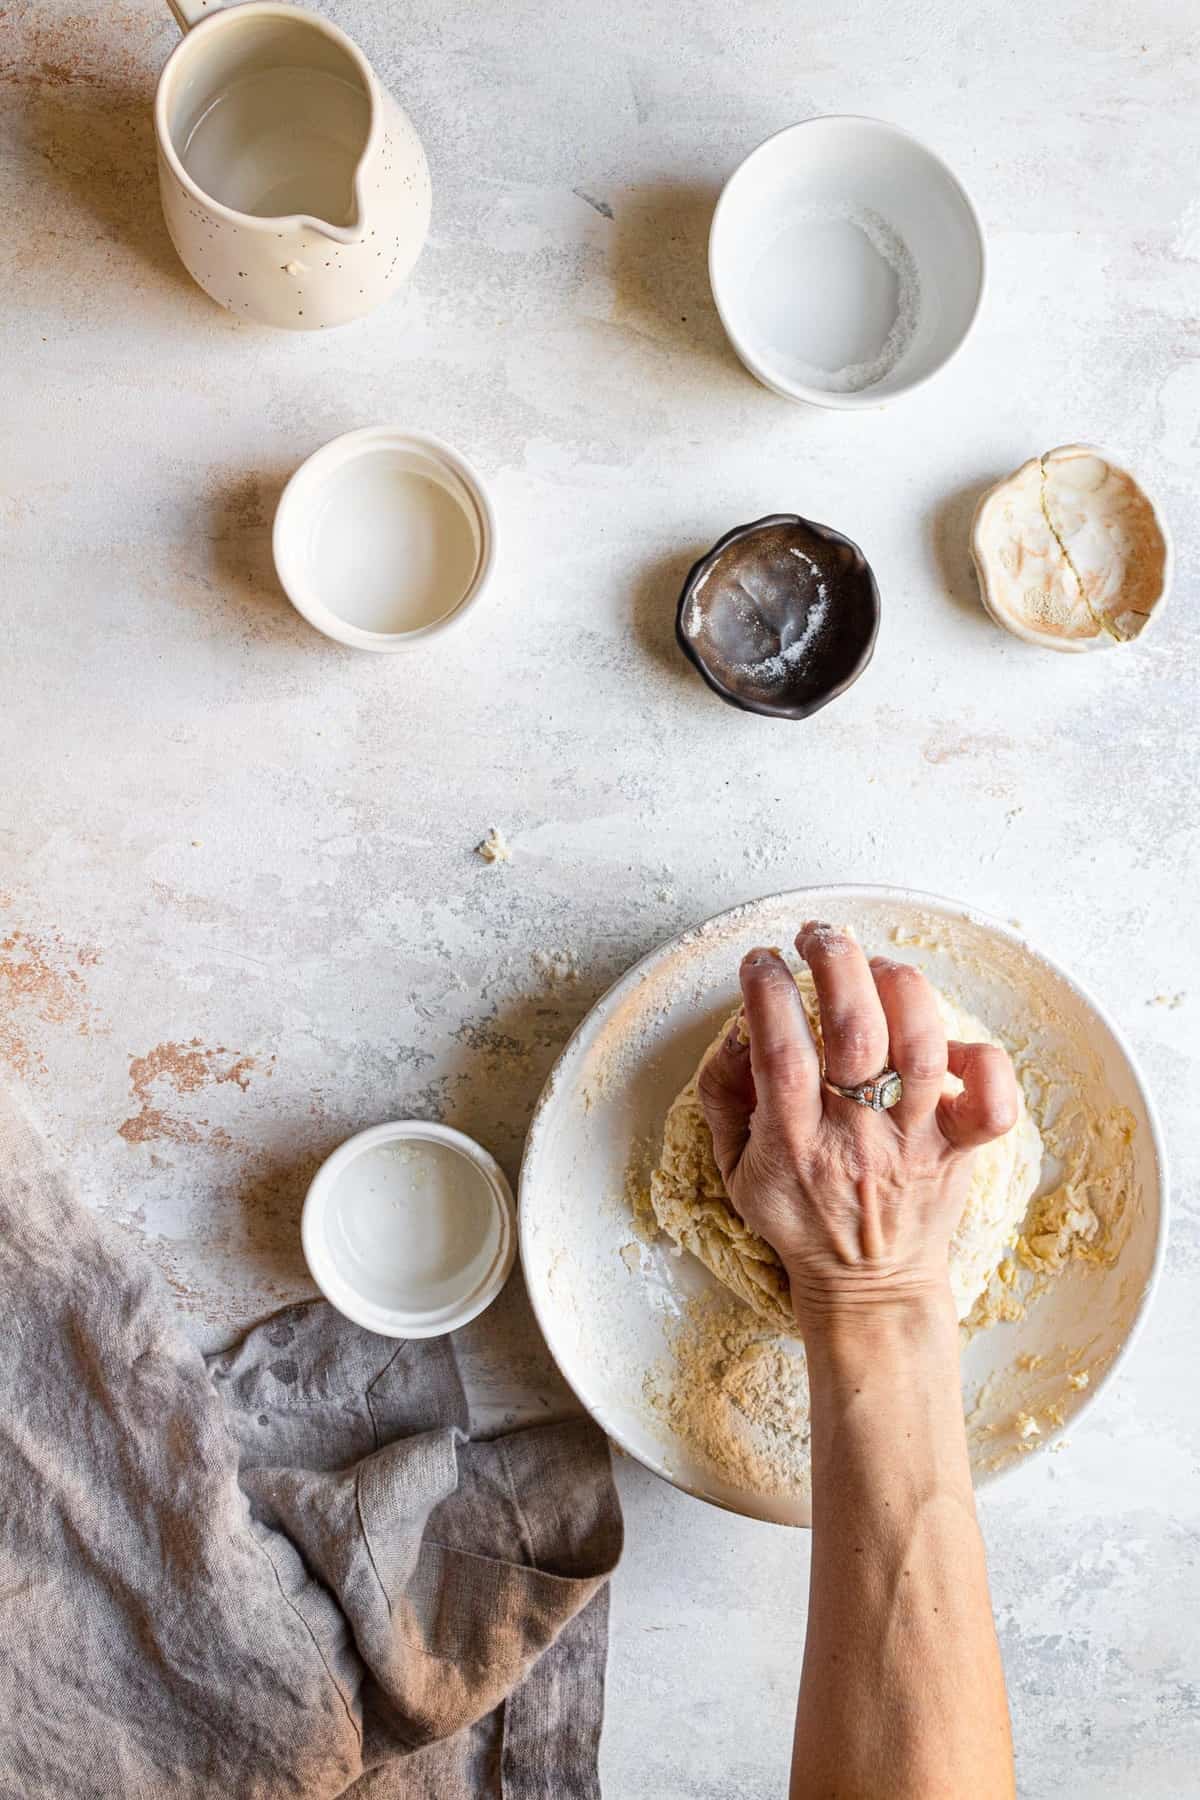
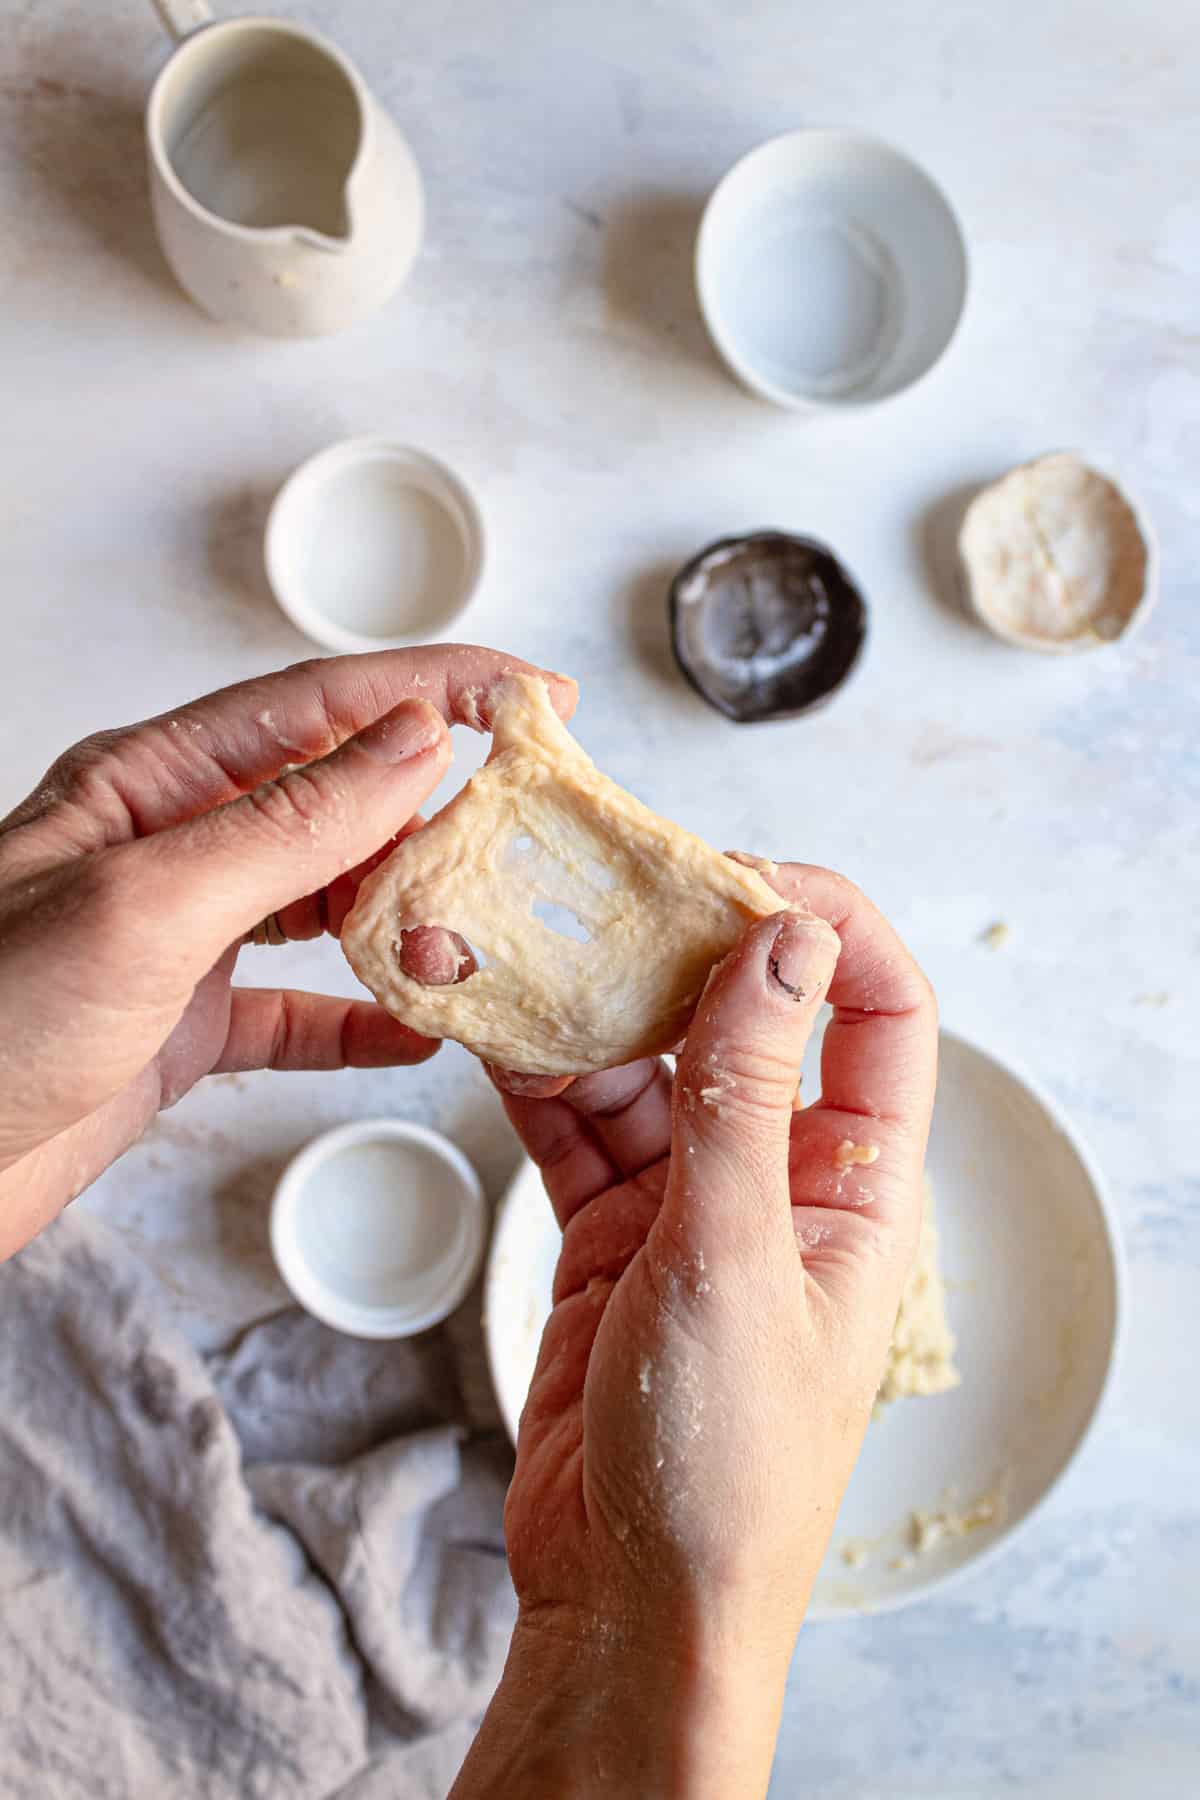
- You can make this recipe using a stand mixer, or a large bowl, a wooden spoon and you hands. The process is the same, and it is crucial not to over knead the dough.
- In addition to greasing the pans line it with parchment paper to make sure the challahs will not stick.
How to know when the dough is ready
When we knead bread dough, the idea is to create long gluten threads and timing is the most important element. When under kneading, the gluten does not develop strong enough and the bread will not rise as well and bake crumbly like a cake. If over kneading, the gluten threads are too tight and the bread will turn out tough and chewy.
How can we tell
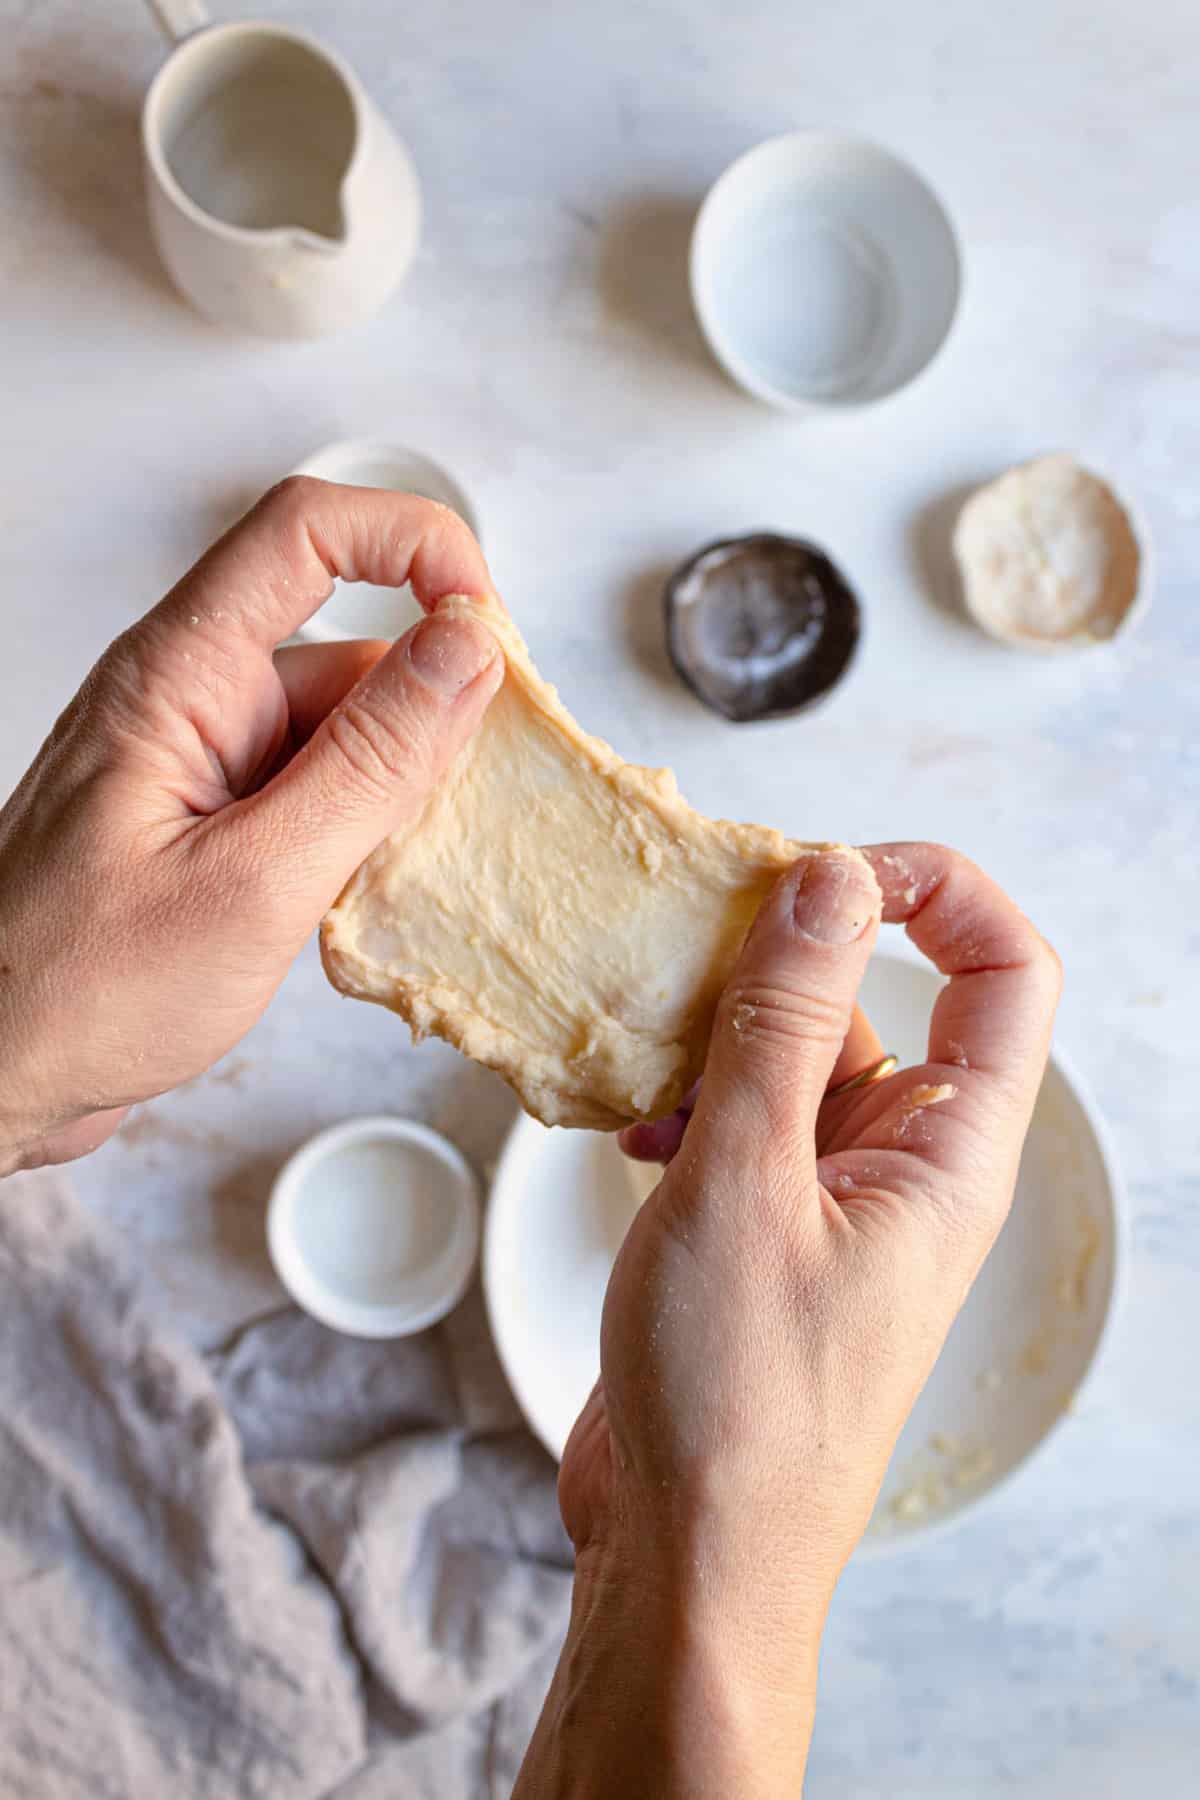
As you knead, once you notice the dough is coming together and becomes smooth and soft, pinch a small piece and gently stretch it into a square using your fingers.
If the dough tears as you stretch it, it needs some more kneading. If the dough stretches first and then tears it is ready and no more kneading is necessary. For me it takes about 2 minutes (from when it comes together to a dough), when using a stand mixer, or 5-7 minutes when using a bowl and kneading by hand.
Resting Time
Since this bread is low in fat/eggs there is no need for a long rising time, the best way to know, is when the dough is double in size. The time may vary depending on the temperature in your kitchen, season, and even the altitude you are in. I like to place the bowl in a plastic shopping bag, then in the microwave where it is warm and sealed.
Avoid over proofing the dough, and keep in mind that the yeast release gas that rise the dough, and also alcohol. So when over proofed, it may get a tangy, punchy taste.
Cooling and Storing the Bread
Once you remove the bread out of the oven, it is important to immediately place it on a cooling rack otherwise it might get soggy at the bottom. You can store the bread at room temperature in a plastic bag up to 3 days or wrap it in tin foil and freeze it in a freezable bag for up to two months.
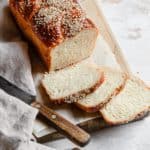
Homemade Challah Bread in a Loaf Pan
Ingredients
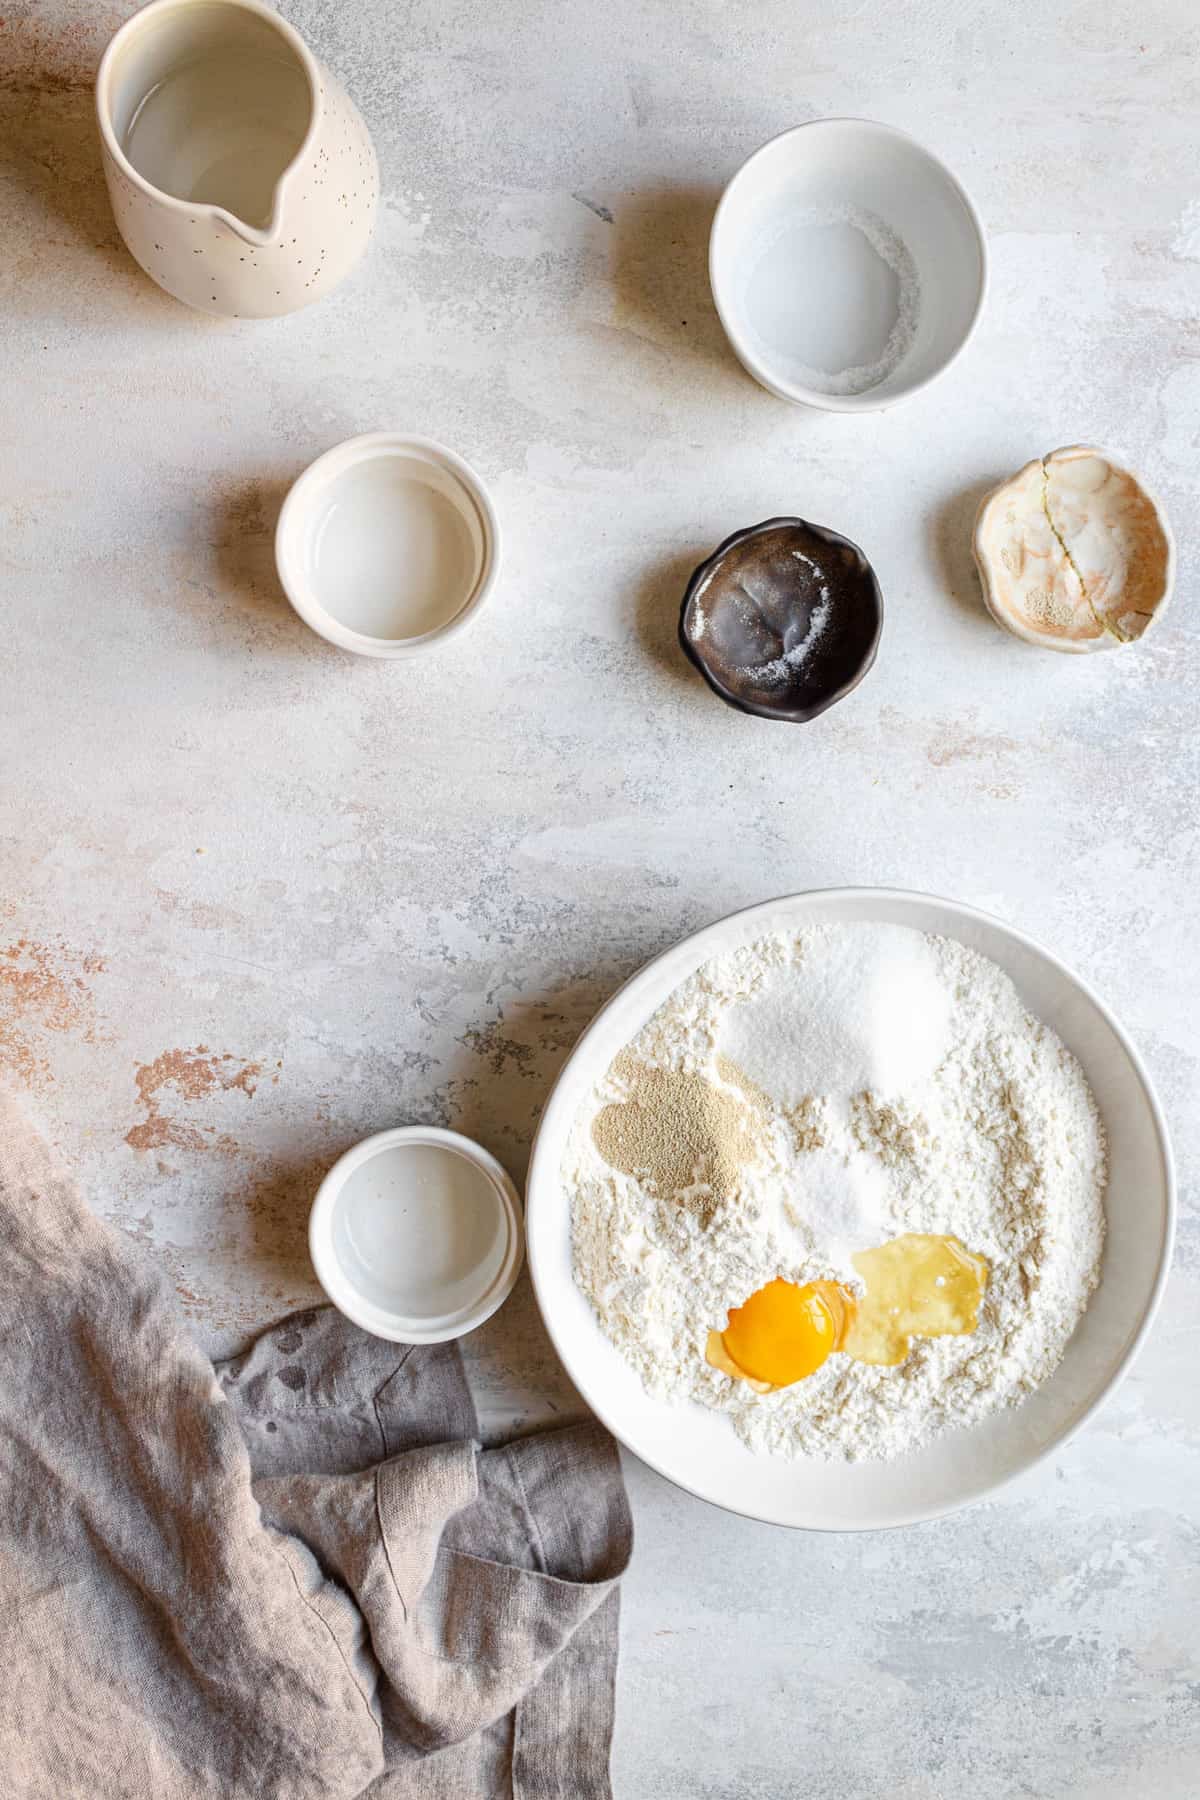
- 4 Cups (500g) AP Flour
- 1 TBS (10g) Instant yeast
- 2 TBS (25g) Sugar
- 2 TBS (30ml) Vegetable oil
- 2 teaspoons Salt
- 1 Large Egg at room temperature
- 1-1 1/4 Cup (240-360ml) Lukewarm water
- 1 large Egg, well beaten for egg wash
Instructions
- In a large bowl or a bowl of a standing mixer sift the flour (500g), yeast (10g), sugar (25g), salt (2 teaspoons), oil (30ml), and egg.
- Drizzle in 1 cup of water and using the paddle attachment, a wooding spoon (or your hands) mix the ingredients into a shaggy mass.
- Remove any access dough from the wooden spoon and keep kneading the dough with your hands until soft and smooth. About 5-7 minutes.
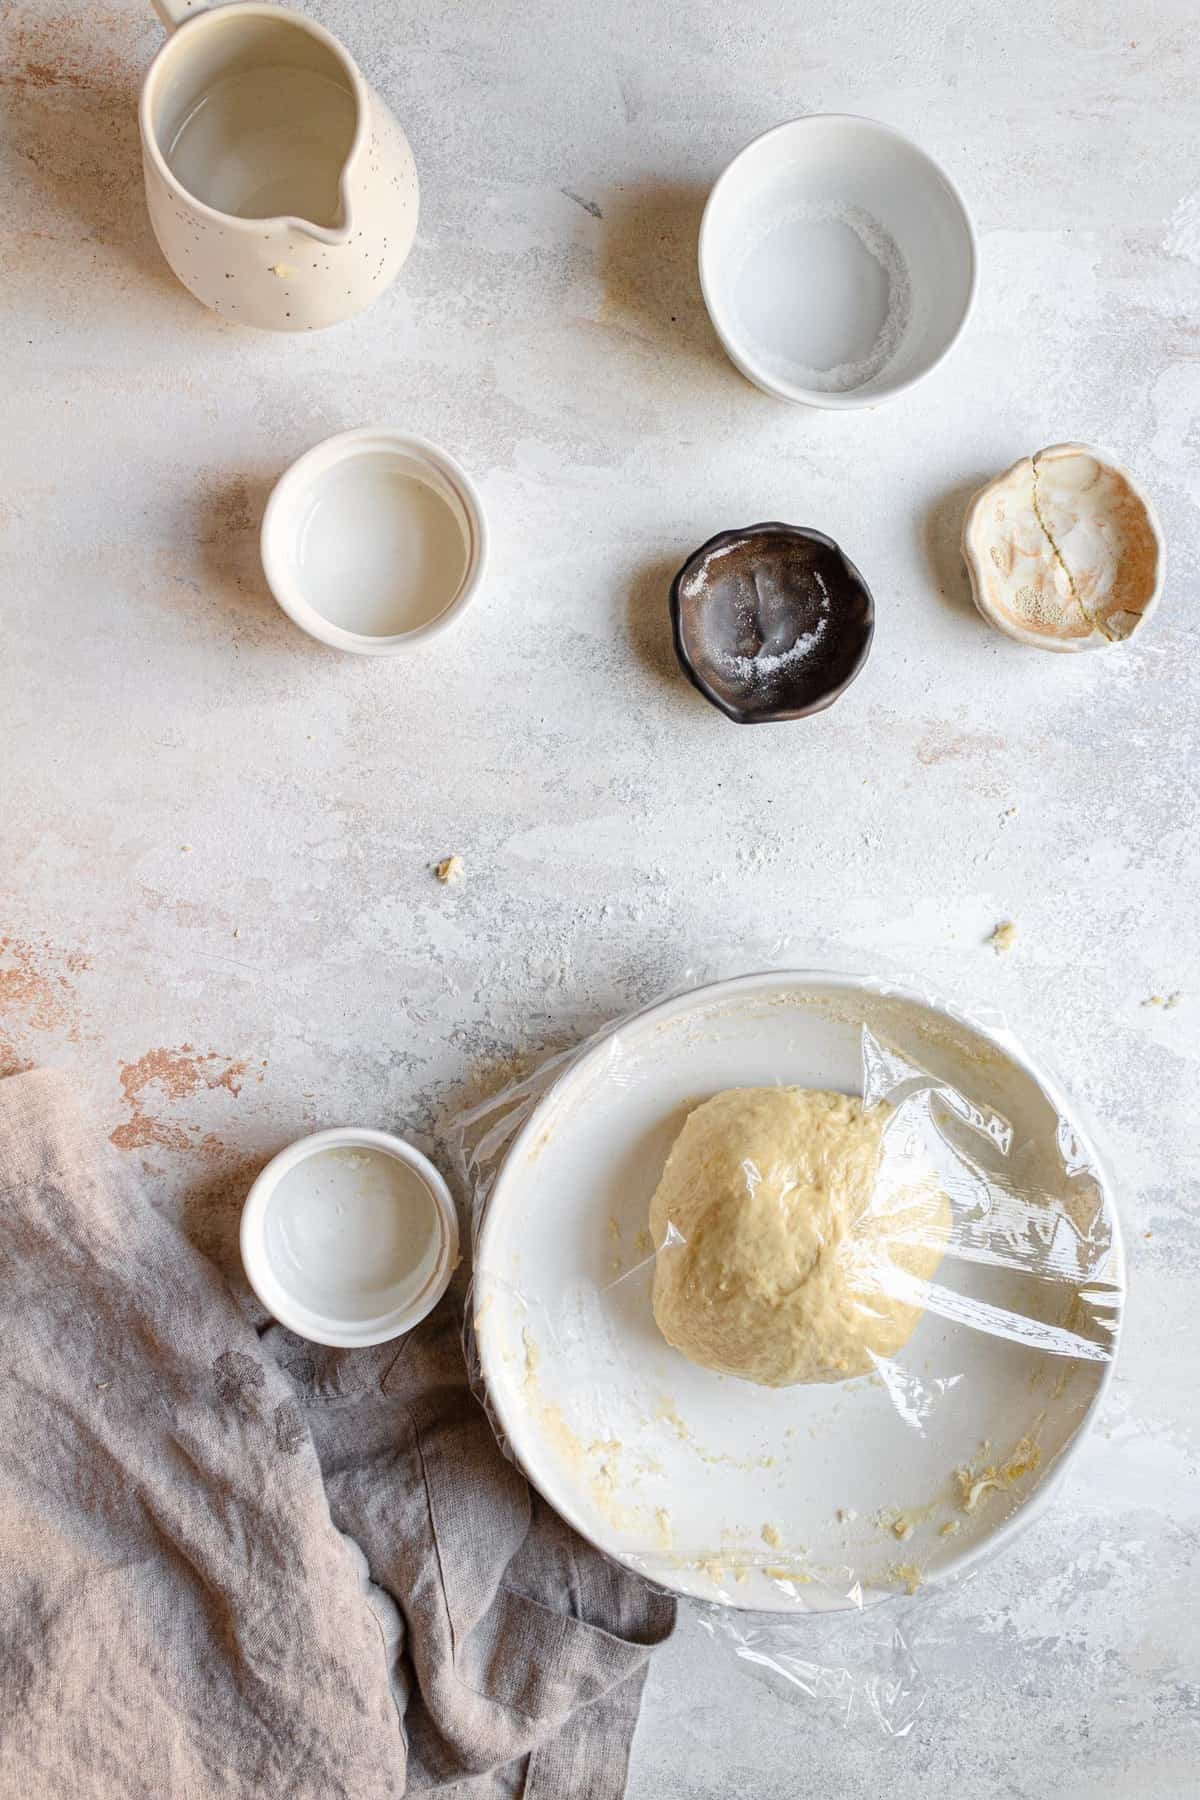
- Place the dough back in the bowl, spray with oil spray and cover the bowl with plastic wrap or a plastic bag.
- Allow the dough to rest and rise until double in size (1.5-3 hours)
- Remove dough from the bowl and release air. Divide dough into 6 or 8 equal pieces and roll each piece into a 12" log.
- Grease two 8-inch loaf pans and line with parchment paper.
- Braid 2 challahs and place each challah in a greased 8" loaf pan.
- Brush loaves with egg wash, sprinkle with sesame or poppy seeds and let rest and rise for about 3-4 hours.
- Preheat oven to 400F and bake loaves for 10 minutes. Reduce temperature to 350 and keep baking for an additional 25 minutes.
- Remove from the oven and remove loaves from the pan. Place on a cooling rack.
Hi! How can we adapt this for a gluten free bread? Would love to try this bread… it looks so good!
Hi there, I am afraid I am not familiar with yeasted gluten-free baking so I can not try if it would work
Hello, I am curious which yeast to use. You stated dry yeast which made me think the active dry, but I thought it had to be activated in warm water before adding the other ingredients. I used the instant, but it did not rise well and was very dense. I would love to try this recipe again. I love your blog and recipes by the way! Thank you.
Hi, I used instant yeast. If the challah came out dense it’s either because of too much water or not enough resting time.
This is THE BEST challah recipe I have found so far. Finally a keeper! Very impressed.
The only thing different I did is
– I used 150g of whole grain bread flour and the rest all purpose to add some nutrition and protein.
– I let the dough rest 10-15min before kneading by hand for a few minutes to ensure stretchiness and
– I made two four strand round loaves instead of the pan load or three strand.
– I used coconut oil at the end for the egg wash.
Aaamaaazing!
I will try to substitute the egg with a flax egg to make it vegan and will share how it came out!
I accidentally put a teaspoon more of salt and it came out a little too salty for my taste instead of with a hint of sweetness.
Next Shabbat I will be more careful.
Thank you so much Elora!!! I am so happy you love this challah as much as I do and I love how creative you are. let me know how the flax egg turns out.
Please advise what the recipe is to make a Challah Bread using a medium size Mold.
Thank you!
Rosalyn
Hi Rosalyn,
You can bake this Basic challah recipes in any mold, the important thing to keep in mind is that the bread needs to proof in the mold, meaning it will puff and so you need to make sure there is enough space for it to grow. Let me know if you have any more questions. I use this recipe to make two 8″x2″ loaf pans which are medium.
Very excited to find this recipe and looking forward to make this but I am wondering why it is necessary for the braided dough rest an additional 3 to 4 hours in the loaf pan before baking. Wouldn’t a couple of hours be enough.
Hi there,
well, two hours just might be enough depending on how warm your kitchen is. I like to give it 3-4 hours for two reasons, one the challahs really puff up nicely, and second the longer the rise the more flavors develop.
How could I make this challah in a loaf pan without braiding it as I think doing that is too complicated, and too much work.
You can simply, roll the dough into a rectangle, roll it, and place it in the pan. Or you can roll it into one strand and twist it.
is braiding necessary?
hii i would like to know is it possible to do an overnight proof for this bread recipe?? & assemble it the next day?? thank you!! lots of love from singapore!!
it should be fine, leave it at room temperature rather than a warm spot. My bakery-style challah has an overnight challah
I love your recipes! Thank you! Is it possible to make challah buns for hamburgers out of this recipe?
Yes!! I do that all the time!
Thanks so much! You have taught me more about baking in two months than I have learned in my entire 67 years. I appreciate you taking the time to share your talents.
Your kind words and support make it all worth the hard work!!! thank you so much!
My second ever bread I have made and the Challah was awesome . I only had the 9 “ loaf pan so it did not rise as high .I’m hooked on bread so I will get the 8 inch pan .
Thanks for making this so easy
Everyone loves it !!!!
That’s wonderful Deb, so glad you enjoyed it.
One question before I try the recipe. Can I just split the dough in half and simply put it in the pan as is when it is ready to bake?
I never baked this recipe after one rise, it should be ok, as long as you give it enough time.
This is the 2nd time I’ve made this recipe and both times the dough rose beautifully in the bowl for the first rise but didn’t rise much in the pans. The flavor is nice but the finished breads are only about 3 inches high. Not sure why this keeps happening.
Hi Lawrance, nothing is wrong, my guess is that the pans you are using are wide. You can either use smaller pans, make one loaf or double the recipe.