Last updated on February 13th, 2026.
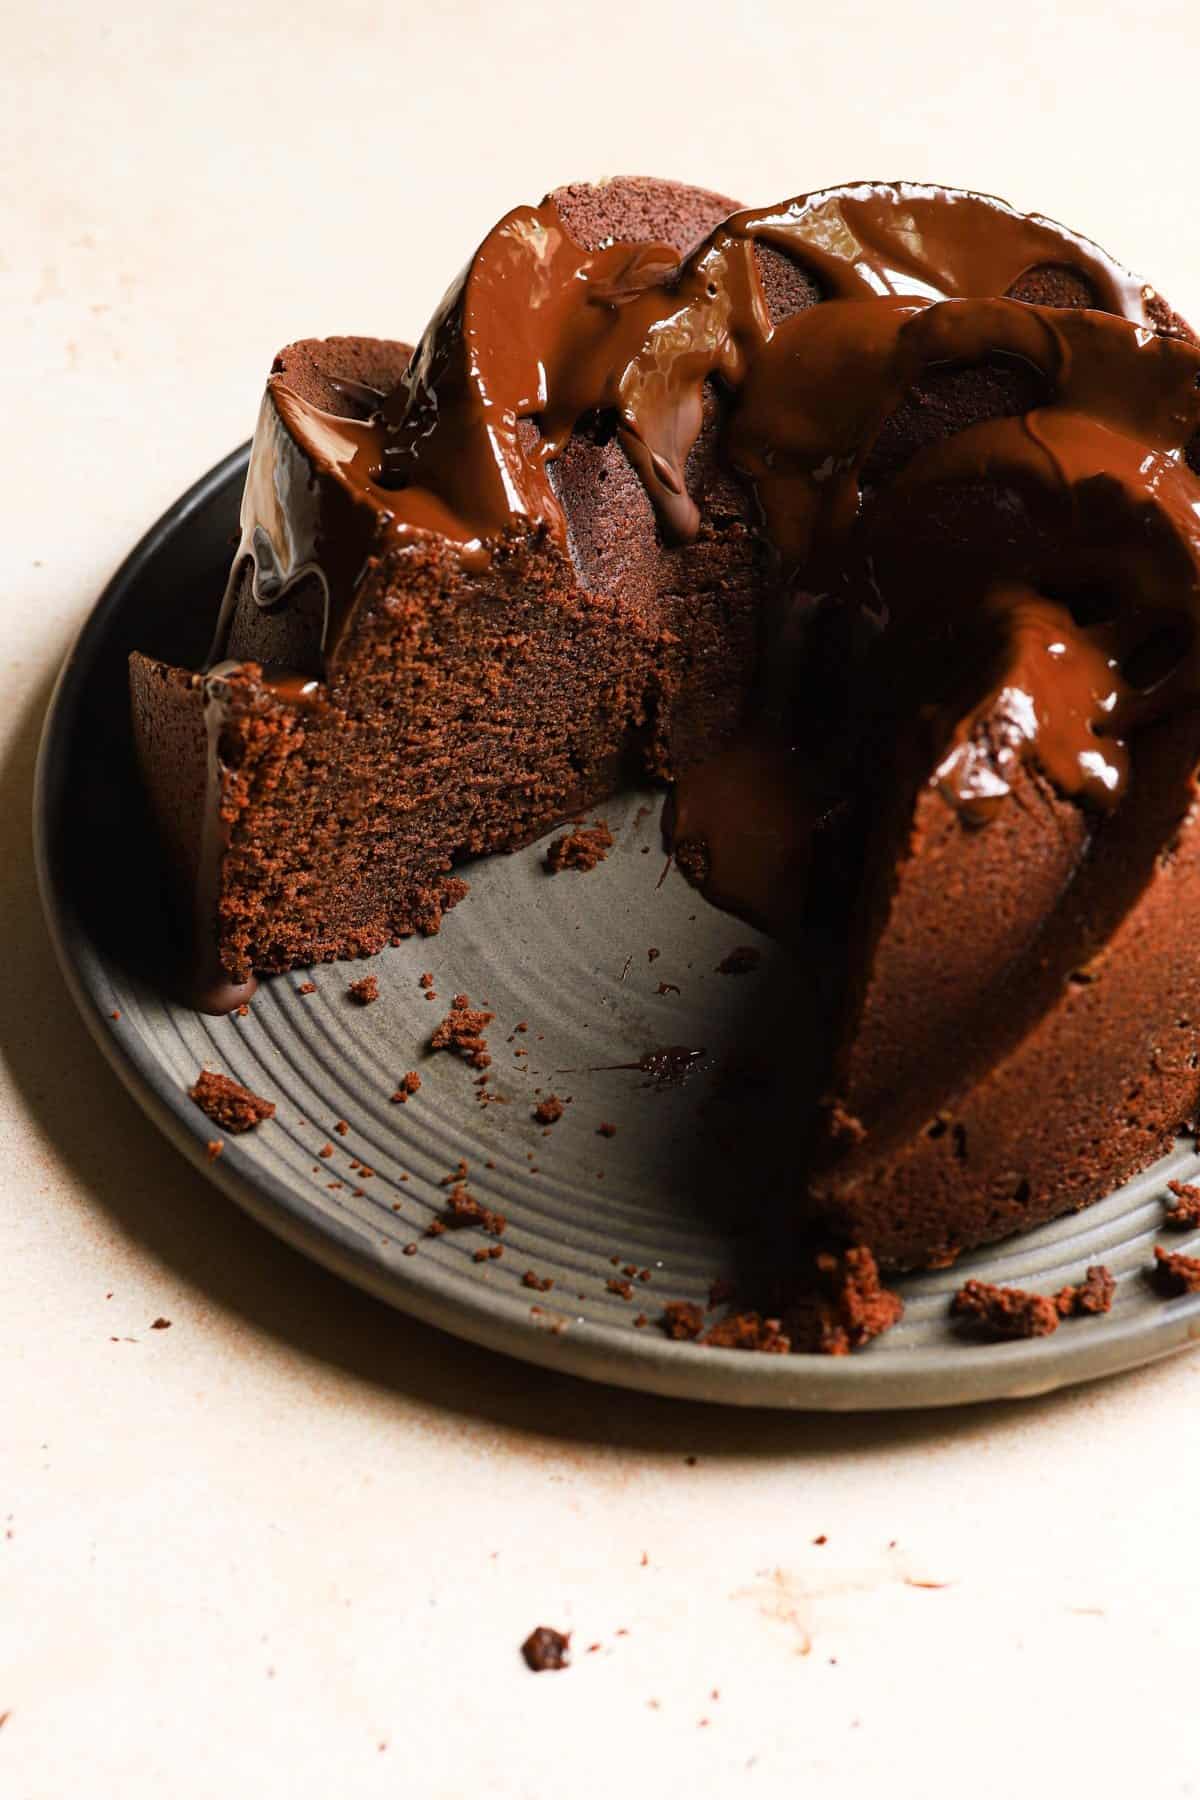
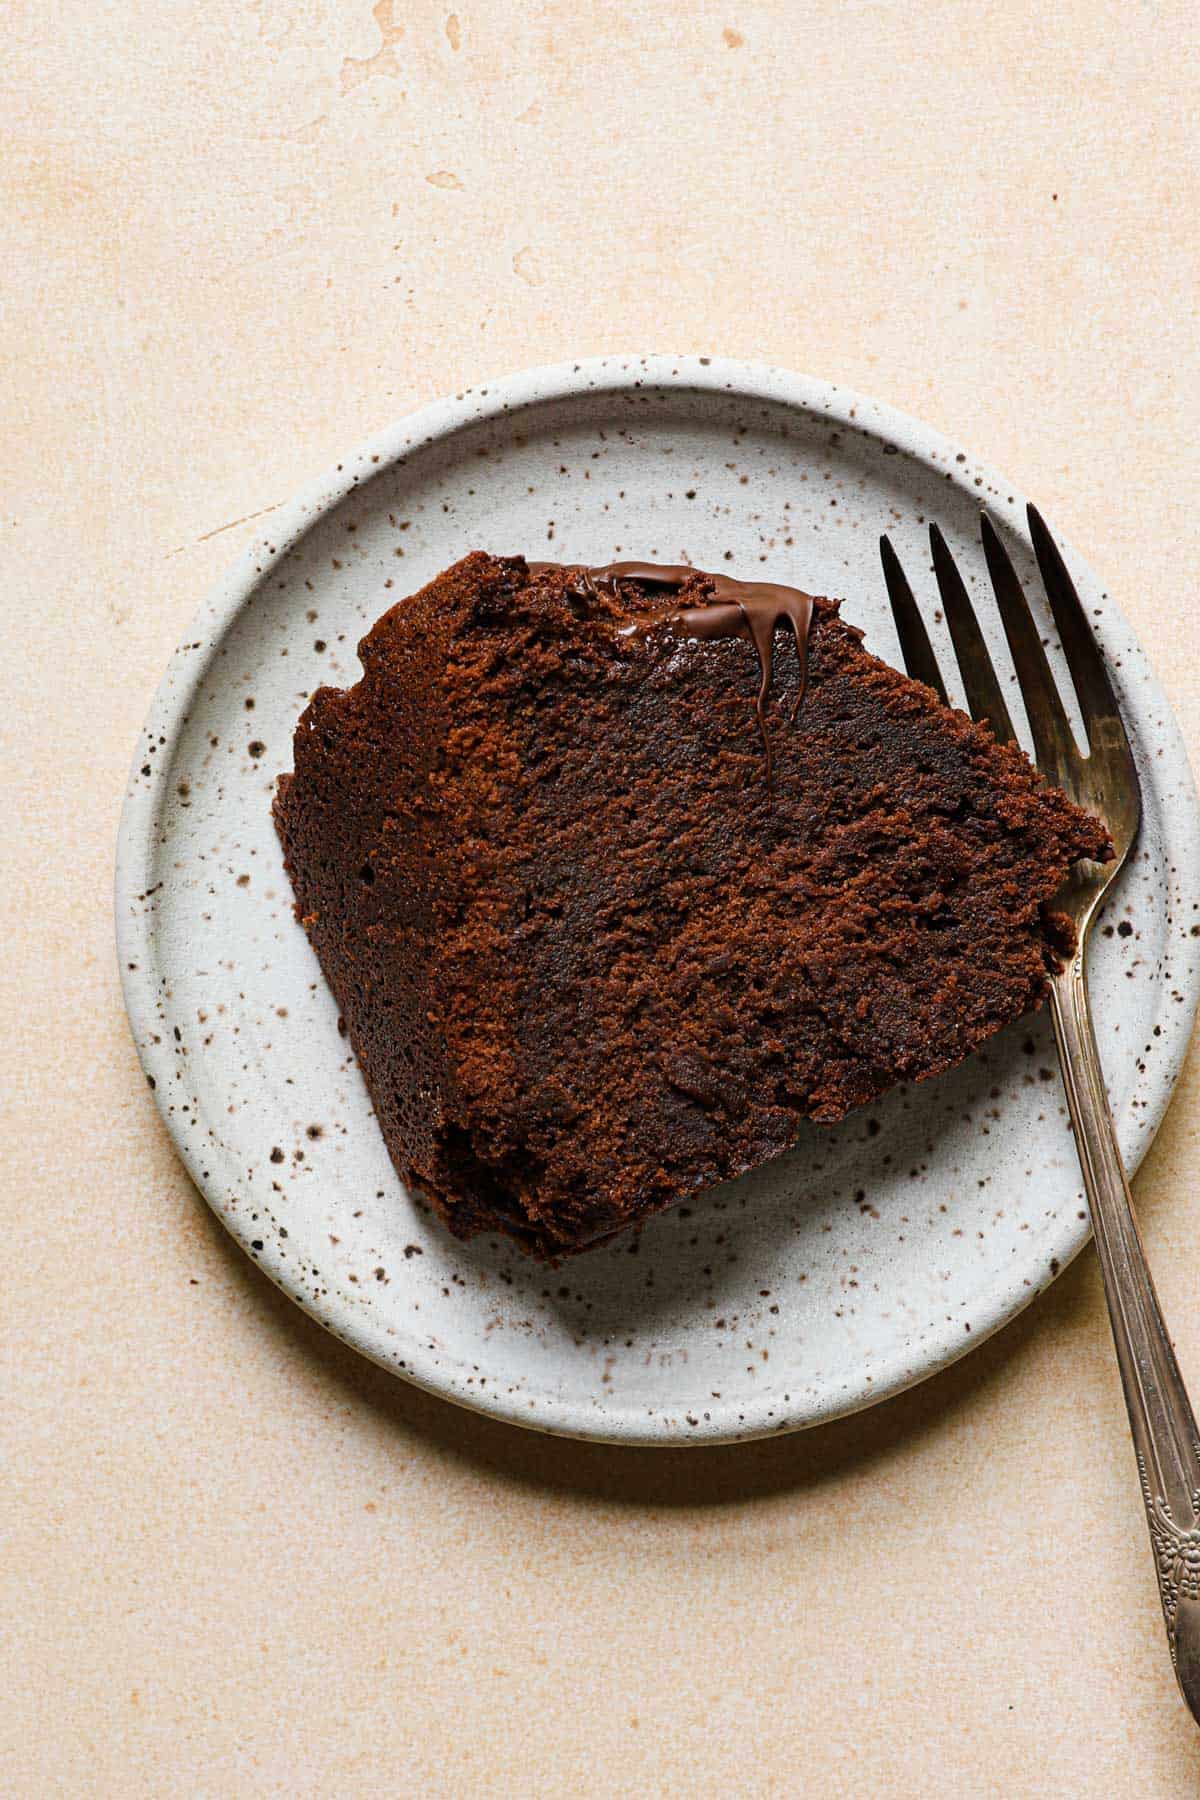
This Brownie Cake is kind of a magic cake. It is fudgy, and rich, and at the same time light, and fluffy, giving it a unique texture like no other cake. All made from scratch, no need for brownie or cake mix, all we need are everyday ingredients, two bowls, and a simple baking trick.
When I tested this recipe, I was determine to create a rich, fudgy and moist chocolate cake with an intense chocolate flavor, but it also had to be light, tender and and melt in the mouth texture. I also wanted the cake be baked from scratch, something different than a brownie mix baked in a cake pan. The vision was so vivid in my head I knew that compromising was not an option.
It took me a few tries, but as you know I am all about the science (even wrote a cookbook about it called Baking Science) and I figured it out. Of course I am sharing not only the recipe but the simple tricks, technique and all the tips so you can bake the perfect bake.
BTW, the cake is great when served with a chocolate ganache glaze, or chocolate whipped cream.
The Secret
By “secret,” I mean the key ideas I used when creating this recipe:
- For the brownie’s texture: it has more fat and sugar than flour, giving it a moist, tender, and fudgy crumb.
- For a light cake texture: air is added by whipping the cream and gently folding it into the batter.
Key Ingredients
The complete recipe including ingredients and measurements can be found at the bottom of this post in the recipe card.
- Natural cocoa powder. It is the one ingredient that provides the most chocolate flavor. It is also an acidic powder, it will set the cake faster, which means less time in the oven and less lose of moisture. Avoid using dutch processed, or black cocoa powder, it is much milder in flavor.
- Heavy whipping cream. Any brand is fine, just make sure it is heavy whipping cream and not light cream.
- Unsweetened chocolate. The high fat content in the chocolate will continue the rich texture of the cake. In addition, the cocoa butter melts at body temperature, which means the cake will literally melt in the mouth. Just like when we bite into a piece of chocolate.
- Light brown sugar and Granulated sugar. The combination of the two will contribute to the flavor and texture of the cake.
- Unsalted butter. You can also use salted butter, make sure not to add the salt.
How to make brownie cake
Below are step by step images for a visual reference. Please take the time to read my notes about the steps. They include tips and valuable information to guide you through the recipe.
- Bloom the cocoa. Pouring boiled cream over the cocoa powder intensifies its flavor by drawing out the fat, where most of the cocoa’s flavor compounds are concentrated, and bringing it to the surface.
- Start with 1/4 cup and mix to a paste then gradually add more cream, to prevent clumping.
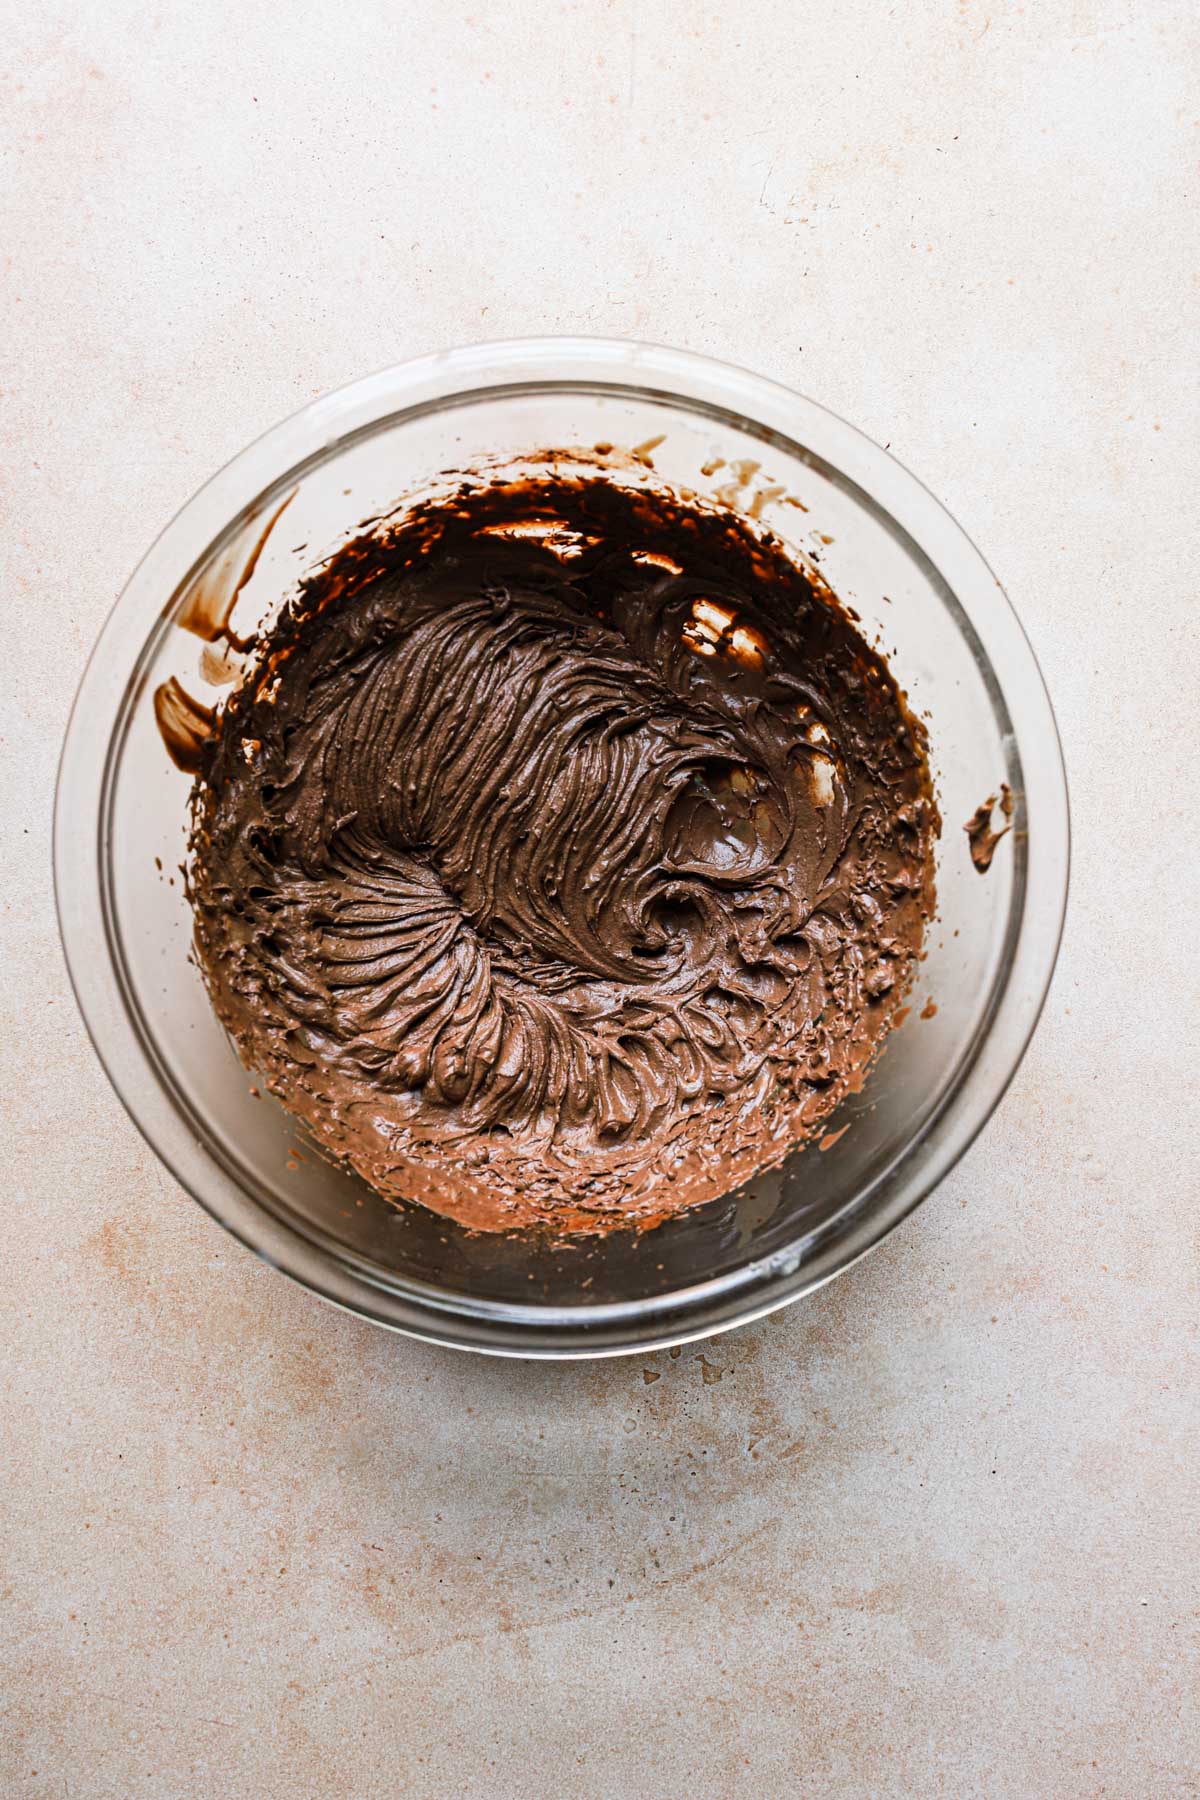
- Whip the cream. Until it is thick and stable. The cream will only whip when it is completely cold, and refrigerating it for 1-2 hours is crucial.
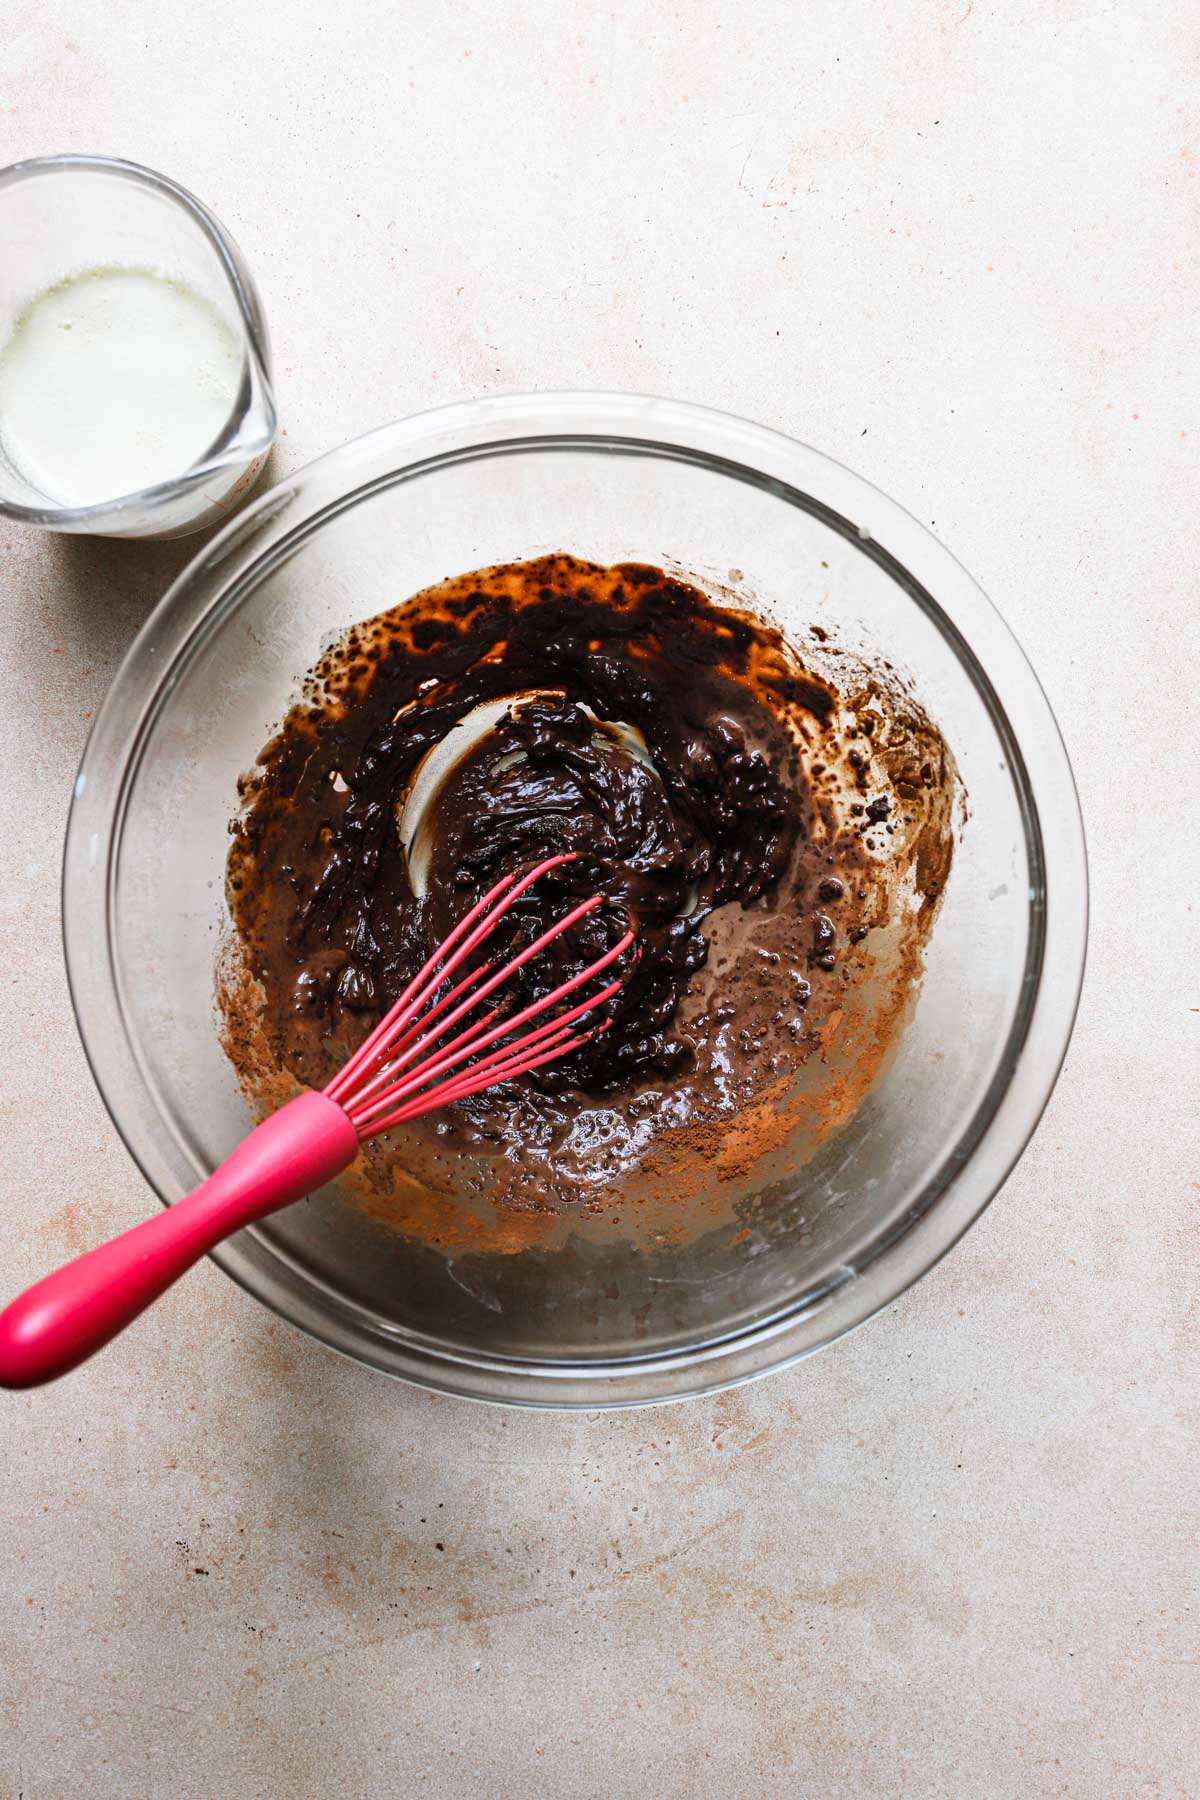
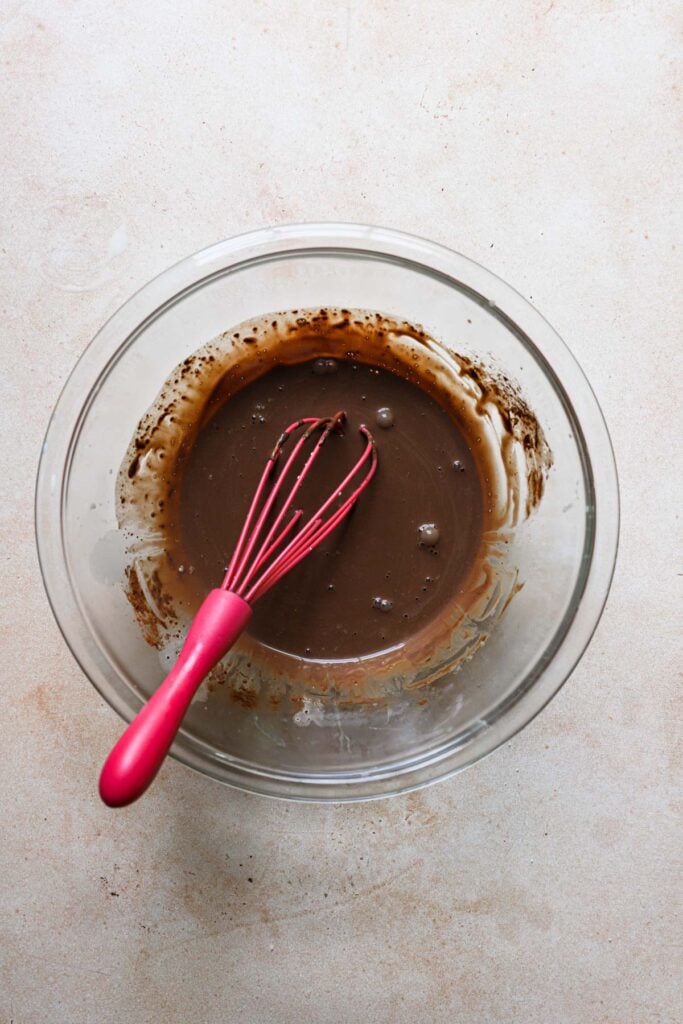
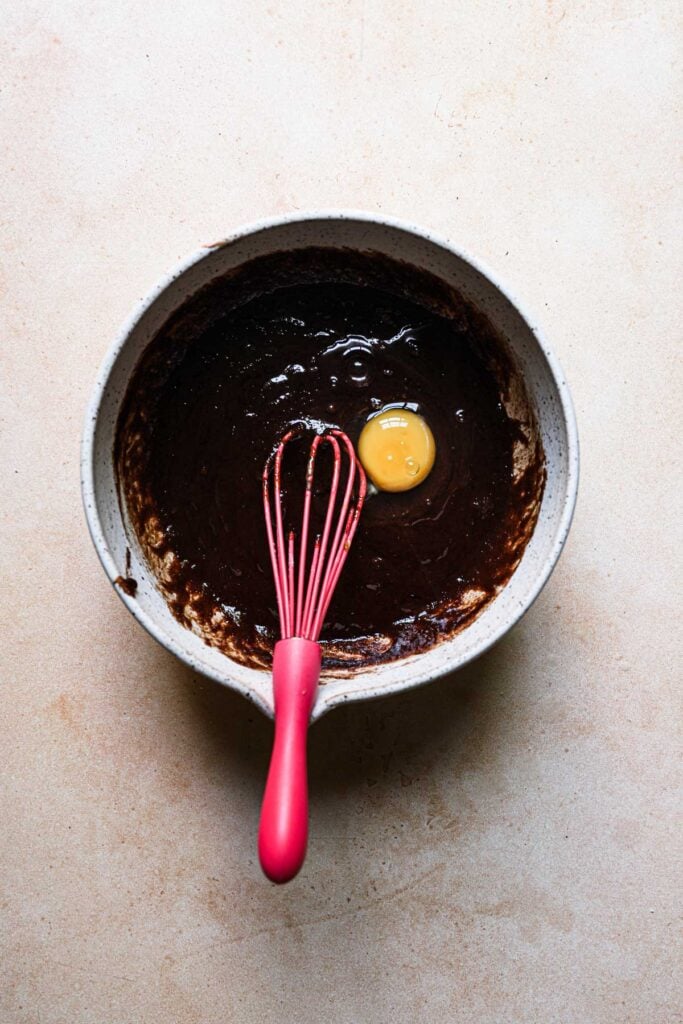
- Make the batter: melt the chopped chocolate, brown sugar, and butter over a double boiler, (or in the microwave, using 30 seconds increments). Mix in the granulate sugar (to cool the mixture), then the eggs. If the mixture is too hot, give it a few minutes to cool of, so it won’t cook the eggs.
- Optional: allow the mixture to rest for 10 minutes. This is so the sugar will bond with the liquid in the mixture and give us another layer of moisture.
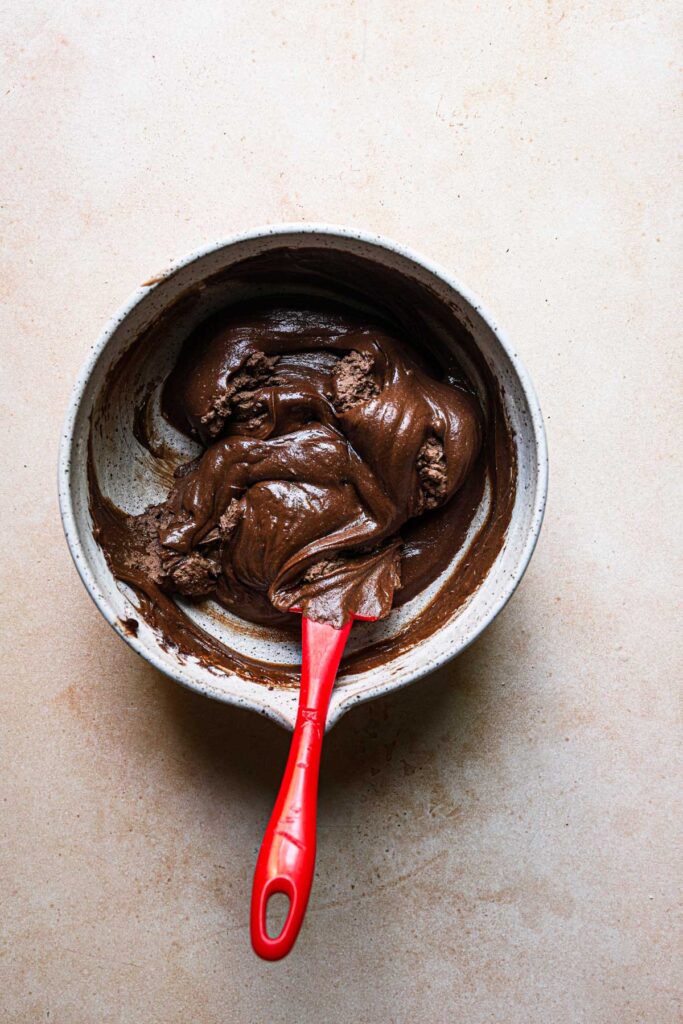
- Mix in the flour, and avoid over mixing. Only mix until you no longer notice any dry flour.
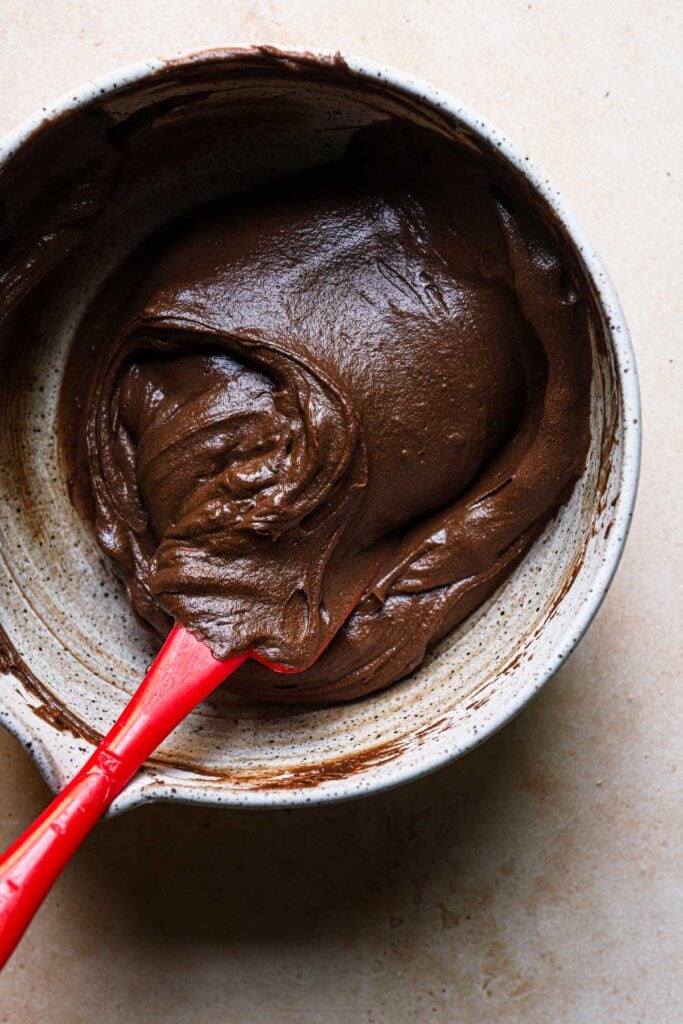
- Fold in the whipped chocolate cream. Fold in the cream in thirds. Add 1/3 at a time, cutting through the center from top to bottom, then sweeping around the bowl’s edges. Repeat until fully incorporated.
- Pour the batter into a greased 8-cups bundt pan, and bake.

Baking And Cooling The Cake
Baking: I always say that we should pay attention to the cake and not the timer. You oven and kitchen are different than mine, and it may need less or more time in the oven. The cake is ready when the top looks crusty, and a toothpick comes out of the center of the cake with a few moist crumbs.
Cooling: place the cake on your kitchen counter and let it cook for about 30 minutes. It will deflate a bit, that’s ok. Turn it over when the pan is warm, but safe to handle without a kitchen towel.
Storing and making ahead
The cake is best stored at room temperature and covered for up to 4 days. You can make the cake/cakes/cupcakes up to 10 days in advance, cover them with plastic wrap, or place them in an airtight container and freeze.
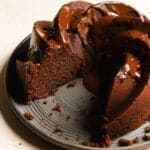
Rich and Tender Brownie Cake | No Mix
Equipment
- 1 Bundt pan 8 cups
- 3 medium bowls
- 1 large bowl
- 2 Rubber spatulas
- 1 hand whisk
- 1 hand mixer
Ingredients
- 1/2 Cup Unsweetened natural cocoa powder (45 g / 1.5 oz)
- 1 1/2 Cups Heavy whipping cream (360 ml / 12 floz)
- 11 TBSP Unsalted butter, cut into 1" pieces (160 g / 5.5 oz)
- 3/4 Cup Unsweetned chocolate, chopped (120 g / 4 oz)
- 1/2 Cup Light brown sugar (100 g / 3.5 oz)
- 1 Cup Granulated sugar (200 g / 7 oz)
- 4 Large Eggs, at room temperature
- 1 Cup All-purpose flour (120 g / 4 oz)
- 1 teaspoon Baking powder
- 1/2 teaspoon Salt
Chocolate Drip
- 1 Cup Semi-sweet chopped chocolate (170 g / 6 oz)
- 2 Tablespoon Vegetable oil (30 ml)
Instructions
Cake
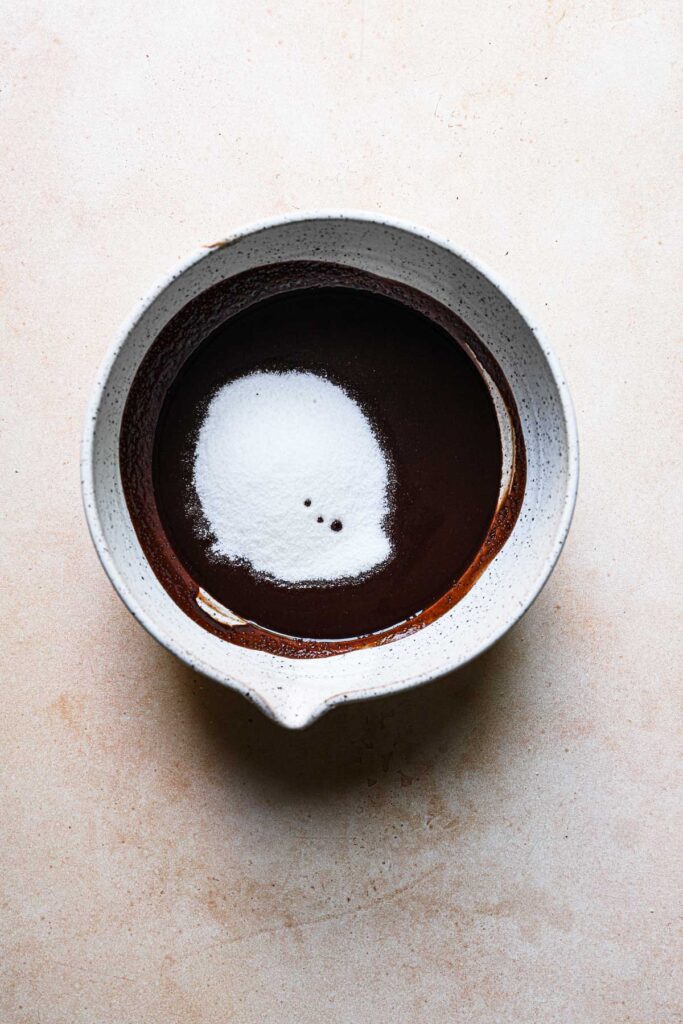
- Make ahead: Place the cocoa powder in a medium bowl (preferably a stainless steel bowl). Bring the heavy cream to a soft boil, then gradually pour the cream over the cocoa powder while stirring to prevent clumps. Let sit for 10 minutes then place in the refrigerator to completely cool, about 2 hours.
- Preheat the oven to 350F (180C), and grease 8 cups bundt pan with butter or a baking oil spray.
- Over a double boiler, or in the microwave, melt the butter, chopped chocolate, and light brown sugar.
- Transfer the melted mixture to a large bowl then mix in the granulated sugar. Mix in the eggs one at a time. Set aside to allow the mixture to dissolve the sugar for about 10 minutes stirring 2-3 times. Meanwhile, prepare the rest of the ingredients.
- Whisk together the flour, baking powder, and salt.
- Use a hand mixer to whip the cool heavy cream until a stiff peak is formed.
- Mix the dry ingredients into the chocolate mixture then fold in the whipped cream. (start by mixing in 1/4 of the cream then fold in the rest)
- Pour the batter into your prepared pan and bake for 35-38 minutes or until a toothpick comes out with moist crumbs from the center of the cake.
- Remove from the oven, let cool for 15 minutes then invert the cake onto your serving plate.
- Serve with melted chocolate, whipped cream, or ice cream.
Chocolate Drip
- Melt the chocolate, and mix in the vegetable oil until smooth, drizzle over the cake.
Notes
- Be sure to pour the boiled cream over the cocoa powder about 2 hours ahead of time and allow it to cool in the refrigerator. If it does not cool completely, the cream will not whip.
- Ensure all ingredients are at room temperature, excluding the cocoa whipped cream.
- To make cupcakes: divide the batter between 18 cupcake liners and fill each up to 3/4 full. Bake for 18 minutes or until a toothpick comes out with a few moist crumbs from the center of the cupcakes.
- To make layer cake: divide the batter between 3 6-inch baking pans and bake for 22-25 minutes or until a toothpick comes out with a few moist crumbs from the center of the cakes. For an 8-inch layer cake, double the recipe of 1.5 (instead of 4 eggs, use six eggs as an example) and divide the cake between 3 8-inch cake pans. Bake for 25-28 minutes.
- The cake is best stored at room temperature for up to 4 days.

This cake is DELICIOUS, and it’s so easy to make!!
thank you so much, Mary, so glad you enjoyed them.
Delicious and easy recipe! Definitely recommend it!
Thank you, Erin, glad you like the recipe.
Great recipe. Made it for Father’s Day and it was a huge hit. Definitely will make it again soon, thank you for the recipe.
I had fun baking this cake, it seemed like it was going to be a pretty good recipe. It doesn’t account for high altitude baking though, I had to leave mine in the oven for about 45-50 minutes.
It’s really chocolatey! I’m a chocolate fiend, so I love that about it. However, the texture wasn’t great. It’s very airy, due to the whipped cream folded in, yet it was dry, so it made for an odd, almost grainy texture. The texture could maybe be chalked up to the fact that I had to bake it a bit longer, but I had my suspicions when I was mixing the batter, as it was pretty thick.
The ganache was pretty good and set up well. Overall, I had fun making it, I love trying new recipes, but this one was not for me. I can’t wait to see next month’s challenge!
Hi Ash,
Sorry, the cake did not turn out as you hoped. From your description my guess is that you live at about 3500-4500ft altitude. The thin air allows the air bubbles to grow more than they usually would, which is why the cake turned out so airy and chalky and took so long to bake. Next time try to increase the temperature by 15 degrees and bake it less. The cake is ready when a toothpick comes out with a few moist crumbs. Depending on how high you live there are some changes in the ingredients that need to be made. I used to live in Utah so I am familiar with this issue so I will create a post all about high-altitude baking and the conversions.
Thank you for your helpful reply, I’d love to try again with these tips!
I live at 5000ft, and after reading Ash’s comments and Dinka’s response I followed some high altitude tips, and felt like I had been more successful.
I like the recipe! It didn’t feel too challenging and I either had the ingredients or they were simple to find at the store.
I think brownie cake is a perfect description, it tastes like a brownie but has a cake-like texture.
My only critique is that I wish it was sweeter.
But I bet it’s perfect with ice cream!
Thank you, Audrey, glad you enjoyed the cake. It’s not supposed to be as sweet as cake more like a brownie, but next time you can mix in 1-2 tablespoons of powdered sugar with the cocoa powder. Also, since you are at 5,000ft next time adjust the following ingredients: increase the flour by 1 tsp, decrease the baking powder by 1/4 tsp and increase the heavy cream by 1 tablespoon. hope this helps.
This cake is amazing! I’ve already made it twice! It was a big hit in my family
Great recipe, I never had much luck with brownies so I was a bit nervous but it turned out to be really easy to make and very delicious. Planning to bake the cookie butter brownies next.
that’s great Leah, so glad you enjoyed the cake.
Ooops I just found the directions for bunt cake cook time. Thank you, Jean
Wonderful!!! The most important thing is to not fill the cake over 3/4 full and the pay attention to the cake and not the timer. The cake is ready when the toothpick or a cake tester comes out with a few moist crumbs.
Well… absolutely amazing recipe. Very taste and rich chocolate flavour cake.
Thank you so much, Barbara; so glad you’ve enjoyed it!
Can you use gluten free flour in the Brownie Cake recipe?
Have yet to try but Gluten free flour 1:1 should work just fine.
Lovely cake. It tasted awesome but the cake left the sides of the pan and shrank to nearly half it’s size as soon as it was out of the oven.( Toothpick test had a very few crumbs)
Had Followed the recipe and instructions ( cake was baked in 6″ *3 cake tins)
Hi Lorna,
The cake does shrinks, but that’s ok and that’s what gives it the rich texture that reminds us of a brownie.
This cake surely lives up to its name! It looks like a cake, but tastes like an incredible brownie. I’ve been baking chocolate cakes for many years since it’s the flavor of choice in my family. So I love when I get to try some new techniques. Chilling, then whipping the cocoa-cream was easy (just have to plan ahead) and necessary for that brownie texture. I also appreciated the step that said to let the chocolate-sugar mixture sit for 10 minutes to make sure the sugar crystals dissolve. I’m going to remember that one and use it with other recipes. So glad I gave this recipe a try.
This Brownie Cake is so delicious!!! I loved trying a new technique “blooming” the cocoa powder.
I did not have a beautiful bundt pan to try this recipe, after making this scrumptious dense chocolate cake, I sure wish I had. This cake deserves to be made in a nicer bundt pan, I think I will invest in a new one soon. The Brownie Cake was nice and dense and oh so good. We love chocolate desserts so I will be making this again.
Thank you Carol, glad you enjoyed that cake.
This is the 2nd time I have made this recipe. I love how moist this cake is and for several days. This time I tried making smaller ones to take as little birthday cakes to a few people. Turned out wonderful. I am finally trying/learning to make cakes NOT from the box 🙂 – this recipe is delicious! – Thanks 🙂
An amazing moist cake. I made mini bundt cakes and they were a huge hit
How long would you bake mini bunt, or jumbo cup cakes?
I would say 15-18 minutes. As always pay attention to the cake not the timer
I have not been able to find an 8 cup bundt pan do you have a link to the pan you used?
The next best thing would be a 10-cups bundt pan, but you can also use a loaf pan (or two), as long as the pan is not filled over 3/4 you’re good.
This cake is a big hit in my house. It is easy to make and not overly sweet. I even wonder whether i could reduce sugar further. Thank you so much for sharing. You are very kind and i enjoyed most of your recipes 🙂